Serial No. 95
Table Plastic (Autodesk Inventor 2010)

Click the following link to get the model file: - http://bit.ly/2nuJNYU
Table Plastic (Autodesk Inventor 2010)
Click the following link to get the model file: - http://bit.ly/2nuJNYU
_1")
_2")
Box (mini size) - Autodesk Inventor 2010

Click the following link to get the model file:- http://bit.ly/2nCiCLW


")
")
")

....................................................................................................
Visit the following link to watch the basic tutorial on Autodesk Inventor by us
https://www.youtube.com/playlist?list=PLb-IhKRMYSERYpB48aY-sZ10fN6CfXIL4
.........................................................................
To watch detailed tutorials on the same software visit the following link
https://www.youtube.com/playlist?list=PL74BDF7431ED13443
..........................................................................................
Hope all of you enjoyed the tutorial. If you find the video useful please like it and share it with your friends/colleagues and do not forget to subscribe us to get latest updates about our new uploads.
http://www.youtube.com/user/niveshandnisheeth?sub_confirmation=1
....................................................................................................
Dear Viewers if you like our work and wanted to support us, to keep continuing the good work, then become a patron of ours at ‘Patreon’ site. Patreon is a simple way for you to contribute to the creator’s work every month/ every time they release their new work and get rewards in return. Please visit the following link to know all about our work and what we are offering as the reward to our patrons…
https://www.patreon.com/nisheethsri+


Drill Machine (Video Tutorial) Autodesk Inventor 2010
This Autodesk Inventor Part & Assembly modelling tutorial which also covers topics from Inventor Basics like sketching and part modelling display a creation process of an assembly named ‘Drill Machine’. After modelling it we will be able to create the animation of the model. But these things are not displayed in the same video, to know this you will have to watch the related video tutorial. The links are mentioned below. The model contains 16 part and 4 content centre part files which consists of a content centre library. First, we create the Drill Machine frame then later each component is created individually with no relation to each other which you can term Bottom-up designing process. In this process, first parts are designed individually then inserted into the assembly and setup by using the mate command. When the parts have modified the changes also appear in the assembly.
……………………………………………………………..
To learn the dynamic simulation of the model visit the following link:--
https://www.youtube.com/watch?v=jCyx4UqEGtY

Click the following link to get the model file: - http://bit.ly/2mcIbTx
....................................................................................................
Visit the following link to watch the basic tutorial on Autodesk Inventor by us
https://www.youtube.com/playlist?list=PLb-IhKRMYSERYpB48aY-sZ10fN6CfXIL4
.........................................................................
To watch detailed tutorials on the same software visit the following link
https://www.youtube.com/playlist?list=PL74BDF7431ED13443
..........................................................................................
Hope all of you enjoyed the tutorial. If you find the video useful please like it and share it with your friends/colleagues and do not forget to subscribe us to get latest updates about our new uploads.
http://www.youtube.com/user/niveshandnisheeth?sub_confirmation=1
....................................................................................................
Dear Viewers if you like our work and wanted to support us, to keep continuing the good work, then become a patron of ours at ‘Patreon’ site. Patreon is a simple way for you to contribute to the creator’s work every month/ every time they release their new work and get rewards in return. Please visit the following link to know all about our work and what we are offering as the reward to our patrons…
https://www.patreon.com/nisheethsri+


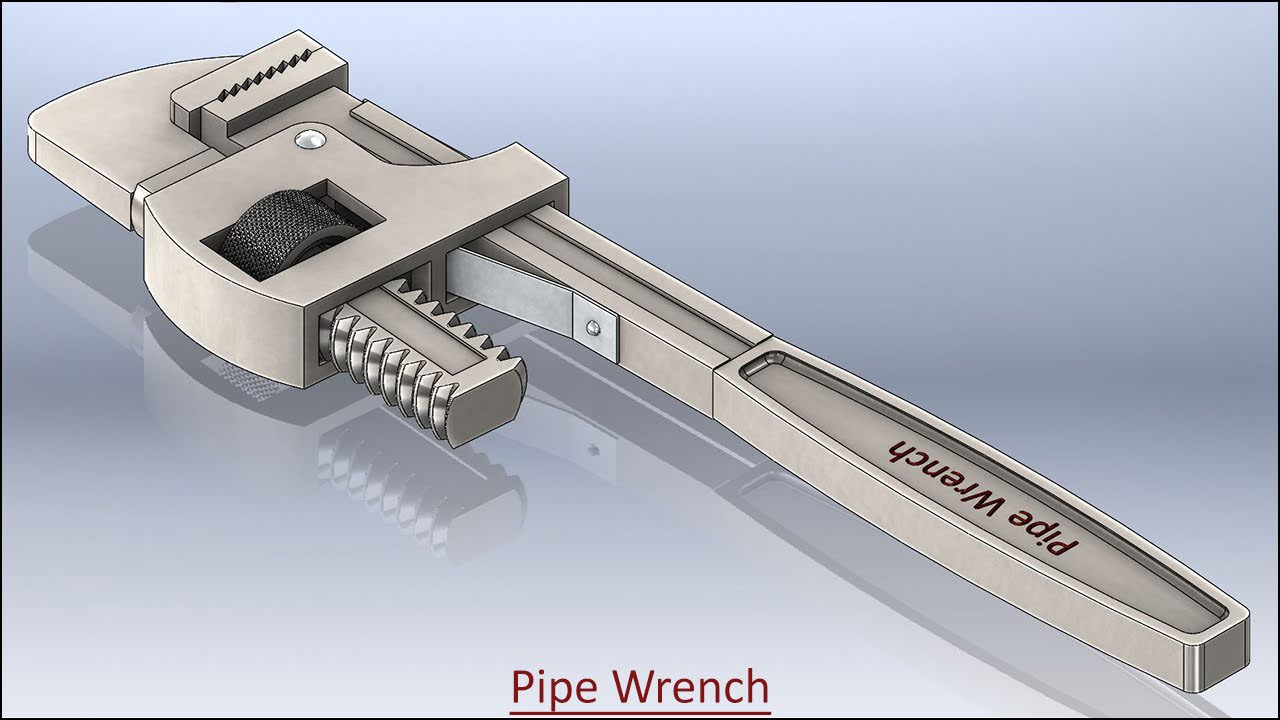
Pipe Wrench (Autodesk Inventor 2010 Tutorial)
In this part /assembly modelling tutorial of Autodesk Inventor we will create an assembly named ‘Pipe Wrench’. After modelling it we will be able to create animation of the assembly using Drive Constraint or Dynamic Simulation. But these things are not displayed in this video, to know about that you will have to watch the related video tutorials, their links are mentioned below.
Let’s get back to our main topic, the Pipe Wrench assembly has eight parts. The parts are to be created individually not in context or with reference of other parts of the assembly, later they are placed into the assembly and by using the assembly mates they are fitted according to the model design.
So in this way the by watching the tutorial any one can observe the application of many 2D sketching and 3D features of the software along with usage of different mates.
Watch the full video tutorial to know more…………

Click the following link to get the model file:-http://bit.ly/2nZXe3A
To create the animation of this model using the Drive Constraint command watch the video at the following link:-
Pipe Wrench-Drive Constraint (Autodesk Inventor 2012)
In the same way to create the animation of this model using the Dynamic Simulation watch the video at the following link:--
Pipe Wrench-Dynamic Simulation (Autodesk Inventor 2012)
....................................................................................................
Visit the following link to watch the basic tutorial on Autodesk Inventor by us
https://www.youtube.com/playlist?list=PLb-IhKRMYSERYpB48aY-sZ10fN6CfXIL4
.........................................................................
To watch detailed tutorials on the same software visit the following link
https://www.youtube.com/playlist?list=PL74BDF7431ED13443
..........................................................................................
Hope all of you enjoyed the tutorial. If you find the video useful please like it and share it with your friends/colleagues and do not forget to subscribe us to get latest updates about our new uploads.
http://www.youtube.com/user/niveshandnisheeth?sub_confirmation=1
....................................................................................................
Dear Viewers if you like our work and wanted to support us, to keep continuing the good work, then become a patron of ours at ‘Patreon’ site. Patreon is a simple way for you to contribute to the creator’s work every month/ every time they release their new work and get rewards in return. Please visit the following link to know all about our work and what we are offering as the reward to our patrons…
https://www.patreon.com/nisheethsri
-Dynamic-Simulation")
To download the finished file, visit the following link:-- http://www.mediafire.com/?32pc9d8s2iabvqk
Following video will explain about Dynamic Simulation of Autodesk Inventor 2010:-

To download the finished file, visit the following link:--
http://www.mediafire.com/?yiu3xujiax9h66m
Following video will explain about Dynamic Simulation of Autodesk Inventor 2010:-

To download the finished file, visit the following link:--http://www.mediafire.com/?977d5mw9wh86ad1


Combination Pliers (Autodesk Inventor 2010)

Click the following link to get the model file: - http://bit.ly/2lB9oiw