Showing posts with label Box (mini size). Show all posts

Monday, December 18, 2017

Animation displayed in Box (mini size) -- SolidWorks 2017 (with caption and audio narration)

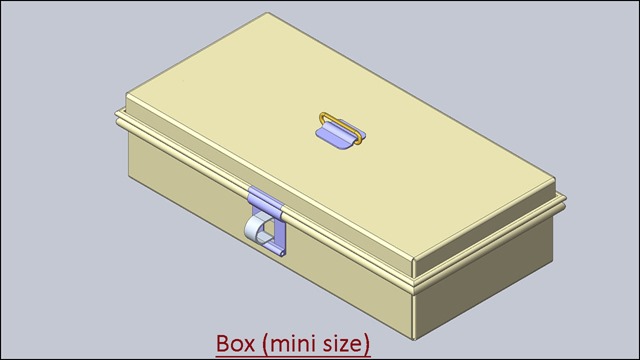
Box (mini size) with Animation

Serial No. 215

Animation displayed in Box (mini size) -- SolidWorks 2017 (with caption and audio narration)

In this video, we will demonstrate how to apply the different type of mates in the assembly environment for creating the animation in SolidWorks 2017.

download-Link


Click the following link to get the model file: - http://bit.ly/30MboTG


Transcription of the Video

  1. Create a new assembly with an inch template.
  2. And place the ‘Part1’ file in the assembly.
  3. When the first part file is placed in the assembly, the part remains as a grounded component.
  4. This part does not need to place any mates.
  5. Go to the ‘View Orientation’ tab and choose an ‘Isometric’ view.
  6. Activate the ‘Insert Components’ command and place the ‘Part3’ file in the assembly.
  7. Apply a ‘Coincident’ mate between the Front face of ‘Part1’ and Back face of ‘Part3’.
  8. Apply a ‘Coincident’ mate between Front Plane of the assembly and Front Plane of ‘Part3’.
  9. Apply a ‘Distance’ mate between the top face of ‘Part3’ and ‘Part1’.
  10. Set the distance value 0.688 inches and click OK.
  11. Activate the ‘Insert Components’ command and place the ‘Part6’ file in the assembly.
  12. Apply a ‘Concentric’ mate between the inner circular face of ‘Part6’ and an outer circular ring of ‘Part1’.
  13. Apply a ‘Coincident’ mate between the back face of ‘Part1’ and back face of ‘Part6’.
  14. Save the assembly with the name ‘Base Assembly’.
  15. Apply a ‘Distance’ mate between the side face of ‘Part1’ and ‘Part6’.
  16. Set the distance value 2.564 inches and click OK.
  17. In the same manner, place a copy of ‘Part6’ in the assembly and mate it with ‘Part1’.
  18. Create another new assembly and place the ‘Part2’ file in the assembly.
  19. Open the visibility of Front Plane of assembly and turn on the ‘View Planes’ button.
  20. Open the visibility of Top Plane of ‘Part2’.
  21. Right-click on the ‘Part2’ file and select ‘Float’ option.
  22. Apply a ‘Coincident’ mate between the Top Plane of ‘Part2’ and Front Plane of Assembly.
  23. Turn off the visibility of planes.
  24. Apply a Coincident mate between Right Plane of ‘Part2’ and Right Plane of ‘Assembly2’.
  25. Save the assembly, name it as ‘Lid Assembly’.
  26. The part is not fully defined in the assembly, so that apply another ‘Coincident’ mate between the Top plane of Lid assembly and the Front plane of ‘Part2’.
  27. Activate the ‘Insert Components’ command and place the ‘Part7’ file in the assembly.
  28. Apply a ‘Coincident’ mate between the top face of ‘Part2’ and back face of ‘Part7’.
  29. Apply a ‘Coincident’ mate between Front Plane of Lid assembly and Front Plane of ‘Part7’.
  30. Apply a ‘Coincident’ mate between Right Plane of the ‘Part7’ and Right Plane of ‘Lid assembly’.
  31. Place the ‘Part5’ file in the assembly.
  32. Apply a ‘Concentric’ mate between the outer circular face of ‘Part5’ and inside face of the hole of ‘Part2’.
  33. Apply a ‘Coincident’ mate between Front Plane of ‘Part5’ and Front Plane of ‘Lid Assembly’.
  34. Apply a ‘Coincident’ mate between Right Plane of ‘Lid Assembly’ and Right Plane of ‘Part5’.
  35. Now the part is Fully Defined in the assembly.
  36. Go to the ‘Evaluate’ tab and check the interference between two components by using ‘Interference Detection’ command.
  37. Save and close all the assembly files.
  38. Create a new Assembly file, it is our main assembly to create animation, and place the ‘Base Assembly’ file in the assembly.
  39. Choose an Isometric View, right-click in the design area and activate the ‘View Orientation’ command.
  40. In the Orientation dialogue box, select the ‘New View’ option.
  41. Set the ‘Named View’ as ‘View-1’ and click OK.
  42. Save the assembly by the name ‘Box (mini size) with Animation’.
  43. Activate the ‘Insert Components’ command and place the ‘Lid Assembly’ file.
  44. Apply a ‘Concentric’ mate between inside hole of the hinge and outer circular face of wire.
  45. Apply a ‘Coincident’ mate between the side face of the hinge and face of slot of lid.
  46. Drag the Lid Assembly and see the result, the ‘Lid Assembly’ rotates on the base of the hinge.
  47. Place the ‘Part4’ file in the assembly.
  48. Apply a ‘Concentric’ mate between the hole of the ‘Part4’ and outer circular face of wire.
  49. Apply a ‘Coincident’ mate between the side face of ‘Part4’ and face of slot of lid.
  50. Apply a ‘Tangent’ mate between the bottom face of the lid and outer circular ring of ‘Part1’.
  51. Apply a ‘Coincident’ mate between the front face of ‘Base Assembly’ and back face of ‘Part4’.
  52. Place the ‘Part8’ file in the assembly.
  53. Turn off the visibility of the sketch of ‘Part8’ by using ‘View Sketches’ command.
  54. Apply a ‘Concentric’ mate between ‘Axis1’ of the Lid assembly and circular face of ‘Part8’.
  55. Apply a ‘Coincident’ mate between the Front Plane of ‘Part8’ and Front Plane of main assembly.
  56. Apply a ‘Tangent’ mate between the cylindrical face of ‘Part8’ and the top face of ‘Part7’.
  57. Check the interference between Handle and base.
  58. Suppress the ‘Tangent1’, ‘Coincident3’ and ‘Tangent2’ mates.
  59. Apply an ‘Angle’ mate between the Right Plane of ‘Part8’ and the top face of ‘Part7’.
  60. Set the angle value to 12.46923 degrees and Click OK.
  61. Change the name of the angle mate as ‘Drive-1’.
  62. Unsuppress the ‘Tangent1’ mate and apply an ‘Angle’ mate between the back face of the ‘Part4’ and the front face of the ‘Part1’.
  63. Set the angle value to 0 degree and Click OK.
  64. Change the name of the angle mate as ‘Drive-2’.
  65. Suppress the ‘Tangent1’ and ‘Drive-2’ mates.
  66. Drag the ‘Lid Assembly’ and turn on the ‘View Planes’ button.
  67. Apply the ‘Angle’ mate between Plane3 of ‘Part1’ and back face of ‘Lid Assembly’.
  68. Set the angle value to 0 degree and Click OK.
  69. Unsuppress the ‘Drive-2’ mate and change the name of the ‘Angle6’ mate as ‘Drive-3’.
  70. In the next section of this video, we will create three additional views with in alternate position of this model before entering the ‘Motion Study’ environment.
  71. These saved views will be used later in animation timeline.
  72. Click on the ‘Motion Study’ tab and click the ‘Collapse Motion Manager’ button.
  73. Choose ‘View-2’ in the Orientation dialog box.
  74. Click ‘Expand Motion Manager’ button.
  75. Go on the ‘Orientation and Camera’ tab in the animation timeline.
  76. Right-click the View-5 key and select ‘Replace Key’ option.
  77. Right-click on the animation timeline, move the time bar at 2 second.
  78. Copy the ‘View-2’ key and paste it.
  79. Pause 2 seconds on the ‘View-2’ position.
  80. Move the time bar at 7 second and place the new key.
  81. Choose ‘View-3’ in the Orientation dialogue box.
  82. Right-click on the View-2 key and select ‘Replace Key’ option.
  83. Time required 5 seconds in changing from View-2 to View-3 position.
  84. In the Mates folder, copy the ‘Drive-1’ mate key.
  85. Move the time bar at 9 second and paste the key.
  86. Pause 2 seconds on the ‘View-3’ position.
  87. Move the time bar at 24 second and place the new key.
  88. Double click on the new key to modify the key and set the specified angle 167.53077 degrees and click OK.
  89. Move the time bar at 26 second, copy the ‘View-3’ key and paste it.
  90. Move the time bar at 31 second and place the new key.
  91. Minimize the animation timeline and set the view as ‘View-4’ position.
  92. Expand the animation timeline and choose ‘Replace Key’ option.
  93. Time consume 5 seconds in changing from View-3 to View-4 position.
  94. Move the time bar at 33 second.
  95. Copy the ‘Drive-2’ mate key and paste the key.
  96. Move the time bar at 48 second and place the key.
  97. Modify the key and set the angle value to 90 degree.
  98. Move the time bar at 50 second, copy the ‘View-4’ key and paste the key.
  99. Move the time bar at 55 second and paste the key.
  100. Choose ‘View-5’ in the Orientation dialogue box.
  101. Right-click on the View-4 key and select ‘Replace Key’ option.
  102. Move the time bar at 57 second, copy the ‘Drive-3’ mate key and paste the key.
  103. Move the time bar at 72 second and place the new key.
  104. Modify the key and set the angle value to 90 degree.
  105. The time spent for each Drive mates will be of 15 seconds.
  106. Click ‘Calculate’ button to calculate the motion study.
  107. Stop the animation and click ‘Play from Start’ button and start the animation.
  108. Follow the same steps which were done earlier to create the animation in reverse direction.
  109. Now start the animation to see the result.
  110. Save the assembly.

Friday, December 1, 2017

Box (mini size) supported with Animation (Solid Edge ST9) with caption and audio narration

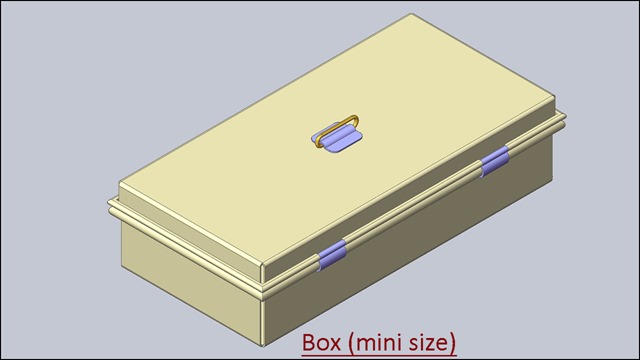
Box (mini size) with Animation


Serial No. 40

Box (mini size) supported with Animation (Solid Edge ST9) with caption and audio narration
.........................................................................
In this video, we will display how to create an animation of our model ‘Box (mini size)’ using ‘Simulate Motor’ command. In this model we have created two subassemblies, one is ‘Base Assembly’ & other is ‘Lid Assembly’ by using Assemble command.
.................................................................................
Inside this video, you can see the full detailed process of making 3-D Parametric CAD Model through Solid Edge ST9.


download-Link

  
Click the following link to get the model file: - http://bit.ly/2OuEHaM


Transcription of the Video

  1. Create a new inch assembly file.
  2. Save the file, name it as ‘Base Assembly’.
  3. Activate the ‘Insert Component’ command.
  4. Go to the ‘Parts Library’ tab and browse the folder ‘Box (mini size) with Animation’.
  5. Place the ‘Base Body’ part file in the assembly.
  6. Activate the ‘Insert Component’ command.
  7. Place the ‘Hook of Latch’ part file.
  8. ‘Assemble’ command is pre-activated by default when the part is placed in the assembly.
  9. Select the back face of Hook of Latch and the front face of the Base Body and apply the mate.
  10. Activate the ‘Assemble-Construction Display’ command.
  11. And choose ‘Show Reference Planes’ option.
  12. Open the visibility of reference planes of assembly.
  13. Apply a mate between the right plane of Hook of Latch and Base Body.
  14. Activate the ‘Planar Align’ command and set the offset value 0.688 inch.
  15. Apply a Planar Align mate between the top face of hook and base.
  16. Close the visibility of reference planes of assembly.
  17. Place the part file ‘Hinge’ and apply an axis mate between the inner circular face of Hinge and outer circular face of the base.
  18. Click ‘Flip Side’ button to rotate the part.
  19. Activate the ‘Flash Fit’ command, select the back face of Hinge and Base body and choose the flip side button to apply mate.
  20. Apply the Planar Align mate between Hinge and Base Body and set the offset value 2.564 inch.
  21. In the ‘Assemble’ command, ‘Flash Fit’ option is very useful tool in this software, for mating the assembly components easily in the assembly environment. This tool reduces the number of steps of the assembly relationships (like Mate, Planar Align and Axil Align mates etc.)
  22. In the same manner, fix one more Hinge on the Base Body.
  23. Open a new subassembly and place the Lid part file.
  24. Save the assembly, name it as ‘Lid Assembly’.
  25. Place the ‘Handle Base’ part file by using ‘Assemble’ command.
  26. Apply the mate between the back face of Handle Base and top face of Lid.
  27. Go to the Assemble tab and choose ‘Show Reference Planes’ option.
  28. The Planes of Handle Base are visible in the design window.
  29. Open the visibility of assembly planes.
  30. Apply the mate between the Right plane of Handle Base and Lid.
  31. Apply another mate between Front Plane of Handle Base and Lid.
  32. Close the visibility of all visible planes.
  33. In the same manner, place the ‘Wire’ part in the assembly and apply the mate.
  34. Go to the Inspect tab and check the Interference between ‘Wire’ and ‘Lid’ components by using ‘Check Interference’ command.
  35. Save the file and close all the subassemblies.
  36. Create a new inch assembly, this is our main assembly.
  37. Base Assembly and Lid Assembly will be placed in this assembly which has been created earlier.
  38. Save the file with the name ‘Box (mini size) with Animation’.
  39. Apply the Mate between the outer circular face of Wire and inner circular face of Hinge.
  40. Apply another mate between inner slot face of Lid and the front face of Hinge.
  41. Now drag the Lid subassembly by using ‘Drag Component’ command.
  42. The Lid Assembly starts to move on the base of Hinge.
  43. Check the Interference between ‘Lid Assembly’ and ‘Base Assembly’.
  44. Apply a tangent mate between the bottom face of Lid and cylindrical face of the Base Body part.
  45. Place the ‘Handle Wire’ part file.
  46. And select it, choose the Show/Hide Component option.
  47. Place the checkmark in the ‘Reference Planes’ On button and click OK.
  48. Close the visibility of Base assembly.
  49. Open the visibility of Right plane of Lid Assembly.
  50. Apply a Mate between the Right planes of Lid Assembly and Handle Wire.
  51. Apply a Connect mate between the axis of Handle Wire and the Front plane of Lid Assembly.
  52. Apply another Connect mate between the axis of Handle Wire and Plane 4 of Handle Base.
  53. Hide all the work planes in the assembly by using Show/Hide Component command.
  54. Rotate the handle to the proper position by using ‘Drag Component’ tool.
  55. Place the part file ‘Top of Latch’ in the assembly.
  56. Apply the mate constraint between Axis of Top of Latch and Wire.
  57. Apply another mate between the side face of Latch and inner slot face of Lid.
  58. Activate the ‘Angle’ mate command → select the front face of the latch → select the front face of the lid, and at last select side face of the lid and apply the mate.
  59. Select the Top of Latch part and set the angle mate value to 0-degree, click accept.
  60. Apply a Tangent mate between Handle Wire and the top face of Handle base.
  61. Three mates such as angle mate of Top of Latch, Tangent mate of Handle Wire and Tangent mate of Lid Assembly have to be Suppressed before going in the motion environment.
  62. Activate the ‘Rotational Motor’ command.
  63. ‘Select Moving Part Step’ option is preselected.
  64. Select the ‘Handle Wire’ part as moving part.
  65. Choose the ‘Select Axis Step’ option.
  66. Select the cylindrical face of ‘Handle Wire’, the part will rotate about the axis.
  67. Use the ‘Flip Direction’ button in reverse direction.
  68. Set the speed of motor 20 degree/sec and set the Limit value to 165.64 degrees.
  69. In the same manner, set the motor on the ‘Top of Latch’ and ‘Lid Assembly' by using ‘Rotational Motor’ command.
  70. Now see in the browser bar, three Rotational motion is visible under the Motors folder.
  71. Go to the Tools tab → ‘Environs’ panel and activate the ‘Explode-Render-Animate’ command.
  72. Activate the ‘Animation Editor’ command, the animation timeline is visible in the design window.
  73. Activate the ‘Animation Properties’ command and set the animation length value to 21 seconds.
  74. Click OK.
  75. Right-click on the ‘Motors’ and choose ‘Edit Definition’ option.
  76. In the Motor Group Properties dialogue box, three rotational motors are automatically added to the ‘Motors in Animation’ area.
  77. Click OK to execute the command.
  78. Now the three rotational motors are added in the animation timeline.
  79. Drag the Rotational Motor 2 and 3 at a convenient distance.
  80. Right-click the Rotational 1, click Properties.
  81. Change the value of start frame 16 seconds and click OK.
  82. Edit the properties of Rotational 2 and change the value of start frame 145 seconds and click OK.
  83. Edit the properties of Rotational 3 and change the value of start frame 232 seconds and click OK.
  84. Minimize the animation timeline.
  85. Zoom the view on the Handle Wire, Go on the ‘View Orientation’ tab and activate the ‘Save Current View’ command, name it as ‘View-2’.
  86. Zoom the view on the Top of Latch and save the current view name it as ‘View-3’.
  87. Maximise the animation timeline.
  88. In the same manner, create two more views as shown.
  89. Right-click on the ‘Camera’ and choose ‘Edit Definition’ option.
  90. In the ‘Camera Path Wizard’ dialogue box, activate the ‘Build using Named Views’ option.
  91. Add 4 views in the keyframes box.
  92. Click Finish button to execute the command.
  93. The camera patch is added to the animation timeline.
  94. Click ‘Go to Start’ button to set the animation cursor on starting position.
  95. Minimize the animation timeline and set the view as ‘View-1’ position.
  96. Right click on the animation timeline and choose ‘Insert Camera Location’ option.
  97. Move the animation cursor at 1 second and set the view as ‘View-2’ position.
  98. Right click on the animation timeline and choose ‘Insert Camera Location’ option.
  99. Delete the unused key by using ‘Delete key Frame’ command.
  100. Move the animation cursor at 8 seconds and set the view as ‘View-2’ position.
  101. Right click on the animation timeline and choose ‘Insert Camera Location’ option.
  102. Stay in still position on View-2 for 8 seconds.
  103. In the same manner, set the View-3 and View-4 on the Camera Path.
  104. Click ‘Play’ button and start the animation.
  105. Return back to the assembly environment and save the file.

Thursday, October 13, 2016

Box (mini size) - Video Tutorial (Siemens NX 11)

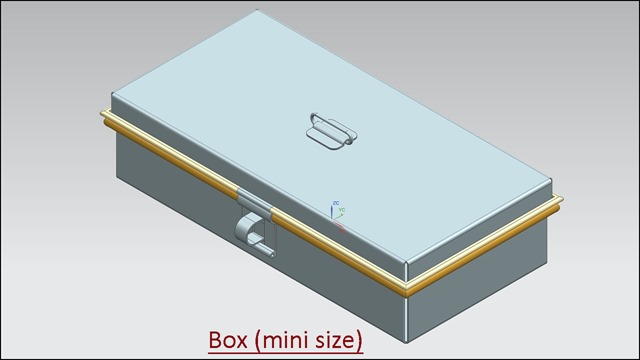
Box (Mini Size)_1

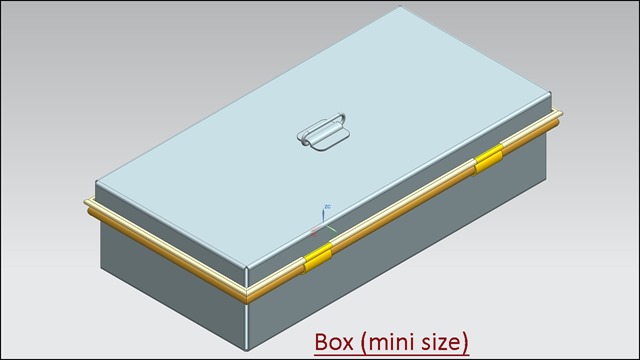
Box (Mini Size)_2

Serial No. 70.

Box (mini size) - Video Tutorial (Siemens NX 11)

In this Siemens Nx Tutorial we will describe how to build the model of a ‘Box (Mini Size)’ through sheet metal features. It is a part and assembly modeling tutorial, 10 Parts and 3 Assemblies has been created (2 sheet metal parts and 8 other parts) like Box base, Box cover, Wire, Hinge, Sliding and so on in the assembly environment with the help of ‘Create New Component’ command.

It will cover the following topics.

........................................................................................................

• Creating 2D Sketches on different Planes.

• Use the sketch constraints that are applied on during sketch creation.

• Use Sheet metal features such as Tab, Flange, Closed Corner and Flat Pattern.

• Use feature commands such as Extrude, Edge Blend, Mirror feature, Sweep along Guide, Trim body, Unite etc.

• How to set thickness of the sheet and Bend radius by using Sheet Metal Preferences.

• How to create a base feature by extruding a sketch along vector by thickness value by using Tab command.

• How to add a flange at an angle to planar face.

• How to create top-down assembly modelling in Siemens NX software.

• How to remove the degree of freedom of the parts with the help of ‘Assembly Constraints’ command.

• How to rotate the part by using ‘Move Component’ command.

• How to smooth the edges of model by using ‘Visualization Preferences’ command.


download-Link


Click the following link to get the model file: - http://bit.ly/2VqZHk7

Monday, December 16, 2013

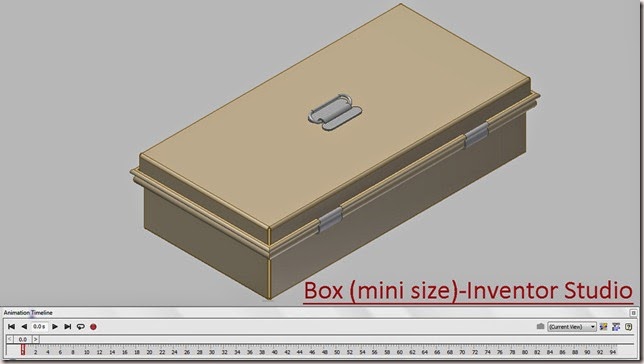
Box (mini size)-Inventor Studio-Autodesk Inventor 2013 (with caption and audio narration)


Box (mini size)-Inventor Studio_1
Box (mini size)-Inventor Studio_2


Serial No. 10

Box (mini size)-Inventor Studio-Autodesk Inventor 2013 (with caption and audio narration)

In this video, we will demonstrate how to give the different type of mates in the assembly environment for creating the animation of the ‘Box (mini size)'.


download-Link 


Click the following link to get the model file:- http://bit.ly/2n4wL4j


 Transcription of Video

Display of motion in Box (mini size) through Inventor Studio

Base Body Assembly:-

  1. Create a New ‘Standard (in).iam’ Assembly file.
  2. Save it with the name ‘Base Assembly’.
  3. Select ‘Place Component’ from the marking menu and place the ‘Base Body’ in the Assembly.
  4. Re-orient the model in the design window by using View Cube.
  5. Set the current view as Home View by using the toggle next to View Cube.
  6. Place the ‘Hook of Latch’ in the Assembly.
  7. Align the Hook of Latch with reference to box, by using the Rotate Component Tool.
  8. Apply a Mate Constraint between front face of Base Body and back face of Hook of Latch.
  9. Apply a Flush Mate between YZ plane of Assembly and XY plane of Hook of Latch.
  10. Apply another Flush Mate between top face of Base of Box and top face of Hook of Latch.
  11. Enter the value (-0.688) inch in the Offset input box.
  12. Place the ‘Hinge’ in the Assembly.
  13. Align the Hinge with reference to box, by using the Rotate Component Tool.
  14. Apply an Axis Mate between round rim of Base Body and Hinge.
  15. Apply a Mate Constraint between Red face of Hinge and back face of Base Body.
  16. Apply a Flush Mate between side face of Base Body and side face of Hinge.
  17. Enter the value (-2.5 inch) in the Offset input box.
  18. Hold the Ctrl Key and select Hinge in Browse Bar.
  19. Drag the Hinge in design window to place another identical part in the Assembly.
  20. Repeat the same process to fix the second Hinge on the Base Body.
  21. Align the Hinge with reference to Box, by using the Rotate Component Tool.
  22. Apply an Axis Mate between round rim of Base Body and Hinge.
  23. Apply a Mate Constraint between Red face of Hinge and back face of Base Body.
  24. Apply a Flush Mate between side face of Base Body and side face of Hinge.
  25. Enter the value (-2.5 inch) in the Offset input box.
  26. Save the Assembly and close it.

Lid Assembly:-

  1. Create a New ‘Standard (in).iam’ Assembly.
  2. Save it with the name ‘Lid Assembly’.
  3. Select ‘Place Component’ from the marking menu and place the ‘Lid’ in the Assembly.
  4. Place the ‘Wire’ in the Assembly.
  5. Apply an Axis Mate between the Wire and front round rim of Lid.
  6. Apply an Axis Mate between the Wire and side rim of Lid.
  7. Place the ‘Top of Latch’ in the Assembly.
  8. Apply an axis Mate between Wire and Top of Latch.
  9. Apply a Mate Constraint between green face of Lid and Top of Latch.
  10. Re-orient the model in the design window by using View Cube.
  11. Set the current view as Home View by using the toggle next to View Cube.
  12. Apply Angle Constraint, first select front face of Lid then select front face of Top of Latch and at the last select side face of Lid.
  13. Click Ok.
  14. Place the ‘Handle Base’ in the Assembly.
  15. Apply a Mate Constraint between back face of Handle Base and Top face of Lid.
  16. Apply a Mate Constraint between YZ Plane of Assembly and XY Plane of Handle Base.
  17. Apply a Mate Constraint between XY Plane of Assembly and YZ Plane of Handle Base.
  18. Place the ‘Handle Wire’ in the Assembly.
  19. Apply an Axis Mate between Axis of Handle Wire and ‘Work Axis1’ of Handle Base in the Browser Bar.
  20. Apply a Mate Constraint between XY Plane of Assembly and YZ Plane of Handle Wire.
  21. Activate Angle Constraint, first select YZ Plane of Assembly then select XY Plane of Handle Wire and at the last select side face of Lid.
  22. Enter the value 66.02 degree in the Angle Input Box.
  23. Click Ok.
  24. Set the browser from Assembly View to Modeling View by using Toggle at the top of the Browser Bar.
  25. Select the Angle:2 Constraint under the Constraints folder in the Browser Bar and Change its name as ‘Drive-1’ by clicking twice slowly.
  26. In the same manner, change the name of the Angle:1 constraint as ‘Drive-2’.
  27. Save the Assembly and close it.

Main Assembly:-

  1. Create a New ‘Standard (in).iam’ Assembly.
  2. Save it with the name ‘Box (mini size)-Inventor Studio’.
  3. Select ‘Place Component’ from the marking menu and place the ‘Base Assembly’ in the Main Assembly.
  4. Re-orient the model in the design window by using View Cube.
  5. Set the current view as Home View by using the toggle next to View Cube.
  6. Place the ‘Lid Assembly’ in the Main Assembly.
  7. Align the Lid Assembly with reference to Base Assembly, by using the Rotate Component Tool.
  8. Apply an Axis Mate between Axis of Wire and Axis of Hinge.
  9. Apply a Mate Constraint between current selected face (yellow coloured) of Lid and current selected face (yellow coloured) of Hinge.
  10. Activate Angle Constraint, first select front face of Base then select front face of Lid and at the last side face of Base.
  11. Click OK.
  12. Select the Angle:1 Constraint under the Base Assembly in the Browser Bar and Change its name as ‘Drive-3’ by clicking twice slowly.
  13. Click the ‘Inventor Studio’ icon from the Begin Panel of Environments Tab.
  14. Click the ‘Animation Timeline’ icon from the Animate Panel of Render Tab.
  15. Click the Animation Options Button on the Animation Timeline.
  16. In the Animation Options dialogue box, enter the value 1 minute 35 seconds in the ‘Length’ section option.
  17. Select Constant Speed radio button in the Default Velocity Profile and click Ok.
  18. Select ‘Drive-1’ Constraint under Handle Wire:1 in the Browser Bar, right click and select Animate Constraints in the context menu.
  19. In ‘Action’ section of Animate Constraint dialogue box, enter the value (-66.02) degree in the End input box.
  20. In the ‘Time’ section of Animate Constraint dialogue box, click Specify Button and enter the value 15 second in the End input box.
  21. Click Acceleration Tab.
  22. Select ‘Constant Speed’ radio button in the Velocity Profile.
  23. Click OK.
  24. Click Expand Action Editor Button on the Animation Timeline.
  25. Select ‘Drive-1’ constraint in the Animation Timeline, right click and choose ‘Mirror’ from the context menu.
  26. Edit previously Mirror animation action in the Animation Timeline.
  27. In the ‘Time’ section of Animate Constraint dialogue box, enter the value 80 second in the Start input box, and enter the value 95 second in the End input box.
  28. Click OK.
  29. Select ‘Drive-2’ Constraint under Top of Latch:1 in the Browser Bar, right click and select Animate Constraints in the context menu.
  30. In ‘Action’ section of Animate Constraint dialogue box, enter the value (-90 degree) in the End input box.
  31. In the ‘Time’ section of Animate Constraint dialogue box, click Specify button.
  32. In the Start input box, enter the value 15 second and in the End input box, enter the value 30 second.
  33. Click Acceleration Tab.
  34. Select ‘Constant Speed’ radio button in the Velocity Profile.
  35. Click OK.
  36. Select ‘Drive-2’ constraint in the Animation Timeline, right click and choose ‘Mirror’ from the context menu.
  37. Edit previously Mirror animation action in the Animation Timeline.
  38. In the ‘Time’ section of Animate Constraint dialogue box, enter the value 65 second in the Start input box and enter the value 80 second in the End input box.
  39. Click OK.
  40. Select ‘Drive-3’ Constraint under Base Assembly:1 in the Browser Bar, right click and select Animate Constraints in the context menu.
  41. In ‘Action’ section of Animate Constraint dialogue box, enter the value (-90 degree) in the End input box.
  42. In the ‘Time’ section of Animate Constraint dialogue box, click Specify button.
  43. In the Start input box, enter the value 30 second and in the End input box, enter the value 45 second.
  44. Click Acceleration Tab.
  45. Select ‘Constant Speed’ radio button in the Velocity Profile.
  46. Click OK.
  47. Select ‘Drive-3’ constraint in the Animation Timeline, right click and choose ‘Mirror’ from the context menu.
  48. Edit previously Mirror animation action in the Animation Timeline.
  49. In the ‘Time’ section of Animate Constraint dialogue box, enter the value 50 second in the Start input box and enter the value 65 second in the End input box.
  50. Click OK.
  51. Select Collapse Action Editor Button on the Animation Timeline.
  52. Clear the screen by activating the Clean Screen command.
  53. Click ‘Go to Start’ Button.
  54. Click Play Animation button to display motion in Box (mini size).