Showing posts with label Piston. Show all posts

Saturday, April 23, 2022

Piston Assembly (Autodesk Inventor 2018 Tutorial)

Serial No. 327.

Piston Assembly (Autodesk Inventor 2018 Tutorial)

Hi Viewers, Today we have created a model named ‘Piston’ in Autodesk Inventor 2018 Software. In this video, you will learn the full modelling process of this model after completing this part we placed the part in the Connecting Rod and Connecting Rod Cap Assembly. This assembly consists of 3 part files and two copies of the Bolt to make this assembly that is positioned according to design intent by using Assembly Mates like Mate Constraint, Flush mates etc. You will learn how to create basic 2D sketches on different Work planes, and you can also learn how to apply 3-D features tools like Extrude and Revolve tools etc. and apply the fillets over the multiple edges of the model, and create a simple hole by using the 'Hole' command. Hope all of you enjoyed the tutorial.


Click the following link to get the model file: - https://bit.ly/3uxb5hx


....................................................................................................
Visit the following link to watch the basic tutorial on Autodesk Inventor by us
https://www.youtube.com/playlist?list=PLb-IhKRMYSERYpB48aY-sZ10fN6CfXIL4
.........................................................................
To watch detailed tutorials on the same software visit the following link
https://www.youtube.com/playlist?list=PL74BDF7431ED13443
..........................................................................................
Hope all of you enjoyed the tutorial. If you find the video useful please like it and share it with your friends/colleagues and do not forget to subscribe us to get latest updates about our new uploads.
http://www.youtube.com/user/niveshandnisheeth?sub_confirmation=1
....................................................................................................
Dear Viewers if you like our work and wanted to support us, to keep continuing the good work, then become a patron of ours at ‘Patreon’ site. Patreon is a simple way for you to contribute to the creator’s work every month/ every time they release their new work and get rewards in return. Please visit the following link to know all about our work and what we are offering as the reward to our patrons…
https://www.patreon.com/nisheethsri+

Friday, April 22, 2022

Caterpillar Tractor Piston SolidWorks_2017_Tutorial

Serial No. 246

Caterpillar Tractor Piston SolidWorks_2017_Tutorial

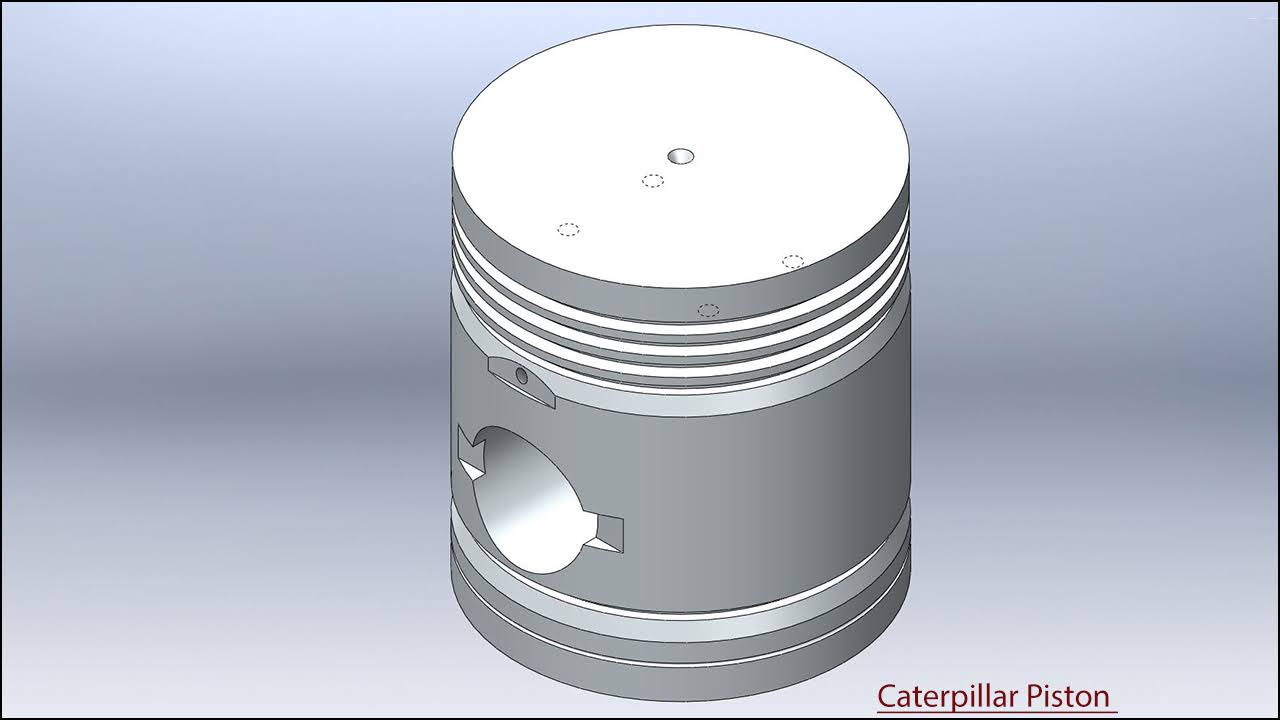
Hi Viewers, Today we will create a model 'Caterpillar Tractor Piston' in SolidWorks 2017. In this video, you will learn the full modelling process of this model. Create basic 2D sketches on different work-planes like Front, Top and Right with the help of Line, Circle, and Rectangle tools and after this create a solid feature by using the Extrude Boss/Base, Extruded Cut, Revolve Boss/Base, Swept Cut, Fillet, Hole, Mirror Feature and Chamfer commands. Hope all of you enjoyed the tutorial.


Click the following link to get the model file: - https://bit.ly/37CYoJs


....................................................................................
Visit the following link to watch the basic tutorial on SolidWorks by us
https://www.youtube.com/playlist?list=PLb-IhKRMYSES3Zw3QHmQVqQ-rcFVzgYHy
.........................................................................
To watch more detailed tutorials on the same software visit the following link
https://www.youtube.com/playlist?list=PLKWX3xUP3pPo77gFCyy669sI76qJa5jKw
...................................................................................
Hope all of you enjoyed the tutorial. If you find the video useful please like it and share it with your friends/colleagues and do not forget to subscribe us to get latest updates about our new uploads.
http://www.youtube.com/user/nisheethsorjm?sub_confirmation=1
....................................................................................................
Dear Viewers if you like our work and wanted to support us, to keep continuing the good work, then become a patron of ours at ‘Patreon’ site. Patreon is a simple way for you to contribute to the creator’s work every month/ every time they release their new work and get rewards in return. Please visit the following link to know all about our work and what we are offering a reward to our patrons…
https://www.patreon.com/nisheethsri
...................................................................................................................................

Tuesday, April 14, 2020

Elbow Piston (Solid Edge ST9 Tutorial)

Serial No. 117

Elbow Piston along with Drawing Sheet (Solid Edge ST9 Tutorial)

Designing a machine part from the 2D sketch. Dear Viewers, In this video we will show how to create a 3D model 'Elbow Piston' with the help of 2D drawing sheet in Solid Edge Tutorial Software.


Download the 2D drawing sheet in PDF form by visiting the following link: -- https://bit.ly/2QFjjzK


Visit the following link to watch more tutorial on Solid Edge by us
https://www.youtube.com/playlist?list=PLKWX3xUP3pPq5ijHdni6jXNX445Il3MWJ
..........................................................................................
Hope all of you will enjoy the tutorial. If you find the video useful please like it and share it with your friends/colleagues and do not forget to subscribe us to get latest updates about our new uploads.
http://www.youtube.com/user/nisheethsorjm?sub_confirmation=1m
....................................................................................................
Dear Viewers if you like our work and wanted to support us, to keep continuing the good work, then become a patron of ours at ‘Patreon’ site. Patreon is a simple way for you to contribute to the creator’s work every month/ every time they release their new work and get rewards in return. Please visit the following link to know all about our work and what we are offering a reward to our patrons…
https://www.patreon.com/nisheethsri
.............................................................

Wednesday, September 6, 2017

Engine MKII (Volume-1) Siemens NX 11 Tutorial

Engine MKII_1

Engine MKII_2

Serial No. 100-A.

Engine MKII (Volume-1) Siemens NX 11 Tutorial

The Design of this model has been taken from Assembly file of 'Rear Exhaust-2 Shoe' of ‘Sample files’ of Autodesk Inventor, it is a fragment of ‘Engine MKII’ Assembly.
(Rest of the Assembly is designed in Volume-2)
.................................................................................................
Rest components of the model ‘Engine MKII Assembly’ (consisting of several numbers) have also been designed. You may watch them by visiting on the following playlist:-
https://www.youtube.com/playlist?list=PLKWX3xUP3pPplOPikb5S8WD4re7tAnT3-
.................................................................................
In this Siemens NX11 Assembly tutorial, we have created a model named ‘Engine MKII’. The Assembly consist of 2 Subassemblies and 38 parts that are positioned according to design intent by using Assembly Constraints. Tutorial watch how an assembly of engine components is created by using different mates.
The animation of internal components is also accomplished after setting all the components.
To complete this tutorial, first get the files used for creating the assembly.
This tutorial will give you a good practice of applying constraints in an assembly and give you an idea of Engine MKII mechanism.
The video covers following assembly modelling techniques:--
_____________________________________________________________
• Use the Assembly commands such as Add Components, Assembly Constraints, and Move Component with Triad tools etc.
• 38 Parts will be inserted with the help of ‘Add Component’ tool.
• Use the Touch/Align, Fix, Align/Lock and Angle constraints between the two components etc.
• How to create two different views of assembly components, one will be visible only internal components and other visible all components by using the ‘Arrangements’ command.
• Animate the internal components like an Engine Piston, Crank shaft, Connecting rod of Engine with the help of ‘Insert Motion’ command in the Assembly Sequence task environment.

download-Link


Click the following link to get the model file: - http://bit.ly/30VamVp

Engine MKII (Volume-2) Siemens NX 11 Tutorial

Engine MKII_1

Engine MKII_2

Serial No. 100-B.

Engine MKII (Volume-2) Siemens NX 11 Tutorial

The Design of this model has been taken from Assembly file of 'Rear Exhaust-2 Shoe' of ‘Sample files’ of Autodesk Inventor, it is a fragment of ‘Engine MKII’ Assembly.
(Starting of the Assembly is designed in Volume-1)
.................................................................................................
Rest components of the model ‘Engine MKII Assembly’ (consisting of several numbers) have also been designed. You may watch them by visiting on the following playlist:-
https://www.youtube.com/playlist?list=PLKWX3xUP3pPplOPikb5S8WD4re7tAnT3-
.................................................................................
In this Siemens NX11 Assembly tutorial, we have created a model named ‘Engine MKII’. The Assembly consist of 2 Subassemblies and 38 parts that are positioned according to design intent by using Assembly Constraints. Tutorial watch how an assembly of engine components is created by using different mates. The animation of internal components is also accomplished after setting all the components.
To complete this tutorial, first get the files used for creating the assembly.
This tutorial will give you a good practice of applying constraints in an assembly and give you an idea of Engine MKII mechanism.
The video covers following assembly modelling techniques:--
_____________________________________________________________
• Use the Assembly commands such as Add Components, Assembly Constraints, and Move Component with Triad tools etc.
• 38 Parts will be inserted with the help of ‘Add Component’ tool.
• Use the Touch/Align, Fix, Align/Lock and Angle constraints between the two components etc.
• How to create two different views of assembly components, one will be visible only internal components and other visible all components by using the ‘Arrangements’ command.
• Animate the internal components like an Engine Piston, Crank shaft, Connecting rod of Engine with the help of ‘Insert Motion’ command in the Assembly Sequence task environment.

download-Link


Click the following link to get the model file: - http://bit.ly/30VamVp

Tuesday, September 5, 2017

Engine MKII (Volume-2) Solid Edge ST9 Tutorial

Engine MKII_1

Engine MKII_2

Serial No. 104-B.

Engine MKII (Volume-2) Solid Edge ST9 Tutorial

The Design of this model has been taken from Assembly file of 'Rear Exhaust-2 Shoe' of ‘Sample files’ of Autodesk Inventor, it is a fragment of ‘Engine MKII’ Assembly.
(Starting of the Assembly is designed in Volume-1)

Rest components of the model ‘Engine MKII Assembly’ (consisting of several numbers) have also been designed. You may watch them by visiting on the following playlist:-
https://www.youtube.com/playlist?list=PLKWX3xUP3pPrb1bU6P_goEUCMvcfTuqtI
.................................................................................
In this Solid Edge ST9 Assembly tutorial, we have created a model named ‘Engine MKII’. The Assembly consist of 2 Subassemblies and 38 parts that are positioned according to design intent by using Assembly Constraints. Tutorial watch how an assembly of engine components is created by using different mates. The animation of internal components is also accomplished after setting all the components.
To complete this tutorial, first get the files used for creating the assembly.
This tutorial will give you a good practice of applying constraints in an assembly and give you an idea of Engine mechanism.
The video covers following assembly modelling techniques:--
_____________________________________________________________
• Use the Assembly commands such as Insert Components, Mate, and Drag Component with Triad tools etc.
• 38 Parts will be inserted with the help of ‘Insert Component’ tool.
• Use the Mate, Planer Align, Connect and Angle constraints between the two components etc.
• Check the interference between the two components by using ‘Check Interference’ tool.
• Save different state views of an assembly the internal components of engine easily by using the ‘Alternate Assemblies command.
• Animate the internal components like an Engine Piston, Crank shaft, Connecting rod of Engine with the help of Rotational Motor command in the Simulate Motor environment.

download-Link


Click the following link to get the model file: - http://bit.ly/2MtNAi6

Thursday, June 15, 2017

Engine Piston (Solid Edge ST9 Tutorial)

Engine Piston_1

Engine Piston_2

Serial No. 77.

Engine Piston (Solid Edge ST9 Tutorial)

The Design of ‘Engine Piston’ has been taken from Assembly file of 'Rear Exhaust-2 Shoe' of ‘Sample files’ of Autodesk Inventor, it is a fragment of ‘Engine MKII’ Assembly.

Rest components of the model ‘Engine MKII Assembly’ (consisting of several numbers) have also been designed. You may watch them by visiting on the following playlist:-
https://www.youtube.com/playlist?list=PLKWX3xUP3pPrb1bU6P_goEUCMvcfTuqtI

.......................................................................................
Inside this video, you can see the full detailed process of making 3-D Parametric CAD Model through Solid Edge ST9.

download-Link


Click the following link to get the model file: - http://bit.ly/30YnxFc

Engine Piston (Siemens NX 11 Tutorial)

Engine Piston_1

Engine Piston_2

Serial No. 73.

Engine Piston (Siemens NX 11 Tutorial)

The Design of ‘Engine Piston’ has been taken from Assembly file of 'Rear Exhaust-2 Shoe' of ‘Sample files’ of Autodesk Inventor, it is a fragment of ‘Engine MKII’ Assembly.

Rest components of the model ‘Engine MKII Assembly’ (consisting of several numbers) have also been designed. You may watch them by visiting on the following playlist:-
https://www.youtube.com/playlist?list=PLKWX3xUP3pPplOPikb5S8WD4re7tAnT3-
.......................................................................................
Inside this video, you can see the full detailed process of making 3-D Parametric CAD Model through Siemens NX 11.


download-Link


Click the following link to get the model file: - http://bit.ly/2VrbChR

Saturday, September 3, 2016

Piston (Video Tutorial) Siemens NX 10

Piston

Serial No. 58.

Piston (Video Tutorial) Siemens NX 10

The Design of ‘Piston’ has been taken from Assembly file of 'Suspension' → ‘Sample files’ → Autodesk Inventor.
Rest components of the model ‘Suspension Assembly’ (consisting in several numbers) have also been designed. You may watch them by visiting on following playlist: - https://www.youtube.com/playlist?list=PLKWX3xUP3pPo0_EiKA9ypTPvI9h7A3lgX


download-Link


Click the following link to get the model file: - http://bit.ly/2nuyq3S

Saturday, October 31, 2015

Piston of Suspension (SolidWorks 2015 Tutorial)

Piston

Serial No. 199

Piston of Suspension (SolidWorks 2015 Tutorial)

The Design of the model ‘Piston of Suspension’ has been taken from Assembly file of 'Suspension' → ‘Sample files’ → Autodesk Inventor.


download-Link


Click the following link to get the model file: -http://bit.ly/35bfAje

Piston of Suspension (Autodesk Inventor 2016 Tutorial)

Piston

Serial No. 274

Piston of Suspension  (Autodesk Inventor 2016 Tutorial)

The Design of the model ‘Piston of Suspension’ has been taken from Assembly file of 'Suspension' → ‘Sample files’ → Autodesk Inventor.


download-Link


Click the following link to get the model file: -http://bit.ly/2niHU1X

Thursday, August 13, 2015

Engine Piston (SolidWorks 2015 Tutorial with Caption)


Engine Piston_1

Engine Piston_2


Serial No. 151


Engine Piston (SolidWorks 2015 Tutorial with Caption)

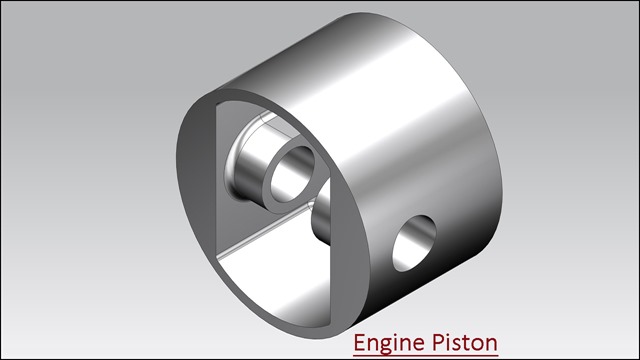
In this SolidWorks tutorial we will create a Piston of an Engine. It is a part modelling tutorial that will cover following topics: ---

· Creating 2D sketch profiles on different planes with the help of Circle tool, Rectangle tool, three point Arc tool, Line tool, Center Line tool etc.

· Each of the sketch will be fully constrained with proper dimensioning and sketch constraints or you can say by using Dimension tool and Add Relations tool.

· Adding 'Extruded Base/Boss' tool on the sketch to create the solid part and 'Extruded Cut' tool to remove the material from the model.

· Adding fillets feature and changing the colour of the model the model.
 

download-Link

Click the following link to get the model file: -http://bit.ly/32WEFfQ


Transcription of Video

  • Create a new part file.
  • Start with a new sketch on the Front Plane.
  • Draw a circle with dimension and create a solid by using 'Extrude Boss/Base' tool.
  • Save the file with the name ‘Engine Piston’.
  • Create a new sketch profile on the rear face of the part and remove the material by using ‘Extruded Cut’ tool.
  • Enter the depth value under the Direction 1 area.
  • Create a sketch for making hole on the Right Plane of the Part.
  • Change the colour of the model (to) ‘Polished Steel’.
  • In this way to adding more features to complete the model.