Showing posts with label Pliers. Show all posts

Sunday, December 31, 2017

Animation displayed in 'Nose Pliers' Assembly--SolidWorks 2017 (with caption and audio narration)

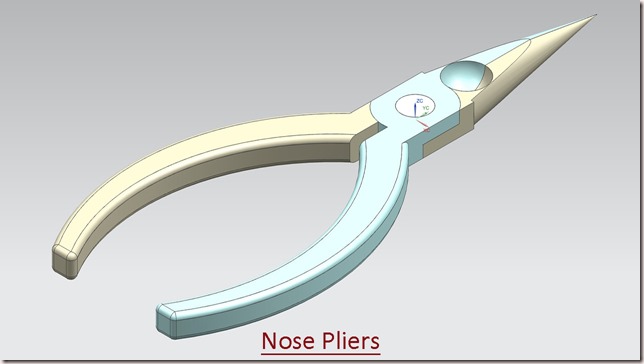
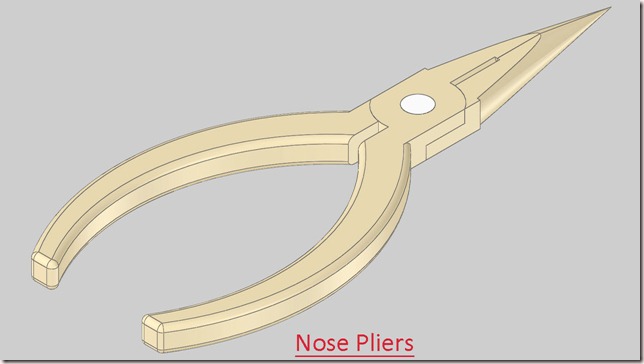
Animation displayed in Nose Pliers

Serial No. 32

Animation displayed in 'Nose Pliers' Assembly--SolidWorks 2017 (with caption and audio narration)

In this video, we will demonstrate how to apply the different type of mates in the assembly environment for creating the animation.
..................................................................................
To watch full sketching video of this model 'Nose Pliers', please visit on my another associated video named as 'Nose Pliers' (Video Tutorial) SolidWorks.

download-Link


Click the following link to get the model file: - http://bit.ly/2oUp3Lb


Transcription of the Video

  1. Create a new assembly inside an English template.
  2. The ‘Begin Assembly’ command is preactivated in the assembly design window.
  3. Place the ‘Part1’ file in the assembly.
  4. Save the assembly, name it as ‘Nose Pliers with Animation’.
  5. When the first part file is placed in the assembly, the part remains as a grounded component.
  6. So we will do unground the part with the help of ‘Float’ option.
  7. Right-click on the ‘Part1’ file and choose ‘Float’ option.
  8. Drag the part and select it, choose ‘Edit Part’ option from the design window.
  9. Go to the model tree and open the visibility of ‘Axis1’.
  10. The Axis is not visible in the design window, so we will turn on the ‘Axes’ button.
  11. Now the axis is visible in the design window.
  12. Return back to the assembly environment.
  13. Apply a ‘Coincident’ mate between the Top Plane of Assembly and Top Plane of ‘Part1’.
  14. Apply another ‘Coincident’ mate between the Axis1 of ‘Part1’ and Origin point of the Assembly.
  15. Activate the ‘Insert Component’ command, place the ‘Part2’ file in the assembly.
  16. Rotate the part by using ‘Move with Triad’ command.
  17. Apply a ‘Concentric’ mate between the two holes of the Part.
  18. Apply a ‘Coincident’ mate between the inside face of the slot of ‘Part1’ and inside face of the slot of ‘Part2’.
  19. Place the ‘Revit’ file in the assembly.
  20. Select the ‘Revit’ file and rotate to the proper position.
  21. Apply a ‘Concentric’ mate between inside cylindrical face of ‘Revit’ and inside cylindrical face of the hole of ‘Part2’.
  22. Apply a ‘Coincident’ mate between inside face of the ‘Part2’ and back face of ‘Revit’.
  23. Apply a ‘Coincident’ mate between Front Plane of ‘Revit’ and Right Plane of the assembly.
  24. Drag the ‘Part1’ file and activate the Mate command.
  25. Different types of mates are available here, choose any mate as you need according to your design.
  26. Select the ‘Angle’ mate option and set the angle value 0 deg.
  27. Select the face of ‘Part1’ and Right Plane of assembly, select the ‘Anti-Aligned’ button under the Mate alignment option.
  28. Choose the ‘Flip dimension’ option and click OK to execute the command.
  29. In the same manner, apply another ‘Angle’ mate on the opposite side of the part.
  30. Now the assembly component is fulley defined in the assembly.
  31. Suppress the ‘Angle2’ mate.
  32. Activate the ‘Move Component’ command and select the ‘Collision Detection’ option.
  33. Drag the part until it touches the opposite part.
  34. Now highlighted face shows here to stop the motion of the component at the moment of touch of any other entity.
  35. Click OK to finish the command.
  36. Go to the Evaluate tab and activate the ‘Measure’ command.
  37. Measure the angle between these two edges of the part.
  38. Activate the ‘Interference Detection’ command.
  39. And check the interference between the two components.
  40. Unsuppress the ‘Angle2’ mate.
  41. Go to the ‘Motion Study’ tab, click the ‘Expand Motion Manager’ button.
  42. Right-click on the ‘Orientation and Camera Views’ option, select the ‘Disable Playback of View Keys’ option.
  43. Go to the ‘Mates’ folder, select the ‘Angle1’ mate and move the timebar at 10 second.
  44. Right-click on the animation timeline and place the new key by using ‘Place Key’ command.
  45. Modify this new key and paste the angle value 69.78676/2 deg. and click OK.
  46. Move the timebar at 13 second and place the new key.
  47. Pause the animation for 3 seconds.
  48. Move the timebar at 23 second and place the new key.
  49. Modify this new key, fill the value 0 deg. and click OK.
  50. Follow the same steps which were done earlier to create the animation for ‘Angle2’ mate.
  51. Click the ‘Calculate’ button to check the animation.
  52. Stop the animation and clear the screen to view full screen of the model.
  53. At the last, click ‘Play from Start’ button to see the result.

Wednesday, December 27, 2017

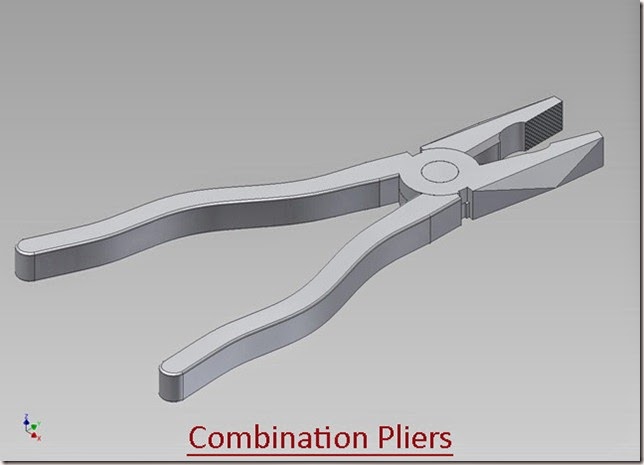
Animation displayed in 'Combination Pliers' Assembly--SolidWorks 2014 (with caption and audio narration)

Animation by Precise Positioning in Combination Pliers

Serial No. 33

Animation displayed in 'Combination Pliers' Assembly--SolidWorks 2014 (with caption and audio narration)

In this video, we will demonstrate how to apply the different type of mates in the assembly environment for creating the animation.

………………………………………………………………………………

To watch full sketching video of this model 'Combination Pliers', please visit on my another associated video named as 'Combination Pliers' (Video Tutorial) SolidWorks.

download-Link


Click the following link to get the model file: - http://bit.ly/2oyA2ti


Transcription of the Video

  1. Create a new assembly inside an English template.
  2. The ‘Begin Assembly’ command is preactivated in the assembly design window.
  3. Place the ‘Part1’ file in the assembly.
  4. When the first part file is placed in the assembly, the part remains as a grounded component.
  5. So we will do unground the part with the help of ‘Float’ option.
  6. Right-click on the ‘Part1’ file and choose ‘Float’ option.
  7. Rotate the part by using ‘Move with Triad’ command.
  8. Save the assembly, name it as ‘Combination Pliers with Animation’.
  9. Select the part file in the design window and choose ‘Edit Part’ option.
  10. Go to the design tree, open the visibility of ‘Axis1’ and go on the ‘View’ tab and turn on the ‘Axes’ button.
  11. The Axis is shown in the design window.
  12. Return back to the assembly environment.
  13. Apply a ‘Coincident’ mate between the Top Plane of Assembly and Top Plane of ‘Part1’.
  14. Apply another ‘Coincident’ mate between the Axis1 of ‘Part1’ and Origin point of the Assembly.
  15. Activate the ‘Insert Component’ command, place the ‘Part2’ file in the assembly.
  16. Apply a ‘Concentric’ mate between the two holes of the Part.
  17. Apply a ‘Coincident’ mate between the inside face of the slot of ‘Part2’ and inside face of the slot of ‘Part1’.
  18. Drag the Plier to see the effect, the part moves on its own axis.
  19. Place the ‘Part3’ file in the assembly.
  20. Select the ‘Part3’ file and rotate to the proper position.
  21. Apply a ‘Concentric’ mate between inside cylindrical face of ‘Part3’ and inside cylindrical face of the hole of ‘Part1’.
  22. Apply a ‘Coincident’ mate between inside face of the ‘Part1’ and back face of ‘Part3’.
  23. Close the visibility of ‘Axis1’.
  24. Go to the View tab and turn on the ‘Planes’ button.
  25. Open the visibility of Right Plane of the assembly.
  26. Apply an ‘Angle’ mate on this face and Right Plane of the assembly.
  27. Set the angle value 0 degree and click OK.
  28. In the same way, apply another ‘Angle’ mate on the opposite side of the part.
  29. Apply a ‘Coincident’ mate between Right Plane of the ‘Part3’ and Right Plane of the assembly.
  30. Go to the ‘Mates’ folder and Suppress the ‘Angle2’ mate.
  31. Activate the ‘Move Component’ command and select the ‘Collision Detection’ option.
  32. Drag the part until touch to the opposite part.
  33. Now highlighted face shows here to stop the motion of the component at the moment of touch of any other entity.
  34. Click OK to finish the command.
  35. Go to the ‘Evaluate’ tab, measure the angle between these two edges of the part by using ‘Measure’ command.
  36. Activate the ‘Interference Detection’ command and check interference between the two components.
  37. Unsuppress the ‘Angle2’ mate.
  38. Go to the ‘Motion Study’ tab and click on the ‘Disable Playback of View Keys’ option on the animation timeline.
  39. Go to the Mates folder, select ‘Angle1’ mate and drag the timebar at 10 second.
  40. Modify the ‘Angle1’ mate key, fill the angle value to 20.077055 deg. and click OK.
  41. Drag the timebar at 13 second and right-click on the timeline, click ‘Place Key’ option.
  42. Pause the animation for 3 seconds.
  43. Drag the timebar at 23 second, double click on the ‘Angle1’ mate and fill the value 0 deg. in the Modify dialogue box, click OK.
  44. Repeat same steps which were done earlier for creating the animation of ‘Angle2’ mate.
  45. Click the ‘Collapse Motion Manager’ button.
  46. Now start the animation to see the result.
  47. Save the assembly.

Saturday, December 24, 2016

Nose Pliers with Animation (Solid Edge ST9 Tutorial)

Nose Pliers with Animation

Serial No. 15

Nose Pliers with Animation (Solid Edge ST9 Tutorial)

In this video we will describe you how to rotate the Nose Pliers by using ‘Rotational Motor’ command. When you click the ‘Simulate Motor’ command, the Motor Group Properties dialog box is displayed so you can specify which motors you want to use, the default duration, and other similar options. When you click OK, the Animation Editor is displayed so you can run the simulation. To run the simulation, click the Play button.

It will cover the following topics.

........................................................................................................

• How to mate the parts in the assembly.

• How to mate the parts by using ‘Flash Fit’ command in the assembly.

• How to animate the Plier in Explode-Render-Animate environment

• How to create the custom named views by using ‘View Orientation’ command.

• How to set the camera view by using ‘Camera Path Wizard’ command.

• How to change the custom view during the animation.

• Use ‘Minimize the Ribbon’ option to clear screen view of the model.


download-Link


Click the following link to get the model file: - http://bit.ly/2LXG7ZG

Monday, December 19, 2016

Combination Pliers with Animation (Solid Edge ST9 Tutorial)


Combination Pliers with Animation


Serial No. 13

Combination Pliers with Animation (Solid Edge ST9 Tutorial)
In this video we will describe you how to rotate the Combination Pliers by using ‘'Rotational Motor’ command. When you click the Simulate Motor command, the Motor Group Properties dialog box is displayed so you can specify which motors you want to use, the default duration, and other similar options. When you click OK, the Animation Editor is displayed so you can run the simulation. To run the simulation, click the Play button.
It will cover the following topics.
........................................................................................................
• How to mate the parts in the assembly.
• How to mate the parts by using ‘Flash Fit’ command in the assembly.
• How to animate the Plier in Explode-Render-Animate environment
• How to create the custom named views by using ‘View Orientation’ command.
• How to set the camera view by using ‘Camera Path Wizard’.


download-Link

Click the following link to get the model file: - http://bit.ly/35cOQ1T


Tuesday, December 10, 2013

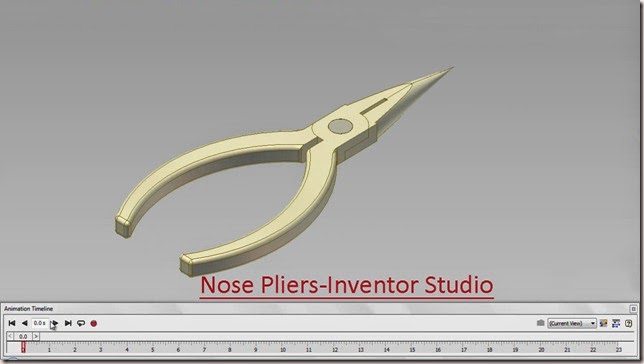
Nose Pliers-Inventor Studio-Autodesk Inventor 2012 (with caption and audio narration)

Nose Pliers-Inventor Studio_1 


Nose Pliers-Inventor Studio_2

Serial No. 66

Nose Pliers-Inventor Studio-Autodesk Inventor 2012 (with caption and audio narration)

In this video, we will demonstrate how to apply the different type of mates in the assembly environment for creating the animation of the ‘Nose Pliers’.

download-Link 


Click the following link to get the model file: - http://bit.ly/2mgIw7T


Transcription of Video

Display of motion in ‘Nose Pliers’ through Inventor Studio

  1. Create a New ‘Standard (in).iam’ Assembly and save it with the name ‘Nose Pliers-Inventor Studio’.
  2. Select Place component from the marking menu and place the ‘Part1’ in the Assembly.
  3. Re-orient the model in the design window by using View Cube.
  4. Set the current view as Home View by using the toggle next to View Cube.
  5. Select the Part1 in the design window and remove its ‘Grounded’ position from the context menu.
  6. Apply an Axis Mate between Z Axis of Assembly and hole of Part1.
  7. Apply a Mate Constraint between XY Plane of Assembly and slotted face of Part1.
  8. Place the ‘Part2’ in the Assembly.
  9. Select the edge of small hole on Part2 to activate Assemble Tool.
  10. Then select the edge of small hole on Part1, click green check mark to place Insert Mate between Part2 and Part1.
  11. Activate an Angle Constraint, first Select face of Jaw of Part1, and then select YZ Plane of Assembly and in the end select top face of Part1. Click OK.
  12. Activate Angle Constraint once again, first Select face of Jaw of Part2, and then select YZ Plane of Assembly and in the end select top face of Part2.
  13. Enter the value 180 degree in the Angle Input box and Click Ok.
  14. Place the ‘Rivet’ in the Assembly.
  15. Select the inner circular edge of Rivet to activate Assemble Tool.
  16. Then select the inner small circular edge of hole on the Part2, click green check mark to place Insert Mate between Part2 and Rivet.
  17. Set the browser from Assembly View to Modeling View using the toggle at the top of the browser.
  18. Select ‘Angle:2’ constraint under the Constraints folder in the Browser Bar, Right click and choose ‘Suppress’ from the context menu.
  19. Select Part1 and Part2 in the Browser Bar, right click and choose ‘Contact Set’ from the context menu.
  20. Select ‘Activate Contact Solver’ in the Interference panel of Inspect Tab.
  21. Drag the Part2, it will stop at the point of Collision between Part1 and Part2.
  22. Measure the swing angle between the jaw of Part1 and Part2. The detected swing angle is 70.64 degree.
  23. Restore the settings to previous state.
  24. Click the ‘Inventor Studio’ icon from the Begin Panel of Environments Tab.
  25. Select ‘Angle:1’ Constraint under Part1 in the Browser Bar, right click and select Animate Constraints in the context menu.
  26. In ‘Action’ section of Animate Constraints dialogue box, enter the value 35.32 degree in the End input box.
  27. In the ‘Time’ section of Animate Constraint dialogue box, enter the value 10 second in the End input box.
  28. Click Acceleration Tab.
  29. Select ‘Constant Speed’ radio button in the Velocity Profile.
  30. Click OK.
  31. Select Expand Action Editor Button on the Animation Timeline.
  32. Select Angle:1 constraint in the Animation Timeline, right click and choose ‘Mirror’ from the context menu.
  33. Edit Mirrored animation action in the Animation Timeline.
  34. In the ‘Time’ section of Animate Constraint dialogue box, enter the value 13 second in the Start input box and enter the value 23 second in the End input box, to give effect of 3 second pause.
  35. Click OK.
  36. Select ‘Angle:2’ Constraint under Part2 in the Browser Bar, right click and select Animate Constraints in the context menu.
  37. In ‘Action’ section, enter the value (180-35.32) degree in the End input box.
  38. In the ‘Time’ section of Animate Constraint dialogue box, enter the value 10 second in the End input box.
  39. Click Acceleration Tab.
  40. Select ‘Constant Speed’ radio button in the Velocity Profile.
  41. Click OK.
  42. Select Angle:2 constraint in the Animation Timeline, right click and choose ‘Mirror’ from the context menu.
  43. Edit Mirrored animation action in the Animation Timeline.
  44. In the ‘Time’ section of Animate Constraint dialogue box, enter the value 13 second in the Start input box and enter the value 23 second in the End input box.
  45. Click OK.
  46. Select Collapse Action Editor Button on the Animation Timeline.
  47. Click the Animation Options Button.
  48. In the Animation Options dialogue box, click ‘Fit to Current Animation’ button in the ‘Length’ section option.
  49. Select Constant Speed radio button in the Default Velocity Profile and click Ok.
  50. Clear the screen by activating the Clean Screen command.
  51. Click ‘Go to Start’ Button.
  52. Click Play Animation button to display motion in Nose Pliers.

Monday, December 9, 2013

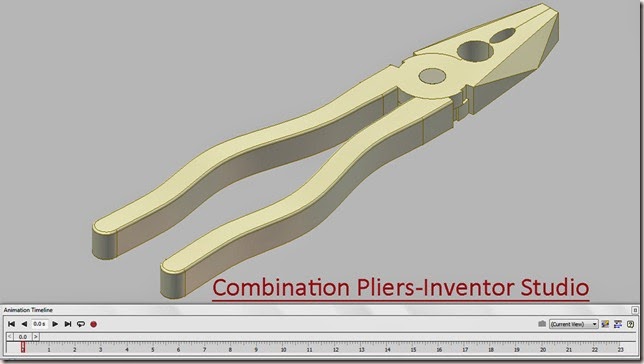
Combination Pliers-Inventor Studio-Autodesk Inventor 2012 (with caption and audio narration)

Combination Pliers-Inventor Studio_1 


Combination Pliers-Inventor Studio_2

Serial No. 22

Combination Pliers-Inventor Studio-Autodesk Inventor 2012 (with caption and audio narration)

In this video, we will demonstrate how to apply the different type of mates in the assembly environment for creating the animation of the ‘Combination Pliers’.


 download-Link 


Click the following link to get the model file: -http://bit.ly/2n4Yhig


Transcription of Video

Display of motion in ‘Combination Pliers’ through Inventor Studio

  1. Create a New ‘Standard (in).iam’ Assembly and save it with the name ‘Combination Pliers-Inventor Studio’.
  2. Select Place component from the marking menu and place the ‘Part1’ in the Assembly.
  3. Re-orient the model in the design window by using View Cube.
  4. Set the current view as Home View by using the toggle next to View Cube.
  5. Select the Part1 in the design window and remove its ‘Grounded’ position from the context menu.
  6. Apply an Axis Mate between Z Axis of Assembly and Z Axis of Part1.
  7. Apply a Mate Constraint between Centre Point of Assembly and Centre Point of Part1.
  8. Place the ‘Part2’ in the Assembly.
  9. Select the edge of small hole on Part2 to activate Assemble Tool.
  10. Then select the edge of small hole on Part1, click green check mark to place Insert Mate between Part2 and Part1.
  11. Activate an Angle Constraint, first Select face of Jaw of Part1, and then select YZ Plane of Assembly and in the end select top face of Part1. Click OK.
  12. Activate Angle Constraint once again, first Select face of Jaw of Part2, and then select YZ Plane of Assembly and in the end select top face of Part2.
  13. Enter the value 180 degree in the Angle Input box and Click Ok.
  14. Place the ‘Rivet’ in the Assembly.
  15. Select the inner circular edge of Rivet to activate Assemble Tool.
  16. Then select the inner small circular edge of hole on the Part2, click green check mark to place Insert Mate between Part2 and Rivet.
  17. Set the browser from Assembly View to Modeling View using the toggle at the top of the browser.
  18. Select ‘Angle:2’ under the Constraints folder in the Browser Bar, Right click and choose ‘Suppress’ from the context menu.
  19. Select Part1 and Part2 in the Browser Bar, right click and choose ‘Contact Set’ from the context menu.
  20. Select ‘Activate Contact Solver’ in the Interference panel of Inspect Tab.
  21. Drag the Part2, it will stop at the point of Collision between Part1 and Part2.
  22. Measure the swing angle between the jaw of Part1 and Part2. The detected swing angle is 40.18 degree.
  23. Restore the settings to previous state.
  24. Click the ‘Inventor Studio’ icon from the Begin Panel of Environments Tab.
  25. Select ‘Angle:1’ Constraint under Part1 in the Browser Bar, right click and select Animate Constraints in the context menu.
  26. In ‘Action’ section, enter the value -20.09 degree in the End input box.
  27. In the ‘Time’ section of Animate Constraint dialogue box, enter the value 10 second in the End input box.
  28. Click Acceleration Tab.
  29. Select ‘Constant Speed’ radio button in the Velocity Profile.
  30. Click OK.
  31. Select Expand Action Editor Button on the Animation Timeline.
  32. Select Angle:1 constraint in the Animation Timeline, right click and choose ‘Mirror’ from the context menu.
  33. Edit Mirrored animation action in the Animation Timeline.
  34. In the ‘Time’ section of Animate Constraint dialogue box, enter the value 13 second in the Start input box and enter the value 23 second in the End input box, to give effect of 3 second pause.
  35. Click OK.
  36. Select ‘Angle:2’ Constraint under Part2 in the Browser Bar, right click and select Animate Constraints in the context menu.
  37. In ‘Action’ section, enter the value (180+20.09) degree in the End input box.
  38. In the ‘Time’ section of Animate Constraint dialogue box, enter the value 10 second in the End input box.
  39. Click Acceleration Tab.
  40. Select ‘Constant Speed’ radio button in the Velocity Profile.
  41. Click OK.
  42. Select Angle:2 constraint in the Animation Timeline, right click and choose ‘Mirror’ from the context menu.
  43. Edit Mirrored animation action in the Animation Timeline.
  44. In the ‘Time’ section of Animate Constraint dialogue box, enter the value 13 second in the Start input box and enter the value 23 second in the End input box.
  45. Click OK.
  46. Select Collapse Action Editor Button on the Animation Timeline.
  47. Click the Animation Options Button.
  48. In the Animation Options dialogue box, click ‘Fit to Current Animation’ button in the ‘Length’ section option.
  49. Select Constant Speed radio button in the Default Velocity Profile and click Ok.
  50. Clear the screen by activating the Clean Screen command.
  51. Click ‘Go to Start’ Button.
  52. Click Play Animation button to display motion in Combination Pliers.