Showing posts with label Hinge. Show all posts

Thursday, November 24, 2016

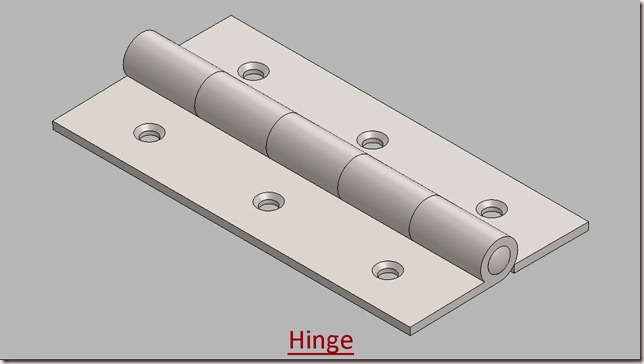
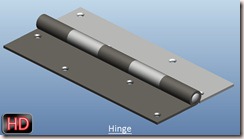
Hinge Modelling along with Animation--Solid Edge ST9 Tutorial

Hinge

Serial No. 7

Hinge Modelling along with Animation--Solid Edge ST9 Tutorial

In this video, we will describe you how to made a Hinge with various part modelling tools. How to place parts in the assembly and afterward give the 'Rotational Motor' command on the under-constrained part.
When you click the Simulate Motor command, the Motor Group Properties dialog box is displayed so you can specify which motors you want to use, the default duration, and other similar options. When you click OK, the Animation Editor is displayed so you can run the simulation. To run the simulation, click the Play button.


download-Link


Click the following link to get the model file: - http://bit.ly/2oZXFeM

Wednesday, November 5, 2014

Designing of part by introducing ‘Configuration Manager’ (SolidWorks 2014)

Designing of part by introducing--Configuration Manager

Serial No. 30

Designing of part by introducing ‘Configuration Manager’ (SolidWorks 2014)


Configuration Manager: -- configurations allow you to create multiple variations of a part or assembly model within a single document.

Configurations provide a convenient way to develop and manage families of models with different dimensions, components, or other parameters.

download-Link


Click the following link to get the model file: - http://bit.ly/2nyGzV3

Sunday, November 2, 2014

Controlling parameters of assembly by using ‘Derived Component’ (Autodesk Inventor 2013)

Controlling parameters of assembly by using--Derived Component

Serial No. 218

Controlling parameters of assembly by using ‘Derived Component’ (Autodesk Inventor 2013)


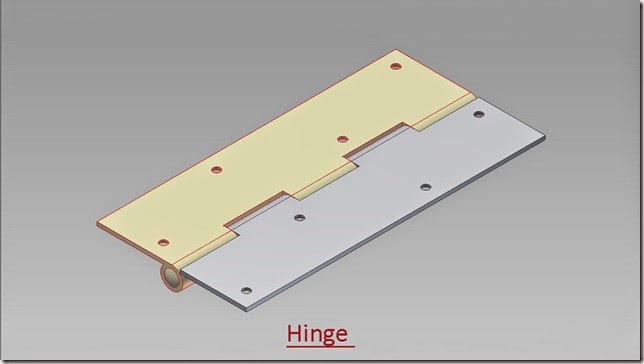
  In this video we would create a Hinge. The parts of the Hinge are created on the basis of a derived part. Changing the parameters of derived part, It will change all the parts accordingly in the assembly.  

download-Link


Click the following link to get the model file: - http://bit.ly/2miNXDi

Monday, February 10, 2014

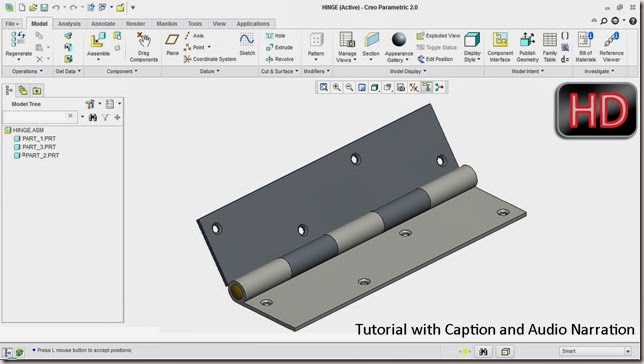
Setting up a Hinge (Pin) Mechanism in Creo Parametric 2.0

Setting up a Hinge (Pin) Mechanism in Creo Parametric 2

Video Tutorial with caption and audio narration
..............................................................................

In this Assembly Modelling Tutorial of Creo Parametric a mechanism of a Hinge is created by using predefined Pin constraint that is available in the software. First of all, the previously created components of Hinge will be placed in the assembly and then mates will be applied to set up the mechanism. To animate this mechanism read a related blog post by me Animation of Hinge || Using Creo Mechanism.

 download-Link


Click the following link to get the model file: -http://bit.ly/2nzc29d


Transcription of Video

  1. We have following components of Hinge, which we will place in an assembly.

  2. Later we will test its mechanism with the help of Drag Component tool.

  3. Create a new assembly with default template.

  4. Give it a name Hinge.

  5. Place the part_1 in the assembly.

  6. Drag the part so that you can see the Datum Planes of Assembly clearly.

  7. Constraint Type is set to Automatic by default.

  8. Apply a constraint between Right Datum plane of assembly and Right Datum Plane of part_1.

  9. Add a new constraint and select Front Datum Planes of assembly and Front Datum Planes of part_1 to apply a coincident constraint automatically.

  10. In the same way apply a coincident constraint between Top Datum Plane of Assembly and Top Datum Plane part_1.

  11. Now STATUS area indicates that the component is fully constrained in the assembly.

  12. Click the green check mark to apply and save the changes.

  13. Now place the part_3 in the assembly.

  14. Drag the part_3 and re-align it in the graphic window.

  15. Select the axis of part_1 and axis of part_3 to apply a coincident constraint between them.

  16. Drag the part_3 in the graphics window and apply a coincident constraint between its front datum plane and Front datum plane of the assembly.

  17. Now the component is fully constrained in the assembly.

  18. Place part_2 in the assembly.

  19. Rotate the part and re-align it.

  20. Select a predefined constraint named Pin.

  21. Select the axis of part_2 and axis of part_3 to apply a coincident constraint between them.

  22. Now click the Placement tab and define the reference of translation.

  23. The STATUS area indicates the Connection Definition is complete.

  24. Click the green check mark to apply and save the changes.

  25. Give away different colours to the parts of the assembly so that they can be recognized easily.

  26. Align the model in an isometric view using Re-orient tool.

  27. Clear the screen by closing the visibility of Datum planes, axis, points and everything else.

  28. Select the top face of part_2 and drag it with the help of Drag Component tool to check the mechanism of Hinge assembly.

  29. Only part_2 of Hinge can be moved because we applied a pre-defined Pin constraint on it.

  30. Re-generate the file and save it.

Monday, December 9, 2013

Hinge-Autodesk Inventor 2012 (with caption and audio narration)

Hinge_1 


Hinge_2

Serial No. 49

Hinge-Autodesk Inventor 2012 (with caption and audio narration)

download-Link 


Click the following link to get the model file: - http://bit.ly/2lHZ1cO


Transcription of Video

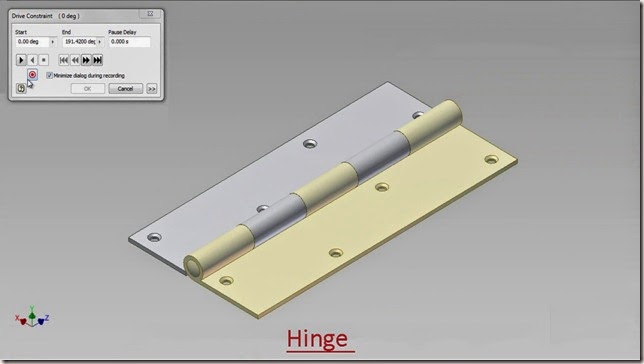
Hinge Modelling and apply motion in it through Drive-Constraint.

  1. Create a New ‘Standard (in).ipt’ Part file.
  2. Sketch1 is active by default.
  3. Draw a Rectangle 1.25 in. x 0.0625 in., coincident with Auto project part origin.
  4. Draw a Circle of 0.375 in. diameter.
  5. Apply a Tangent Constraint between circle and base line of the rectangle.
  6. Apply a Vertical Constraint between centre point of Circle and Auto project part origin.
  7. Draw another Circle of 0.25 in. diameter, Concentric with the previous one.
  8. Finish the Sketch.
  9. Start the Extrude command, select rectangle and the profile formed between the two circles.
  10. Enter the distance value 5 in. and select Symmetric option in the direction field.
  11. Click OK.
  12. Change the existing colour of the part into Popcorn.
  13. Save the file with the name Part 1.
  14. Create a new work plane 1 in. away from the front face of part.
  15. Start a new sketch on this Work Plane.
  16. Take the project of this edge of the part with Project Geometry Tool.
  17. Right click in the design window and select Slice Graphic from the context menu.
  18. By doing so hidden sketches behind the part will be seen clearly.
  19. Draw two lines to close the profile.
  20. Finish the Sketch.
  21. Start the Extrude command. It will automatic select the last drawn sketch profile, choose Cut option to remove the material from the part.
  22. Enter the distance value 1 in.
  23. Click ok.
  24. Start the Rectangular Pattern tool.
  25. Select Extrusion2 in the design window as feature.
  26. Click the ‘Direction 1’ button, and then select the outer edge of the Part1.
  27. Enter the value 2 in the column count input box.
  28. Enter the value 2 in. in the column spacing input box.
  29. Click OK.
  30. Take the project of edges of the model.
  31. Draw a rectangle coincident with the end point of the projected lines.
  32. Start the Offset tool, select the rectangle and drag the profile inside.
  33. A new Rectangle will be created.
  34. Place the dimension .25 in. as offset distance between the two rectangles.
  35. Start the Rectangular Pattern tool.
  36. Select bottom line of the rectangle.
  37. Click the ‘Direction 1’ button, and then select the vertical line of the rectangle. Click Flip button to change the direction of pattern.
  38. Enter the value 4 in the column count input box.
  39. Click the arrow button to expand the input choices in the column spacing input box.
  40. Choose ‘Measure’ option then select the vertical line of rectangle.
  41. Click more button to expand the dialogue box.
  42. Select ‘Fitted’ option and click OK.
  43. Convert all sketches into construction geometry.
  44. Hold the Ctrl Key and select the end points of these lines and convert them to centre point.
  45. Start the Hole Tool. The Points which we converted into centre point will be automatically selected.
  46. Set the diameter of the hole to 0.125 in.
  47. In the termination drop down menu select Through All option and Click OK.
  48. Start the Chamfer Tool.
  49. Select the top edges of all the holes.
  50. Enter the value 1/32 in. in the Distance field.
  51. Click OK.
  52. Save the file.
  53. Save As the same file with the name Part 2 also.
  54. This file will be used later in creation of Hinge Assembly.
  55. Close the file.
  56. Create a New Standard (in).iam Assembly file.
  57. Place the ‘Part 1’ file in the Assembly with aid of Place Component Tool.
  58. Save the Assembly with name ‘Hinge’.
  59. Place the ‘Part 2’ in the Assembly.
  60. Align ‘Part 2’ in correct position by using Rotate Component Tool.
  61. Some modifications are needed here in ‘Part 2’, so as to match it with Part 1.
  62. Select the Part 2 and double click it, to edit in the part modelling environment.
  63. Edit the Extrusion2 feature in the Browser Bar by double clicking it.
  64. In the Extrude2 dialogue box, change the direction of extrusion.
  65. In the same way, edit the Rectangular Pattern1.
  66. In the Column count input box, enter the value 3 and click OK.
  67. Click the Return icon, to return back in the Assembly modelling environment.
  68. Apply a mate constraint between the Axis of Part 1 and Part 2.
  69. Apply a Flush mate between the Front face of Part 1 and Part2.
  70. Right Click in the design window and select Create Component Tool from the marking menu.
  71. Give name of the part as ‘Centre Pin’.
  72. Click Ok.
  73. Select XY plane of Assembly, as a base plane for the new component.
  74. At present sketch1 is active of newly created Centre Pin.
  75. Take the project of edge of the hole.
  76. Finish the sketch.
  77. Start Extrude command. The sketch profile is automatically selected.
  78. In the extents drop down menu, select Between option.
  79. Select front face of part and then rear face of the part.
  80. Click ok.
  81. Change the model colour to Popcorn to distinguish it more clearly.
  82. Create a new sketch on the YZ plane of the Centre Pin.
  83. Take the project of front edge of the Centre Pin.
  84. Activate Slice Graphic Command from the Right click context menu.
  85. Draw a Three Point Rectangle, coincident with the midpoint and end point of the projected line.
  86. Apply a horizontal dimension of 0.03125 in. on the rectangle.
  87. Draw a Thee Point Arc inside the rectangle.
  88. Finish the sketch.
  89. Start Revolve command, first select the sketch profile and later the axis.
  90. Click OK.
  91. Start the Mirror Command from the Pattern Panel of the Model Tab.
  92. Select Revolve1 feature in the browser bar.
  93. Select Mirror Plane button in the Mirror dialogue box, then select XY plane of Centre Pin.
  94. Click Ok and return back to the assembly.
  95. Change the view of Assembly by using View Cube.
  96. Apply an Angle Constraint between Part1 and Part2, to show the motion in the Assembly of ‘Hinge’.
  97. Activate an Angle Constraint, first select the top face of Par1, then top face Part2, at last select the front face Part2.
  98. Click OK.
  99. Set the browser Assembly View to Modelling View using the toggle at the top of the Browser Bar.
  100. Select the Angle:1 constraint under Constraints folder in the Browser Bar and change its name as ‘Drive’ by clicking twice slowly.
  101. Right click the ‘Drive’ Constraint and select Drive Constraint from the context menu.
  102. In the Drive Constraint dialogue box, set End value to 191.42 deg.
  103. Click more button to expand the dialogue box and set the value for Increment 0.25 deg.
  104. In the Repetitions field select Start/End/Start and enter value 2.
  105. Clear the screen by activating the Clean Screen command, Click the Forward Button to display the motion in the ‘Hinge’ Assembly.

Sunday, October 20, 2013

Assembly Modeling in Pro E Wildfire (Hinge)


Hinge (You Tube Icon This video tutorial displays the modelling of a Hinge in Pro E Wildfire. Hinge is the assembly of three parts so viewers will see the application of many part and assembly modelling tools of Pro E Wildfire 5.0 like Extrude, Hole, Mirror, Chamfer /Adding and creating new parts in assembly, applying constraints parts etc.


download-Link 


Click the following link to get the model file: -http://bit.ly/2mC9d7f


Related Newer  Post:---

Hinge || Creo Parametric Tutorial