Serial No. 101
Tray-Autodesk Inventor 2013 (with caption and audio narration)
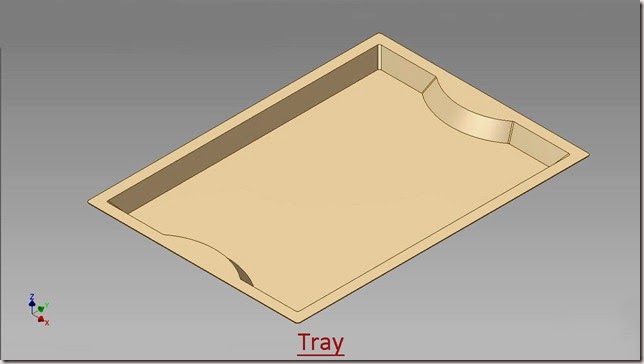
In this exercise, a Tray will be created by using surface features of Autodesk Inventor. First of all, a pre-constructed sketch will be imported and later Boundary Patch, Surface Loft, Stitch Surface and Thicken /Offset tools will be utilized to complete the model.
Click the following link to get the model file: - http://bit.ly/2mCzuSL
Transcription of Video
- Create a new Standard(in).ipt file .
- Import the ‘Base Sketch’ as a derived component, required for creating the model.
- Activate the Derive Component Tool from the Create panel of 3D model tab.
- Select ‘Base Sketch of Tray’ file and open it.
- Derived Part dialogue box is visible in the design window.
- Derive the sketches from the file.
- Click Ok to execute the command.
- Two sketches (one for top face and the other for back face) have been imported from the file ‘Base Sketch of Tray’.
- Activate the ‘Boundary Patch’ tool from the Surface Panel of 3D Model Tab.
- Boundary Patch dialogue is visible in the graphics window.
- Select the top sketch of the model.
- Click Ok to create the Boundary Patch Feature.
- Activate the Boundary Patch Tool once again.
- Select the bottom sketch profile of the model to create another boundary patch feature.
- Activate the Loft tool from the Create panel of 3D Model tab.
- The Loft dialogue box is visible in the graphics window.
- Select the internal edge (loop) of Boundary Patch1 and outer edge (loop) of Boundary Patch2 to create a new 3D surface.
- A preview of loft is visible in the graphics window.
- Click OK to execute the loft feature.
- Activate the ‘Stitch Surface’ tool from the Surface Panel of 3D Model Tab.
- Stitch dialogue box is visible in the graphics window.
- Surfaces selection is active by default.
- Right click in the graphics window and choose ‘Select All’ option from the context menu to select all the surfaces at once.
- A preview of stitch is visible in the graphics window.
- Click Apply to stitch all the surfaces.
- Stitch Surface tool combined all the surfaces into a single surface.
- Activate the ‘Thicken/Offset’ tool from the Surface Panel of 3D Model Tab.
- Thicken/Offset dialogue is visible in the graphics window.
- Face radio button is selected by default.
- Click the Quilt radio button to select all the surfaces of the model at once.
- And select the surface in the graphics window.
- Enter the value 1/32 inch in Distance field to specify the thickness of the model.
- A sheet along with its thickness is now visible in the preview.
- Click OK to execute the Thicken feature.
- Close the visibility of Stitch Surface1 from the Browser Bar.
- Change the model colour to ‘Flaked Reflective – Beige’.
- Apply a fillet of 1/8 inch on the following edges of the model.
- Save the part file with the name ‘Tray’.


No comments:
Post a Comment