Showing posts with label Dynamic Simulation. Show all posts

Friday, September 28, 2018

Modelling of 'Screw Gauge' with Dynamic Simulation (Volume-2) Autodesk Inventor 2018 Tutorial

Screw Gauge.jpg_1

Screw Gauge.jpg_2

Screw Gauge.jpg_3

Serial No. 305-B.

Modelling of 'Screw Gauge' with Dynamic Simulation (Volume-2) Autodesk Inventor 2018 Tutorial(Starting of the model is designed in Volume-1)


Click the following link to get the model file: - http://bit.ly/2oWAced


Procedure of reading of Screw Gauge

Total number of divisions imprinted on Circular scale (in one round) = 25

Total number of divisions imprinted on Linear scale = 40

Pitch of Linear scale = total length of Linear scale/total number of divisions imprinted on Linear scale
= 25.4mm/40 = 0.635mm

Least count of Circular scale = Pitch of Linear scale/total number of divisions imprinted on Circular scale
= 0.635mm/25 = 0.0254mm

Reading of Linear scale = Pitch of Linear scale x Number of divisions opened on Linear scale
= 0.635mm x 4 = 2.54mm

Reading of Circular scale = Least count of Circular scale x Number of divisions
ahead of central line of Linear scale
= 0.0254mm x 2 = 0.0508mm

Total Reading = Reading of Linear scale + Reading of Circular scale
= 2.54mm + 0.0508mm = 2.5908mm

Saturday, December 14, 2013

Cam and Follower-Dynamic Simulation-Autodesk Inventor 2013 (with caption and audio narration)

Cam and Follower-Dynamic Simulation

Serial No. 183

Cam and Follower-Dynamic Simulation-Autodesk Inventor 2013 (with caption and audio narration)
In this video, we will demonstrate how to apply the different type of mates in the assembly environment for creating the Dynamic Simulation of the ‘Cam and Follower’. 

download-Link 


Click the following link to get the model file : - http://bit.ly/2maTL1C


Transcription of Video

Display of motion in ‘Cam and Follower’ through Dynamic Simulation

  1. Click the New icon under the Work tab in the Welcome Screen of Autodesk Inventor Professional 2013.
  2. Select Metric Template in the Create New File Dialogue Box.
  3. Create a Standard (mm).iam Assembly file.
  4. Save it with the name ‘Cam and Follower-Dynamic Simulation’.
  5. Select Place component from the marking menu and place the ‘Cam’ in the Assembly.
  6. Align the Cam in correct position by using View Cube.
  7. Set the current view as Home View by using the toggle next to View Cube.
  8. Select the Cam in the design window and remove its ‘Grounded’ position from the context menu.
  9. Click the Degrees of Freedom icon in the Visibility Panel of View Tab.
  10. At present there are six Degrees of Freedom in Cam and it can be moved in any direction in the Assembly.
  11. Apply an Axis Mate between the Z Axis of Assembly and Z Axis of Cam.
  12. Apply a Flush Mate between the XY Plane of Assembly and upper most front face (Red coloured) of Cam.
  13. Now this time only one ‘Degrees of Freedom’ persist and Cam can be moved only on its Z Axis.
  14. Place the ‘Follower’ in the Assembly.
  15. Re-orient the Follower against the Cam using Rotate Component Tool.
  16. Apply a Flush Mate between the upper most front face (Red coloured) of Cam and face of small pulley (Black coloured) of Follower.
  17. Apply a Mate Constraint between YZ Plane of Assembly and YZ Plane of Follower.
  18. Activate the Dynamic Simulation Tool from the Begin Panel of Environments Tab.
  19. Click the view Tab and change the View of the model to ‘Shaded with Edges’ in the Visual Style drop down.
  20. Activate Insert Joint from the Marking menu.
  21. Select ‘Sliding: Cylinder Curve’ from the drop down menu of Insert Joint dialog box.
  22. Select the outer edge of Cam in ‘Curve’ selection option and select circular edge of small pulley of Follower in ‘Cylinder’ selection option.
  23. Click OK.
  24. Select Revolution:1 joint in the Browser under the Standard Joints folder, right click and select Properties from the context menu.
  25. Click dof 1 (R) tab and select Edit imposed motion button and check the Enable imposed motion option.
  26. Click the arrow to expand the input choices, and click Constant Value.
  27. Enter the value 360*2 deg/s and click Ok.
  28. In Simulation Player fill the value 400 in the Images field area.
  29. Clear the screen by activating the Clean Screen command.
  30. Click Run in the Simulation Player to display motion in Cam and Follower.

Monday, December 9, 2013

Pipe Wrench-Dynamic Simulation-Autodesk Inventor 2012 (with caption and audio narration)

Pipe Wrench-Dynamic Simulation

Serial No. 182

Pipe Wrench-Dynamic Simulation-Autodesk Inventor 2012 (with caption and audio narration)


In this video, we will demonstrate how to apply the different type of mates in the assembly environment for creating the Dynamic Simulation of the ‘Pipe Wrench’.


download-Link


Click the following link to get the model file: - http://bit.ly/2mT1v8y


Transcription of Video

Display of Motion in ‘Pipe Wrench’ through Dynamic Simulation.

  1. Create a New ‘Standard (in).iam’ Assembly and save it with the name ‘Pipe Wrench-Dynamic Simulation’.
  2. Select Place component from the marking menu and place the ‘Base Frame’ in the Assembly.
  3. Re-orient the model in the design window by using View Cube.
  4. Set the current view as Home View by using the toggle next to View Cube.
  5. Place the ‘Supporting Bracket’ in the Assembly.
  6. Apply an Axis Mate between hole on the Base Frame and hole on the Supporting Bracket.
  7. Apply a Flush Mate Between XY Plane of Base Frame and XY Plane of Supporting Bracket.
  8. Activate Angle Constraint Command first select side face of Base Frame; then select side face of Supporting Bracket and at the last select top face of Supporting Bracket.
  9. Enter the value -4.76 degree in the Angle Input Box and click OK.
  10. Place the ‘Rivet-1’ in the Assembly.
  11. Fix the Rivet-1 in the hole of Supporting Bracket by the use of Insert Mate as displayed.
  12. Place the ‘Supporting Strip-1’ in the Assembly.
  13. Place the Supporting Strip -1 on the hole of Base Frame with the help of Insert Mate.
  14. Apply an Angle Constraint between top face of Supporting Strip -1 and top face of Base Frame.
  15. In the Solution Type, select Directed Angle.
  16. Place the ‘Rivet-2’ in the Assembly.
  17. Fix the Rivet-2 on the hole of Supporting Strip-1 with the help of Insert Mate.
  18. Place the ‘Supporting Strip-2’ in the Assembly.
  19. Place the Supporting Strip -2 on the hole of Base Frame with the help of Insert Mate.
  20. Apply an Angle Constraint between top face of Supporting Strip -2 and top face of Base Frame.
  21. In the Solution Type, select Directed Angle.
  22. Drag the Rivet-2 from the Browser Bar in the Assembly. This will place a copy of Rivet-2 in the Assembly.
  23. Fix the Rivet-2 on the hole of Supporting Strip-2 with the help of Insert Mate.
  24. Place the ‘Sliding Frame’ in the Assembly.
  25. Apply a Flush Mate between XY Plane of Base Frame and XY Plane of Sliding Frame.
  26. Set the browser from Assembly View to Modeling View using the toggle at the top of the browser.
  27. Apply a Mate Constraint between X Axis of Sliding Frame and Work Plane 7 of Supporting Bracket.
  28. Place the ‘Wheel’ in the Assembly.
  29. Apply a Mate Constraint between X Axis of Sliding Frame and Axis of Wheel.
  30. Apply a Mate Constraint between Work Plane 5 of Supporting Bracket and Work Plane 1 of Wheel.
  31. Apply a Mate Constraint between Jaw of Base Frame and Jaw of Sliding Frame in the Assembly.
  32. Select the previous applied ‘Mate: 5’ under the Constraints folder in the Browser Bar, Right click and choose ‘Supress’ from the context menu.
  33. Activate the Dynamic Simulation Tool from the Begin Panel of Environments Tab.
  34. Select Insert Joint in the Marking menu.
  35. Select ‘Screw’ from the drop down menu of Insert Joint dialog box.
  36. In the Insert Joint dialog box, select Circular edge of Sliding Frame in ‘Component 1’ selection option and select Circular edge of Wheel in ‘Component 2’ selection option.
  37. Enter the value 0.205 in the ‘Pitch’ input box. Click OK.
  38. Select Revolution:2 joint in the Browser under the Standard Joints folder, right click and select Properties from the context menu.
  39. Click dof 1 (R) tab and select Edit imposed motion button and check the Enable imposed motion option.
  40. Click the arrow to expand the input choices, and click Constant Value.
  41. Enter the value (-360/0.205) deg/s and click OK.
  42. In Simulation Player, fill the value 1000 in the Images field area.
  43. Clear the screen by activating the Clean Screen command.
  44. Click Run in the Simulation Player to display motion in Pipe Wrench.

Sunday, December 8, 2013

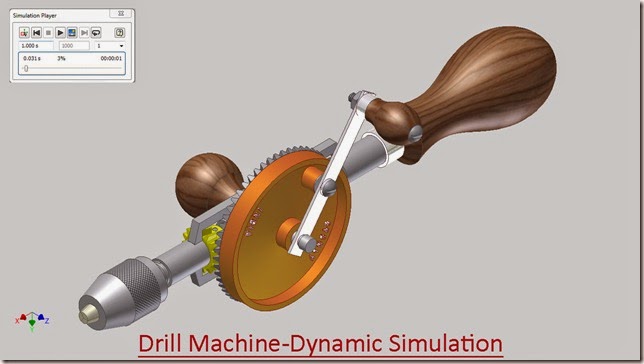
Drill Machine-Dynamic Simulation-Autodesk Inventor 2012 (with caption and audio narration)


Drill Machine-Dynamic Simulation_1


Drill Machine-Dynamic Simulation_2  


Serial No. 30

Drill Machine-Dynamic Simulation-Autodesk Inventor 2012 (with caption and audio narration)

In this video, we will demonstrate how to apply the different type of mates in the assembly environment for creating the Dynamic Simulation of the ‘Drill Machine’.


download-Link 


Click the following link to get the model file: -http://bit.ly/2ncLp9z


Transcription of Video

Display of Motion in Drill Machine through Dynamic Simulation

  1. Create a New ‘Standard (in).iam’ Assembly and save it with the name ‘Drill Machine-Dynamic Simulation’.
  2. Select Place component from the marking menu and place the Frame in the Assembly.
  3. Place Handle-1 and Handle Cap-1 in the Assembly.
  4. Start the Constrain Command and choose Insert Mate from the type option.
  5. First select the inner circular edge of Handle Cap, then select outer circular edge of Handle and click Ok.
  6. Give another Insert Mate between Inner edge of Handle Cap and circular edge of Frame as displayed.
  7. Re-orient the design window using View Cube.
  8. Set the current view as Home View using the toggle next to View Cube.
  9. Place Gear Wheel and Gear in the Assembly.
  10. Apply a Mate Constraint between Axis of Gear Wheel and Axis of Gear.
  11. Next, apply a Mate Constraint between face of Gear Wheel and face of Gear.
  12. Apply another Mate Constraint between YZ Plane of Gear Wheel and XZ Plane of Gear.
  13. Re-orient the Gear Wheel with respect to Frame using Rotate Component Tool.
  14. Apply an Axis Mate between Gear Wheel and stud of Frame.
  15. Place Spindle in the Assembly.
  16. Apply a Mate Constraint between Axis of Frame and Axis of Spindle.
  17. Next, apply a Mate Constraint between inner face of supporting cylinder of frame and back face of the spindle.
  18. Place Pinion-2 in the Assembly.
  19. Apply a Mate Constraint between Axis of Pinion-2 and Axis of Spindle.
  20. Apply an Axis Mate between hole on Pinion-2 and hole on Spindle.
  21. Place Locking Pin in the Assembly and fix it inside the hole of Pinion using Insert Mate.
  22. Place Pinion-1 in the Assembly.
  23. Align the Pinion-1 to match it with the Frame.
  24. Apply a Mate Constraint between Axis of Frame and Axis of Pinion-1.
  25. Select Pinion-1, Pinion-2 and Gear, then right click in the design window, choose ‘Isolate’ from the context menu.
  26. Set the Browser from Assembly view to Modeling View.
  27. Locate the Intersection Point of Pinion-2 inside the Browser Bar.
  28. Apply a Mate Constraint between the Intersection Point of Pinion-2 and Intersection Point of Gear.
  29. In the same manner, apply a Mate Constraint between the Intersection Point of Pinion-2 and the Intersection Point of Pinion-1.
  30. Activate Motion Constraint; first select the Axis of Pinion-1 and afterward the Axis of Gear.
  31. Enter the value 15/56 in the Ratio Input box and click Apply.
  32. Apply same step as above to give motion constraint between Pinion-2 and Gear.
  33. Right click in the design window, choose Undo Isolate from the context menu.
  34. Place Chuck in the Assembly.
  35. Apply a Mate Constraint between the Axis of Spindle and the Axis of Chuck.
  36. Place a Mate Constraint between inner circular face of Chuck and front face of Spindle.
  37. Place another Mate Constraint between YZ Plane of Chuck and YZ Plane of Spindle.
  38. Place Three instances of Jaw in the Assembly.
  39. Apply an Axis Mate between two subsequent Jaws.
  40. Next, apply a Mate between their edges.
  41. Apply a Flush Mate between their end faces.
  42. In the same manner, constraint the third Jaw.
  43. Apply a Mate Constraint between inner circular face of Chuck and rear face of Jaw.
  44. Apply a Mate Constraint between the Axis of Chuck and the Axis of Jaw.
  45. Place a Mate Constraint between YZ Plane of Chuck and YZ Plane of any one Jaw.
  46. Place Handle-2 and Handle Cap-2 in the Assembly.
  47. Apply an Insert Mate between inner circular edge of Handle Cap-2 and outer circular edge of Handle-2.
  48. Position the Handle Cap-2 in respect of the stud of Frame by using Rotate Component Tool.
  49. Apply an Insert Mate between front circular edge of Handle Cap-2 and inner circular edge of stud.
  50. Place Handle Connecting Plate in the Assembly.
  51. Apply an Insert Mate between edge of the hole on Handle Connecting Plate and inner circular edge of stud.
  52. Place Washer-1 in the Assembly.
  53. Apply an Insert Mate between edge of the hole on Washer-1 and edge of the hole on Gear Wheel.
  54. Apply a Mate Constraint between YZ Plane of Handle Connecting Plate and Axis of the hole on Gear Wheel.
  55. Place Screw-2 in the Assembly.
  56. Apply an Insert Mate between inner circular edge of Screw-2 and edge of the hole on Handle Connecting Plate.
  57. Place Handle-3 and Handle Cap-3 in the Assembly.
  58. Fit the Handle Cap-3 over the Handle-3 with the help of Insert Mate.
  59. Apply another Insert Mate between the Handle Cap-3 and hole on the Handle Connecting Plate.
  60. Place Screw-1 and Nut in the Assembly.
  61. Fix the Screw-1 on the Handle-3 with the help of Insert Mate.
  62. Fix the Nut on the Screw-1 by applying Insert Mate.
  63. Open the Visibility of surfaces named ‘Pitch Diameter’ of Pinion-2, Pinion-1 and Gear.
  64. ‘Isolate’ the Pinion-1, Pinion-2 and Gear in the Assembly.
  65. Activate the Dynamic Simulation Tool from the Begin Panel of Environments Tab.
  66. Select Insert Joint in the Marking menu.
  67. Select ‘Rolling: Cone on Cone’ from the drop down menu of Insert Joint dialog box.
  68. Select Pitch Diameter of Pinion-2 in ‘Component 1’ option and select Pitch diameter of Gear in ‘Component 2’ option and click Apply.
  69. In the same manner select Pitch Diameter of Pinion-1 and select Pitch diameter of Gear and click Ok.
  70. Finish Dynamic Simulation and return to Assembly Modelling environment.
  71. Close the visibility of surfaces named ‘Pitch Diameter’ of Pinion-1, Pinion-2 and Gear.
  72. Right Click in the design window and click ‘Undo Isolate’ option.
  73. Activate Dynamic Simulation Tool.
  74. Select Revolution:2 joint in the Browser under the Standard Joints folder, right click and select Properties from the context menu.
  75. Click dof 1 (R) tab and select Edit imposed motion button and check the Enable imposed motion option.
  76. Click the arrow to expand the input choices, and click Constant Value.
  77. Enter the value 360 deg/s and click Ok.
  78. In Simulation Player, fill the value 1000 in the Images field area.
  79. Clear the screen by activating the Clean Screen command.
  80. Click Run in the Simulation Player to display motion in Drill Machine.

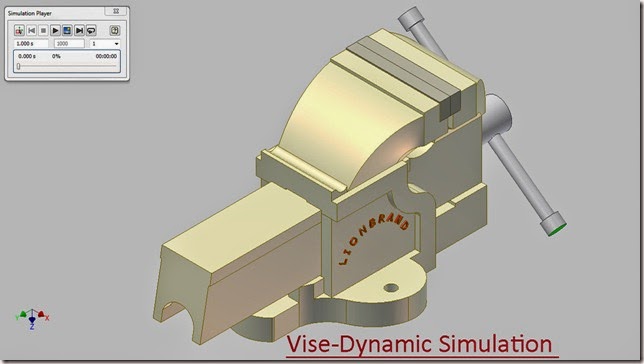
Vise-Dynamic Simulation-Autodesk Inventor 2012 (with caption and audio narration)

Vise-Dynamic Simulation_1 


Vise-Dynamic Simulation_2

Serial No. 106

Vise-Dynamic Simulation-Autodesk Inventor 2012 (with caption and audio narration)

In this video, we will demonstrate how to apply the different type of mates in the assembly environment for creating the Dynamic Simulation of the ‘Vise’.

download-Link 


Click the following link to get the model file: - http://bit.ly/2ms77GX


 Transcription of Video

Display of Motion in Vise through Dynamic Simulation

Sub Assembly-1:

  1. Create a New ‘Standard (in).iam’ Assembly and save it with the name ‘Sub Assembly-1’.
  2. Select Place component from the marking menu and place the ‘Base Housing’ in the Assembly.
  3. Re-orient the model in the design window by using View Cube.
  4. Set the current view as Home View by using the toggle next to View Cube.
  5. Place the ‘Part-1’ in the Assembly.
  6. Apply a Mate Constraint between the bottom face of Part-1 and inner face of Base Housing.
  7. Apply another Mate Constraint between YZ plane of Base Housing and YZ Plane of Part-1.
  8. Apply a Flush Mate between front face of Part-1 and front face of Base Housing.
  9. Fill the offset value 5.672 inch.
  10. Place the ‘Jaw Plate’ in the assembly.
  11. Apply a Mate Constraint between slotted face of Base Housing and back face of Jaw Plate.
  12. Next apply a Mate Constraint between lower face of slotted face and bottom Face of Jaw Plate.
  13. Apply a Flush Mate between the side face of Jaw Plate and side face of Base Housing.
  14. Place two identical ‘Screws’ in the Assembly.
  15. Fix both the Screws in the holes on Jaw Plate by using the Insert Mate.
  16. Save the Sub Assembly-1 and close it.

Sub Assembly-2:

  1. Create a New Assembly and save it with the name ‘Sub Assembly-2’.
  2. Select Place component from the marking menu and place the ‘Sliding Housing’ in the Assembly.
  3. Re-orient the model in the design window by using View Cube.
  4. Set the current view as Home View by using the toggle next to View Cube.
  5. Place the ‘Jaw Plate’ in the Assembly.
  6. Apply a Mate Constraint between slotted face of Sliding Housing and back face of Jaw Plate.
  7. Next apply a Mate Constraint between lower face of slotted face and bottom Face of Jaw Plate.
  8. Apply a Flush Mate between the side face of Jaw Plate and side face of Sliding Housing.
  9. Place two identical ‘Screws’ in the Assembly.
  10. Fix both the Screws in the holes on Jaw Plate by using the Insert Mate.
  11. Save the Sub Assembly-2 and close it.

Sub Assembly-3:

  1. Create a New Assembly and save it with the name ‘Sub Assembly-3’.
  2. Select Place component from the marking menu and place the ‘Threaded Spindle’ in the Assembly.
  3. Place the ‘Compress Spring’ in the Assembly.
  4. Apply a Mate Constraint between Y Axis of Compress Spring and Axis of Threaded Spindle.
  5. Apply a Mate Constraint between circular face of Threaded Spindle and face of Compress Spring.
  6. Place the ‘Washer’ in the Assembly.
  7. Apply an Axis Mate between Washer and Threaded Spindle.
  8. Apply a Mate Constraint between face of Washer and face of Compress Spring.
  9. Place the ‘Pin’ in the Assembly.
  10. Apply an Axis Mate between Pin and hole on the Threaded Spindle.
  11. Apply a Mate Constraint between XY Plane of Threaded Spindle and YZ Plane of Pin.
  12. Place the ‘Handle’ in the Assembly.
  13. Apply an Axis Mate between hole on the Threaded Spindle and Handle.
  14. Next apply a Mate Constraint between XZ plane of Threaded Spindle and YZ Plane of Handle.
  15. Save the Sub Assembly-3 and close it.

Main Assembly (Vise):

  1. Create a New Assembly and save it with the name ‘Vise-Dynamic Simulation’.
  2. Select Place component from the marking menu and place the ‘Sub Assembly-1’ in the Assembly.
  3. Re-orient the model in the design window by using View Cube.
  4. Set the current view as Home View by using the toggle next to View Cube.
  5. Place ‘Sub Assembly-2’ in the Assembly.
  6. Align the Sub Assembly-2 in front of Sub Assembly-1 by using Rotate Component Tool.
  7. Apply a Mate Constraint between the bed of Sub Assembly-1 and bottom face of Sub Assembly-2.
  8. Apply a Flush Mate between YZ Plane of Sub Assembly-1 and XY Plane of Sub Assembly-2.
  9. Place ‘Sub Assembly-3’ in the Assembly.
  10. Apply an Axis Mate between hole on the Sliding Housing and Threaded Spindle.
  11. Apply a Mate Constraint between outer rim of hole on Sliding Housing and rear face of Threaded Spindle.
  12. Apply a Mate Constraint between subsequent faces of Jaw in the Assembly.
  13. Select the previous applied ‘Mate:4’under the Sub Assembly-1 in the Browser Bar, Right click and choose ‘Supress’ from the context menu.
  14. Dynamic Simulation
  15. Activate the Dynamic Simulation Tool from the Begin Panel of Environments Tab.
  16. Select Insert Joint in the Marking menu.
  17. Select ‘Screw’ from the drop down menu of Insert Joint dialog box.
  18. In the Insert Joint dialog box, select Circular edge of Threaded Spindle in ‘Component 1’ selection option and select Circular edge of Part-1 in ‘Component 2’ selection option.
  19. Enter the value 1/7 in the ‘Pitch’ input box. Click OK.
  20. Select Revolution:2 joint in the Browser under the Standard Joints folder, right click and select Properties from the context menu.
  21. Click dof 1 (R) tab and select Edit imposed motion button and check the Enable imposed motion option.
  22. Click the arrow to expand the input choices, and click Constant Value.
  23. Enter the value -360*7 deg/s and click OK.
  24. In Simulation Player, fill the value 1000 in the Images field area.
  25. Clear the screen by activating the Clean Screen command.
  26. Click Run in the Simulation Player to display motion in Vise.
  27. Change the colour of Vise ‘Green (Clear)’ to watch its motion in transparent view.

Monday, November 25, 2013

Roller Chain-Dynamic Simulation-Autodesk Inventor 2012 (with caption and audio narration)

Roller Chain-Dynamic Simulation


Serial No. 81

Roller Chain-Dynamic Simulation-Autodesk Inventor 2012 (with caption and audio narration)

In this video, we will demonstrate how to apply the different type of mates in the assembly environment for creating the Dynamic Simulation of  the ‘Roller Chain’.

download-Link 


Click the following link to get the model file: - http://bit.ly/2lMATWi


Transcription of Video

Display motion in Roller Chain through Dynamic Simulation.

  1. Create a New ‘Standard (in) .iam’ assembly and save it with the name ‘Roller Chain–Dynamic Simulation’.
  2. Hold the Ctrl key, and click the Roller Chains tool on the Power Transmission panel of the Design tab.
  3. The Roller Chains Generator dialog box will open with its default values.
  4. At present ‘Select Chain Mid Plane’ selection is active by default.
  5. Select XY Plane of the Assembly.
  6. Select first Roller Chain Sprocket 1 pulley in the ‘Sprockets’ section. Click Sprocket properties button to change the sprocket parameters.
  7. Enter the value 38 in the ‘Teeth’ input box and click OK.
  8. Click OK again.
  9. Align the Roller Chain in correct position by using View Cube.
  10. Change the color of both the Sprockets from the Browser Bar to watch it more clearly.
  11. Select the ‘Chain Drive’ Assembly in the Browser Bar and choose ‘Flexible’ in the context menu.
  12. Now both the Sprockets are rotating on their own Axis.
  13. Activate the Dynamic Simulation Tool from the Begin Panel of Environments Tab.
  14. Activate Insert Joint from the Marking menu.
  15. Select ‘Belt’ from the drop down menu of Insert Joint dialog box.
  16. In the Insert Joint dialog box, select edge of small Sprocket as ‘Component 1’ and select edge of large Sprocket as ‘Component 2’. Click Ok.
  17. Select Revolution:1 joint in the Browser under the Standard Joints folder, right click and select Properties from the context menu.
  18. Click dof 1 (R) tab and select Edit imposed motion button and check the Enable imposed motion option.
  19. Click the arrow to expand the input choices, and click Constant Value.
  20. Enter the value 360*3 deg/s and click Ok.
  21. In Simulation Player, fill the value 2000 in the Images field area.
  22. Clear the screen by activating the Clean Screen command.
  23. Click Run in the Simulation Player to display motion in Roller Chain.

Synchronous Belt-Dynamic Simulation-Autodesk Inventor 2012 (with caption and audio narration)

Synchronous Belt-Dynamic Simulation

Serial No.  93

Synchronous Belt-Dynamic Simulation-Autodesk Inventor 2012 (with caption and audio narration)

In this video, we will demonstrate how to apply the different type of mates in the assembly environment for creating the Dynamic Simulation of the ‘Synchronous Belt’.

download-Link 


Click the following link to get the model file: - http://bit.ly/2myqVIB


Transcription of Video

Display motion in Synchronous Belt through Dynamic Simulation.

  1. Create a New ‘Standard (in) .iam’ assembly and save it with the name ‘Synchronous Belt–Dynamic Simulation’.
  2. Hold the Ctrl key, and click the Synchronous Belts tool on the Power Transmission panel of the Design tab.
  3. The Synchronous Belts Component Generator dialog box will open with its default values.
  4. At present ‘Belt Mid Plane’ selection is active by default.
  5. Select XY Plane of the Assembly.
  6. Select first Synchronous pulley in the ‘Pulleys’ section. Click Pulley properties button to change the pulley parameters.
  7. Enter the value 38 in the ‘Teeth’ input box and click OK.
  8. Select Second Synchronous pulley in the ‘Pulleys’ section. Click Pulley properties button.
  9. Enter the value 57 in the ‘Teeth’ input box and click OK.
  10. Click OK again.
  11. Align the Belt in correct position by using View Cube.
  12. Change the colour of both the Pulleys from the Browser Bar to watch it more clearly.
  13. Select the ‘Synchronous Belts Transmission’ Assembly in the Browser Bar and choose ‘Flexible’ in the context menu.
  14. Now both the Pulleys are rotating on their own Axis.
  15. Activate the Dynamic Simulation Tool from the Begin Panel of Environments Tab.
  16. Activate Insert Joint from the Marking menu.
  17. Select ‘Belt’ from the drop down menu of Insert Joint dialog box.
  18. In the Insert Joint dialog box, select edge of small Pulley as ‘Component 1’ and select edge of large Pulley as ‘Component 2’. Click Ok.
  19. Select Revolution:1 joint in the Browser under the Standard Joints folder, right click and select Properties from the context menu.
  20. Click dof 1 (R) tab and select Edit imposed motion button and check the Enable imposed motion option.
  21. Click the arrow to expand the input choices, and click Constant Value.
  22. Enter the value 360*3 deg/s and click Ok.
  23. In Simulation Player, fill the value 2000 in the Images field area.
  24. Clear the screen by activating the Clean Screen command.
  25. Click Run in the Simulation Player to display motion in Synchronous Belt.

V-Belt-Dynamic Simulation-Autodesk Inventor 2012 (with caption and audio narration)

V-Belt-Dynamic Simulation

Serial No. 103

V-Belt-Dynamic Simulation-Autodesk Inventor 2012 (with caption and audio narration)

In this video, we will demonstrate how to give the different type of mates in the assembly environment for creating the Dynamic Simulation of the ‘V-Belt’.

download-Link


Click the following link to get the model file: - http://bit.ly/2nqoVSO


Transcription of Video

Display motion in V-Belt through Dynamic Simulation.

  1. Create a New ‘Standard (in) .iam’ assembly and save it with the name ‘V-Belt–Dynamic Simulation’.
  2. Hold the Ctrl key, and click the V-Belts tool on the Power Transmission panel of the Design tab.
  3. The V-Belts Component Generator dialog box will open with its default values.
  4. At present ‘Belt Mid Plane’ selection is active by default.
  5. Select XY Plane of the Assembly.
  6. Select Second Grooved Pulley in the ‘Pulleys’ section. Click Pulley properties button to change the pulley parameters.
  7. In ‘Design Guide’ drop down menu, select Transmission Ratio.
  8. Enter the value 1.5 in the Ratio input box. Click OK.
  9. Click OK again.
  10. Align the Belt in correct position by using View Cube.
  11. Change the colour of both the Pulleys from the Browser Bar to watch it more clearly.
  12. Select the ‘V-Belts transmission’ Assembly in the Browser Bar and choose ‘Flexible’ in the context menu.
  13. Now both the Pulleys are rotating on their own Axis.
  14. Activate the Dynamic Simulation Tool from the Begin Panel of Environments Tab.
  15. Activate Insert Joint from the Marking menu.
  16. Select ‘Belt’ from the drop down menu of Insert Joint dialog box.
  17. In the Insert Joint dialog box, select edge of small Pulley as ‘Component 1’ and select edge of large Pulley as ‘Component 2’. Click Ok.
  18. Select Revolution:1 joint in the Browser under the Standard Joints folder, right click and select Properties from the context menu.
  19. Click dof 1 (R) tab and select Edit imposed motion button and check the Enable imposed motion option.
  20. Click the arrow to expand the input choices, and click Constant Value.
  21. Enter the value 360*3 deg/s and click Ok
  22. In Simulation Player, fill the value 1000 in the Images field area.
  23. Clear the screen by activating the Clean Screen command.
  24. Click Run in the Simulation Player to display motion in V-Belt Belt.

Wednesday, November 20, 2013

Worm Gear-Dynamic Simulation-Autodesk Inventor 2012 (with caption and audio narration)

Worm Gear-Dynamic Simulation


Serial No. 109

Worm Gear-Dynamic Simulation-Autodesk Inventor 2012 (with caption and audio narration)
…….........................................................
In this video, we will demonstrate how to apply the different type of mates in the assembly environment for creating the Dynamic Simulation of the ‘Worm Gear’.


download-Link 


Click the following link to get the model file: - http://bit.ly/2mAv1zO


Transcription of Video

Display motion in Worm Gear through Dynamic Simulation

  1. Create a ‘New Assembly’ and save it with the name ‘Worm Gear–Dynamic Simulation’.
  2. Select Place component from the marking menu and place the Worm in the Assembly.
  3. Select the Worm in the Design window, right click and deselect Grounded from the context menu.
  4. At present there are six Degrees of Freedom in Worm and it can be moved in any direction in the Assembly.
  5. Open the visibility of X Axis of Assembly and X Axis of Worm from the Browser Bar and then apply a Mate Constraint between them.
  6. Apply another Mate Constraint between Centre Point of the Assembly and Centre Point of the Worm.
  7. Now only one Degree of Freedom is left and Worm can be moved only on its X Axis.
  8. Select Place component from the marking menu and place the Worm Gear in the Assembly.
  9. Align the Worm Gear in correct position by using Rotate Component Tool.
  10. Open the visibility of XZ Plane of Assembly and XY Plane of Worm Gear from the Browser Bar and then apply a Mate Constraint between them.
  11. Close the visibility of Work Planes to clear the screen.
  12. Set the browser from Assembly View to Modeling View using the toggle at the top of the browser.
  13. Open the visibility of Pitch Diameter of Worm Gear and Pitch Diameter of Worm and then apply a Tangent Mate between them.
  14. Apply another Mate Constraint between the Z Axis of Worm Gear and YZ Plane of Assembly.
  15. Create a Work Axis in the Assembly, coincident with the axis of surface of Pitch Diameter of Worm Gear.
  16. Activate the Work Axis command from the Work Features Panel of Assemble Tab, and then select Through Revolved Face or Feature in the Axis drop down menu.
  17. Select Pitch Diameter of Worm Gear to create the Work Axis.
  18. In the Quick Access toolbar, click the selection tool dropdown list and choose Select Sketch Features.
  19. Convert this Work Axis to ‘Grounded’.
  20. Activate the Motion Constraint, first select the side face of Worm and then the top face of Worm Gear. In the Ratio input box, enter the value 1/40 and click Ok.
  21. Once again, check the Degrees of Freedom of Worm Gear and Worm in the assembly, this time both the gears are rotating on their own Axis.
  22. Activate the Dynamic Simulation Tool from the Begin Panel of Environments Tab.
  23. Activate Insert Joint from the Marking menu.
  24. Select ‘Worm Gear’ from the drop down menu of Insert Joint dialog box.
  25. In the Insert Joint dialog box, select Pitch Diameter of Worm in ‘Gear option’ and select Pitch Diameter of Worm Gear in ‘Screw option’. Enter the value (- 1/40 ) in the Pitch input box. Click Ok.
  26. Select Revolution:1 joint in the Browser under the Standard Joints folder, right click and select Properties from the context menu.
  27. Click dof 1 (R) tab and select Edit imposed motion button and check the Enable imposed motion option.
  28. Click the arrow to expand the input choices, and click Constant Value.
  29. Enter the value 360*40 deg/s and click Ok.
  30. Close the visibility of Pitch diameter of Worm Gear and Worm.
  31. In Simulation Player, fill the value 1000 in the Images field area.
  32. Clear the screen by activating the Clean Screen command.
  33. Click Run in the Simulation Player to display motion in Worm and Worm Gear.

Note: - The worm gear is always driven by the worm.

Helical Gear (Internal)-Dynamic Simulation-Autodesk Inventor 2012 (with caption and audio narration)

Helical Gear (Internal) Dynamic Simulation

Serial No. 46

Helical Gear (Internal)-Dynamic Simulation-Autodesk Inventor 2012 (with caption and audio narration)

In this video, we will demonstrate how to give the different type of mates in the assembly environment for creating the Dynamic Simulation of the ‘Helical Gear-Internal’.


download-Link 


Click the following link to get the model file: - http://bit.ly/2nfFoJi


 Transcription of Video

Display motion in Helical Gear (Internal) through Dynamic Simulation

  1. Create a ‘New Assembly’ and save it with the name ‘Helical Gear (Internal)-Dynamic Simulation’.
  2. Select Place component from the marking menu and place the Helical Gear in the Assembly.
  3. Align the Gear in correct position by using View Cube.
  4. Select the Gear in the Design window, right click and deselect Grounded from the context menu.
  5. At present there are six Degrees of Freedom in Gear and it can be moved in any direction in the Assembly.
  6. Open the visibility of Z Axis of Assembly and Z Axis of Gear from the Browser Bar and then apply a Mate Constraint between them.
  7. Apply another Mate Constraint between Centre Point of the Assembly and Centre Point of the Gear.
  8. Now only one Degree of Freedom is left and Gear can be moved only on its Z Axis.
  9. Select Place component from the marking menu and place the Pinion in the Assembly.
  10. Activate the Constraint command and change the constraint type to Flush in the Solution field, select the top face of Pinion and top face of Gear, and click OK.
  11. Set the browser from Assembly View to Modeling View using the toggle at the top of the browser.
  12. Open the visibility of Pitch Diameter of Gear and Pitch Diameter of Pinion.
  13. Activate the Tangent Mate, change the Solution type to Inside, then select Pitch Diameter of Pinion and Pitch Diameter of Gear, and click OK.
  14. Apply a Mate Constraint between the Z Axis of Pinion and YZ Plane of Assembly.
  15. Create a Work Axis in the Assembly, coincident with the axis of surface of Pitch Diameter of Pinion.
  16. Activate the Work Axis command from the Work Features Panel of Assemble Tab, and then select Through Revolved Face or Feature in the Axis drop down menu.
  17. Select Pitch Diameter of Pinion to create the Work Axis.
  18. In the Quick Access toolbar, click the selection tool dropdown list and choose Select Sketch Features.
  19. Convert this Work Axis to ‘Grounded’.
  20. Activate the Motion Constraint, first select the top face of Gear and then the top face of Pinion. In the Ratio input box, enter the value 23/57 and click Ok.
  21. Once again, check the Degrees of Freedom of Helical Gear and Pinion in the assembly, this time both the gears are rotating on their own Axis.
  22. Activate the Dynamic Simulation Tool from the Begin Panel of Environments Tab.
  23. Select Insert Joint in the Marking menu.
  24. Select ‘Rolling: Cylinder in Cylinder’ from the drop down menu of Insert Joint dialog box.
  25. Select Rolling constraint option.
  26. In the Insert Joint dialog box, select Pitch Diameter of Gear in ‘Outer Component option’ and select Pitch Diameter of Pinion in ‘Inner Component option’. Click Ok.
  27. Select Revolution:2 joint in the Browser under the Standard Joints folder, right click and select Properties from the context menu.
  28. Click dof 1 (R) tab and select Edit imposed motion button and check the Enable imposed motion option.
  29. Click the arrow to expand the input choices, and click Constant Value.
  30. Enter the value 360 deg/s and click Ok.
  31. Close the visibility of Pitch diameter of Helical Gear and Pinion.
  32. In Simulation Player, fill the value 1000 in the Images field area.
  33. Clear the screen by activating the Clean Screen command.
  34. Click Run in the Simulation Player to display motion in Helical Gear and Pinion.

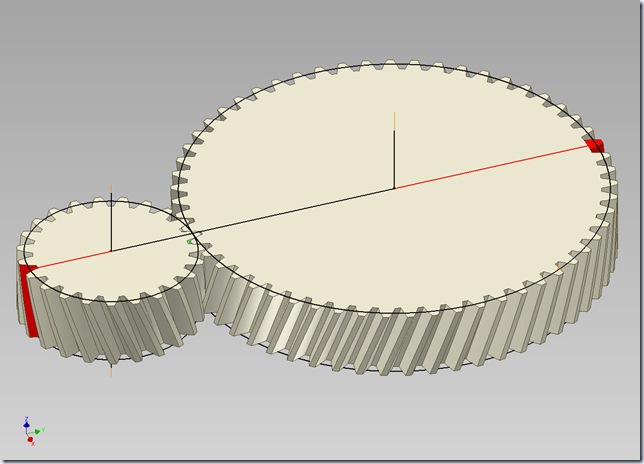
Helical Gear-Dynamic Simulation-Autodesk Inventor 2012 (with caption and audio narration)

Helical Gear-Dynamic Simulation

Serial No. 48

Helical Gear-Dynamic Simulation-Autodesk Inventor 2012 (with caption and audio narration)

In this video, we will demonstrate how to give the different type of mates in the assembly environment for creating the Dynamic Simulation of the ‘Helical Gear’.


download-Link 


Click the following link to get the model file: - http://bit.ly/2ncOwOW


 Transcription of Video

Display motion in Helical Gear through Dynamic Simulation

  1. Create a ‘New Assembly’ and save it with the name ‘Helical Gear–Dynamic Simulation’.
  2. Select Place component from the marking menu and place the Helical Gear in the Assembly.
  3. Align the Gear in correct position by using View Cube.
  4. Select the Gear in the Design window, right click and deselect Grounded from the context menu.
  5. At present there are six Degrees of Freedom in Gear and it can be moved in any direction in the Assembly.
  6. Open the visibility of Z Axis of Assembly and Z Axis of Gear from the Browser Bar, and then apply a Mate Constraint between them.
  7. Apply another Mate Constraint between Centre point of the Assembly and Centre point of the Gear.
  8. Now this time only one Degrees of Freedom is left and Gear can be moved only on its Z Axis.
  9. Select Place component from the marking menu and place the Pinion in the Assembly.
  10. Activate the Constraint command and change the constraint type to Flush in the Solution field, select the top face of Pinion and top face of Gear, click apply.
  11. Apply a Mate Constraint between YZ Plane of Gear and YZ Plane of Pinion.
  12. Set the browser from Assembly View to Modeling View using the toggle at the top of the browser.
  13. Open visibility of Pitch Diameter of Gear and Pitch Diameter of Pinion and then apply a Tangent Mate between them.
  14. Create a Work Axis in the Assembly, coincident with the axis of surface of Pitch Diameter of Pinion.
  15. Activate the Work Axis command from the Work Features Panel of Assemble Tab, and then select Through Revolved Face or Feature in the Axis drop down menu.
  16. Select Pitch Diameter of Pinion to create the Work Axis.
  17. In the Quick Access toolbar, click the selection tool dropdown list and choose Select Sketch Features.
  18. Convert this Work Axis to ‘Grounded’.
  19. Activate the Motion Constraint, first select the top face of Pinion and then top face of Gear. In the Ratio input box, enter the value 23/57 and click Ok.
  20. Suppress the Mate:3 Constraint in the Browser.
  21. Once again, check the Degrees of Freedom of gear and pinion in the assembly, this time both the gears are rotating on their own Axis.
  22. Activate the Dynamic Simulation Tool from the Begin Panel of Environments Tab.
  23. Select Insert Joint in the Marking menu.
  24. Select ‘Rolling: Cylinder on Cylinder’ from the drop down menu of Insert Joint dialog box.
  25. Select Rolling constraint option.
  26. First select the Pitch Diameter of Pinion and then the Pitch Diameter of Gear. Click Ok.
  27. Select Revolution:3 joint in the Browser under the Standard Joints folder, right click and select Properties from the context menu.
  28. Click dof 1 (R) tab and select Edit imposed motion button and check the Enable imposed motion option.
  29. Click the arrow to expand the input choices, and click Constant Value.
  30. Enter the value 360.000 deg/s, and click Ok.
  31. In the Images field, enter the value 1000.
  32. Close the visibility of Pitch diameter of Helical Gear and Pinion.
  33. Mesh the teeth of Gear and Pinion manually in front of each other, after Suppressing the Motion Constraint.
  34. Once again Un-suppress the Motion Constraint.
  35. Clear the screen by activating the Clean Screen command.
  36. Click Run in the Simulation Player to display motion in Helical Gear and Pinion.

Sunday, May 26, 2013

90 Degree M16 Bolt Removal Tool Design (Autodesk Inventor 2012 Tutorial)

90 Degree M16 Bolt Removal Tool Design

Serial No. 142

90 Degree M16 Bolt Removal Tool Design (Autodesk Inventor 2012 Tutorial)


This tutorial is selected from the eBook 'Up and Running with Autodesk Inventor Simulation 2010'

Author: Wasim Younis (Burnley, United Kingdom)


Topics in this video

• Automatically convert Standard and Rolling Joints
• Manually create Rolling Joints
• Environmental constraints
• Analyze results

download-Link 

Click the following link to get the model file: - http://bit.ly/2ob5Ggi

Friday, May 24, 2013

Windshield Wiper - FEA Using Motion Loads (Autodesk Inventor 2012 Tutorial)

Windshield Wiper

Serial No. 141

Windshield Wiper - FEA Using Motion Loads (Autodesk Inventor 2012 Tutorial)


Autodesk Wiki Help Tutorial

Use Dynamic Simulation to generate loads to export and use in Stress Analysis.


Topics in this video

• About this tutorial
• Open Assembly File
• Run a Simulation
• Generate Time Steps
• Export to Stress Analysis
• Use the Motion Loads in Stress Analysis
• Generate a report
• Summary

download-Link 

Click the following link to get the model file: - http://bit.ly/2m06q7i

Wednesday, May 22, 2013

Reciprocating Saw Part 1 - Dynamic Simulation (Autodesk Inventor 2012 Tutorial)

Reciprocating Saw Part 1 - Dynamic Simulation (Video Tutorial)

Serial No. 139

Reciprocating Saw Part 1 - Dynamic Simulation (Autodesk Inventor 2012 Tutorial)

Autodesk Wiki Help Tutorial

Simulate and analyze the dynamic characteristics of an assembly in motion under various load conditions.


Topics in this video

• About this tutorial
• Open the Assembly
• Degrees of Freedom
• Automatic Constraint Conversion
• Assembly Constraints
• Add a Rolling Joint
• Building a 2D Contact
• Add Spring, Damper, and Jack Joint
• Define Gravity
• Impose Motion on a Joint
• Run a Simulation
• Using the Output Grapher
• Simulation Player
• Summary

Get the text slides in the video in pdf format by clicking the following button .

download-Link 

Click the following link to get the model file: - http://bit.ly/2ob6DFp

Reciprocating Saw Part 2 - Dynamic Simulation (Autodesk Inventor 2012 Tutorial)

Reciprocating Saw Dynamic Simulation - Part 2

Serial No. 140

Reciprocating Saw Part 2 - Dynamic Simulation (Autodesk Inventor 2012 Tutorial)

Autodesk Wiki Help Tutorial

Add the blade assembly and complete the operating conditions definition, modify the cam lobe, and then publish the simulation with Inventor Studio.


Topics in this video

• About this tutorial
• Work in the Simulation Environment
• Construct the Operating Conditions
• Add Friction
• Add a Sliding Joint
• Use the Input Grapher
• Use the Output Grapher
• Export to FEA
• Publish Output in Inventor Studio
• Summary

download-Link 

Click the following link to get the model file: - http://bit.ly/2nwSbax

Wednesday, May 15, 2013

Simulate a Cam and Valve Assembly (Autodesk Inventor 2012 Tutorial)

Simulate a Cam and Valve Assembly

Serial No. 138

Simulate a Cam and Valve Assembly (Autodesk Inventor 2012 Tutorial)

Autodesk Wiki Help Tutorial

In this tutorial, you simulate a cam, valve, and spring mechanism. You determine the
contact forces between the cam and valve, the forces in the spring, and the torque
required to drive the cam.
In addition, you view the simulation results in the Output Grapher, and export the
simulation data to Microsoft Excel.

Topics in this video

• About this tutorial
• Open Assembly
• Activate Dynamic Simulation
• Automatic Joint Creation
• Define Gravity
• Insert a Spring
• Define the Spring Properties
• Run the Simulation
• Insert a Contact Joint
• Edit the Joint Properties
• Add Imposed Motion
• View the Simulation Results
• View the Simulation Results (continued)
• Export the Data
• Summary


download-Link 

Click the following link to get the model file: - http://bit.ly/2ojFcth

Saturday, April 16, 2011

Helical Gear (Internal)-Dynamic Simulation through Autodesk Inventor 2010


Following video will explain about Dynamic Simulation of Autodesk Inventor 2010. See how after giving the proper constraints, the gears can be Animated.

Helical-Gear-(Internal)-Dynamic-Simulation 
 

HD Link for this video

To download the finished file, visit the following link:-- http://www.mediafire.com/?32pc9d8s2iabvqk


Worm Gear-Dynamic Simulation through Autodesk Inventor 2010

Following video will explain about Dynamic Simulation of Autodesk Inventor 2010:-

Worm-Gear-Dynamic-Simulation


HD Link for this video

To download the finished file, visit the following link:--
 http://www.mediafire.com/?yiu3xujiax9h66m

Bevel Gear-Dynamic Simulation through Autodesk Inventor 2010

Following video will explain about Dynamic Simulation of Autodesk Inventor 2010:-

Bevel-Gear-Dynamic-Simulation

HD Link for this video

To download the finished file, visit the following link:--http://www.mediafire.com/?977d5mw9wh86ad1

Helical Gear - Dynamic Simulation through Autodesk Inventor 2010


Following video will explain about Dynamic Simulation of Autodesk Inventor 2010.:-
 
Helical-Gear-Dynamic-Simulation 
 
To download the finished file, visit the following link:--
http://www.mediafire.com/?1bso5ip8j7fthi7