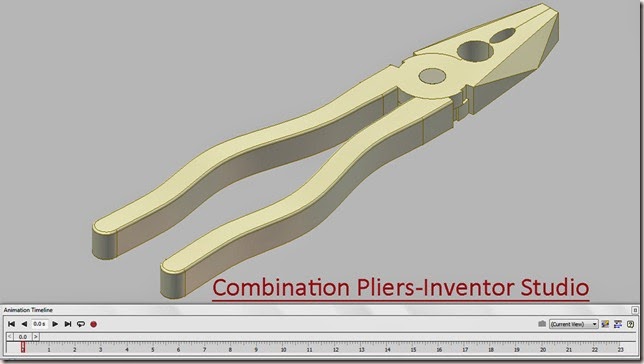
Serial No. 22
Combination Pliers-Inventor Studio-Autodesk Inventor 2012 (with caption and audio narration)
In this video, we will demonstrate how to apply the different type of mates in the assembly environment for creating the animation of the ‘Combination Pliers’.
Click the following link to get the model file: -http://bit.ly/2n4Yhig
Transcription of Video
Display of motion in ‘Combination Pliers’ through Inventor Studio
- Create a New ‘Standard (in).iam’ Assembly and save it with the name ‘Combination Pliers-Inventor Studio’.
- Select Place component from the marking menu and place the ‘Part1’ in the Assembly.
- Re-orient the model in the design window by using View Cube.
- Set the current view as Home View by using the toggle next to View Cube.
- Select the Part1 in the design window and remove its ‘Grounded’ position from the context menu.
- Apply an Axis Mate between Z Axis of Assembly and Z Axis of Part1.
- Apply a Mate Constraint between Centre Point of Assembly and Centre Point of Part1.
- Place the ‘Part2’ in the Assembly.
- Select the edge of small hole on Part2 to activate Assemble Tool.
- Then select the edge of small hole on Part1, click green check mark to place Insert Mate between Part2 and Part1.
- Activate an Angle Constraint, first Select face of Jaw of Part1, and then select YZ Plane of Assembly and in the end select top face of Part1. Click OK.
- Activate Angle Constraint once again, first Select face of Jaw of Part2, and then select YZ Plane of Assembly and in the end select top face of Part2.
- Enter the value 180 degree in the Angle Input box and Click Ok.
- Place the ‘Rivet’ in the Assembly.
- Select the inner circular edge of Rivet to activate Assemble Tool.
- Then select the inner small circular edge of hole on the Part2, click green check mark to place Insert Mate between Part2 and Rivet.
- Set the browser from Assembly View to Modeling View using the toggle at the top of the browser.
- Select ‘Angle:2’ under the Constraints folder in the Browser Bar, Right click and choose ‘Suppress’ from the context menu.
- Select Part1 and Part2 in the Browser Bar, right click and choose ‘Contact Set’ from the context menu.
- Select ‘Activate Contact Solver’ in the Interference panel of Inspect Tab.
- Drag the Part2, it will stop at the point of Collision between Part1 and Part2.
- Measure the swing angle between the jaw of Part1 and Part2. The detected swing angle is 40.18 degree.
- Restore the settings to previous state.
- Click the ‘Inventor Studio’ icon from the Begin Panel of Environments Tab.
- Select ‘Angle:1’ Constraint under Part1 in the Browser Bar, right click and select Animate Constraints in the context menu.
- In ‘Action’ section, enter the value -20.09 degree in the End input box.
- In the ‘Time’ section of Animate Constraint dialogue box, enter the value 10 second in the End input box.
- Click Acceleration Tab.
- Select ‘Constant Speed’ radio button in the Velocity Profile.
- Click OK.
- Select Expand Action Editor Button on the Animation Timeline.
- Select Angle:1 constraint in the Animation Timeline, right click and choose ‘Mirror’ from the context menu.
- Edit Mirrored animation action in the Animation Timeline.
- In the ‘Time’ section of Animate Constraint dialogue box, enter the value 13 second in the Start input box and enter the value 23 second in the End input box, to give effect of 3 second pause.
- Click OK.
- Select ‘Angle:2’ Constraint under Part2 in the Browser Bar, right click and select Animate Constraints in the context menu.
- In ‘Action’ section, enter the value (180+20.09) degree in the End input box.
- In the ‘Time’ section of Animate Constraint dialogue box, enter the value 10 second in the End input box.
- Click Acceleration Tab.
- Select ‘Constant Speed’ radio button in the Velocity Profile.
- Click OK.
- Select Angle:2 constraint in the Animation Timeline, right click and choose ‘Mirror’ from the context menu.
- Edit Mirrored animation action in the Animation Timeline.
- In the ‘Time’ section of Animate Constraint dialogue box, enter the value 13 second in the Start input box and enter the value 23 second in the End input box.
- Click OK.
- Select Collapse Action Editor Button on the Animation Timeline.
- Click the Animation Options Button.
- In the Animation Options dialogue box, click ‘Fit to Current Animation’ button in the ‘Length’ section option.
- Select Constant Speed radio button in the Default Velocity Profile and click Ok.
- Clear the screen by activating the Clean Screen command.
- Click ‘Go to Start’ Button.
- Click Play Animation button to display motion in Combination Pliers.


No comments:
Post a Comment