Showing posts with label video. Show all posts

Friday, August 24, 2018

'Elbow' SolidWorks 2014 Tutorial (with caption and audio narration)

Elbow

Serial No. 20

'Elbow' SolidWorks 2014 Tutorial (with caption and audio narration)

In this video, we create an Elbow by SolidWorks. In modelling of this part, Sweep Boss/Base, Shell, Helix/Spiral Curve, Circular Pattern, Fillet etc. tools are used. To cut thread, British Standard Pipe Thread profile is taken to be used.


  Click the following link to get the model file: - http://bit.ly/2nvXVBT


Transcription of the Video

  1. Open a new part file in SolidWorks.
  2. Activate the 'Edit Document Units' command.
  3. Set the digit in decimal up to 5 places and in fraction column-- 1/16 inches.
  4. Create a new sketch on the Top Plane.
  5. Draw the vertical and horizontal line from the part origin.
  6. Set the dimension of the line and convert it into construction geometry.
  7. Draw a 3 Point Arc, which lies on these two lines.
  8. Apply the radius of this arc and constraint it.
  9. Draw the line on the construction line.
  10. Exit the sketch.
  11. Create a new work-plane on this point of the line.
  12. Draw a circle on this plane.
  13. Activate the 'Swept Boss/Base' command.
  14. First select a circle as a profile and select the arc as a path.
  15. Click OK to finish the command.
  16. Activate the 'Shell' command.
  17. Select these two faces of the part and set the thickness value 1/8 inch.
  18. Save the part file, name it as 'Elbow'.
  19. Change the colour of the internal face of the model.
  20. Create a sketch on this face and take a project of this circular edge.
  21. Go to the 'Curves' panel and activate the 'Helix and Spiral' command.
  22. Select 'Sketch3' from feature manager design tree.
  23. Choose 'Height and Pitch' option.
  24. Select reverse direction and set height and pitch value.
  25. Click OK to finish the command.
  26. Create a new sketch on the Top Plane.
  27. Activate the section view button and choose Top Plane.
  28. Open 'BSP Thread Profile' part file.
  29. Copy the sketch profile and paste into the previous file.
  30. Take the project of helix curve and place the sketch on the endpoint of helix curve.
  31. Convert the helix curve into construction geometry.
  32. Finish the sketch and exit from the section view.
  33. Go to the 'Features' tab and activate the 'Swept Cut' command.
  34. First select BSP Thread Profile and then next select helix curve.
  35. Click OK to finish the command.
  36. Open the visibility of part origin.
  37. Activate the 'Axis' button.
  38. Create an Axis between origin point and Top Plane.
  39. Activate the 'Circular Pattern' command.
  40. First select the axis and then select the Cut-Sweep1 feature.
  41. Set the angle 270 degree and choose reverse direction.
  42. Click OK to finish the command.
  43. Apply the fillet on these two edges.

Tuesday, June 12, 2018

Creating Realistic Knurling on the Cylindrical Surface-Siemens NX 10 Tutorial (with caption and audio)


Serial No. 17

This Siemens NX video tutorial demonstrates the way to create a realistic looking knurling on a cylindrical face in Siemens NX.……………………………………………………………………………………………………….

Note:-

To get faster update in feature pattern and better knurling change the following settings in Swept (10) feature:-

1. Turn on the ‘preserve shape’ option in the selection location field.

2. Change the orientation method of the sweep from ‘Fixed’ to ‘Face Normal’.

……………………………………………………………………………………………………….

The model displayed in video is used as a component in the assembly of Pipe Wrench created earlier by us.

..........................................................

The modeling process of Pipe wrench which is available in two volumes, can be watched on following link... (1) https://youtu.be/8scpgSsermQ, (2) https://youtu.be/4o-ggjtTia4

.........................................................

The video covers the application of 2D sketching, 3D features like Extrude, Wrap Curve, Swept, Circular Pattern, Subtract, Offset Face and Mirror Geometry.


download-Link


Click the following link to get the model file: - http://bit.ly/356q6Z3


Transcription of the Video

  1. Let us open ‘model4’ part file.
  2. Go to the feature panel and choose ‘Datum Plane’ command.
  3. Select the cylindrical surface of the part and then click OK.
  4. Create a new sketch on this datum plane.
  5. Right-click in the design window and choose ‘Orient View to Sketch’ option, or choose the F8 key on your keyboard.
  6. Draw a slant line and apply midpoint constraint.
  7. Make an angle 30 degree between X-axis and line.
  8. Apply the linear dimension 0.4167” between Y-axis and endpoint of the line.
  9. Finish the sketch and back to the Isometric View.
  10. Go to the Menu button > Insert > Derived Curve and activate the ‘Wrap/Unwrap Curve’ command.
  11. This time ‘Wrap’ option is selected by default under the ‘Type’ area.
  12. Select the line and choose ‘Select face’ option, then select the cylindrical face of the model.
  13. In the ‘Specify Plane’ option, select the ‘Datum Plane (5)’ in the design window.
  14. Click Apply button to finish the command.
  15. Hide the Datum plane and sketch both to watch the effect.
  16. The sketch is wrapped on the cylindrical face of the model with the help of ‘Wrap Curve’ command.
  17. Apply the chamfer both side of the cylinder.
  18. Save the model file.
  19. Create a new sketch over the YZ Plane and apply the section view.
  20. Create a triangle with the given dimensions.
  21. Apply the constraints to place in proper position.
  22. Finish the sketch and return back from the section view.
  23. Choose isometric view and save the part file.
  24. Go to the ‘Surface’ tab and activate the ‘Swept’ command.
  25. In the ‘Sections’ option, select the triangle in the design window.
  26. In the ‘Guides’ option, select the guide rail.
  27. Click OK to execute the command.
  28. Triangle is wrapped on the path of guide rail by the help of ‘Swept’ command.
  29. Go to the Menu button > Insert > Offset/Scale and activate the ‘Offset face’ command.
  30. Set a suitable offset value and apply in the front and back face of triangle.
  31. Click OK, now the face is extended both side of the cylinder.
  32. Activate the ‘Mirror Geometry’ command.
  33. Mirror this feature with respect to XZ Plane.
  34. Activate the ‘Subtract’ command.
  35. Select the target body as a main body (cylinder) and afterward select triangle as a tool body.
  36. Click OK to observe the result.
  37. Go to the ‘Feature’ panel and activate the ‘Pattern Feature’ command.
  38. In the ‘Layout’ section, choose ‘Circular’ option.
  39. In the ‘Feature to Pattern’ section, select the ‘Subtract (14)’ feature from the Part Navigator bar.
  40. In the ‘Rotation Axis’ section, select the X-axis.
  41. In the ‘Specify Point’ section, click the point dialog button and click OK.
  42. In the ‘Angular Direction’ section, choose ‘Count and Span’ option.
  43. Set the Count Value 70 numbers and Span angle 360 deg.
  44. Click OK to finish the Pattern Feature command.
  45. Now see the result, pattern feature is created.
  46. Follow the same procedure as we have done earlier on the opposite side of the Mirror Geometry feature.
  47. Save the part file.

Sunday, December 31, 2017

Animation displayed in 'Nose Pliers' Assembly--SolidWorks 2017 (with caption and audio narration)

Animation displayed in Nose Pliers

Serial No. 32

Animation displayed in 'Nose Pliers' Assembly--SolidWorks 2017 (with caption and audio narration)

In this video, we will demonstrate how to apply the different type of mates in the assembly environment for creating the animation.
..................................................................................
To watch full sketching video of this model 'Nose Pliers', please visit on my another associated video named as 'Nose Pliers' (Video Tutorial) SolidWorks.

download-Link


Click the following link to get the model file: - http://bit.ly/2oUp3Lb


Transcription of the Video

  1. Create a new assembly inside an English template.
  2. The ‘Begin Assembly’ command is preactivated in the assembly design window.
  3. Place the ‘Part1’ file in the assembly.
  4. Save the assembly, name it as ‘Nose Pliers with Animation’.
  5. When the first part file is placed in the assembly, the part remains as a grounded component.
  6. So we will do unground the part with the help of ‘Float’ option.
  7. Right-click on the ‘Part1’ file and choose ‘Float’ option.
  8. Drag the part and select it, choose ‘Edit Part’ option from the design window.
  9. Go to the model tree and open the visibility of ‘Axis1’.
  10. The Axis is not visible in the design window, so we will turn on the ‘Axes’ button.
  11. Now the axis is visible in the design window.
  12. Return back to the assembly environment.
  13. Apply a ‘Coincident’ mate between the Top Plane of Assembly and Top Plane of ‘Part1’.
  14. Apply another ‘Coincident’ mate between the Axis1 of ‘Part1’ and Origin point of the Assembly.
  15. Activate the ‘Insert Component’ command, place the ‘Part2’ file in the assembly.
  16. Rotate the part by using ‘Move with Triad’ command.
  17. Apply a ‘Concentric’ mate between the two holes of the Part.
  18. Apply a ‘Coincident’ mate between the inside face of the slot of ‘Part1’ and inside face of the slot of ‘Part2’.
  19. Place the ‘Revit’ file in the assembly.
  20. Select the ‘Revit’ file and rotate to the proper position.
  21. Apply a ‘Concentric’ mate between inside cylindrical face of ‘Revit’ and inside cylindrical face of the hole of ‘Part2’.
  22. Apply a ‘Coincident’ mate between inside face of the ‘Part2’ and back face of ‘Revit’.
  23. Apply a ‘Coincident’ mate between Front Plane of ‘Revit’ and Right Plane of the assembly.
  24. Drag the ‘Part1’ file and activate the Mate command.
  25. Different types of mates are available here, choose any mate as you need according to your design.
  26. Select the ‘Angle’ mate option and set the angle value 0 deg.
  27. Select the face of ‘Part1’ and Right Plane of assembly, select the ‘Anti-Aligned’ button under the Mate alignment option.
  28. Choose the ‘Flip dimension’ option and click OK to execute the command.
  29. In the same manner, apply another ‘Angle’ mate on the opposite side of the part.
  30. Now the assembly component is fulley defined in the assembly.
  31. Suppress the ‘Angle2’ mate.
  32. Activate the ‘Move Component’ command and select the ‘Collision Detection’ option.
  33. Drag the part until it touches the opposite part.
  34. Now highlighted face shows here to stop the motion of the component at the moment of touch of any other entity.
  35. Click OK to finish the command.
  36. Go to the Evaluate tab and activate the ‘Measure’ command.
  37. Measure the angle between these two edges of the part.
  38. Activate the ‘Interference Detection’ command.
  39. And check the interference between the two components.
  40. Unsuppress the ‘Angle2’ mate.
  41. Go to the ‘Motion Study’ tab, click the ‘Expand Motion Manager’ button.
  42. Right-click on the ‘Orientation and Camera Views’ option, select the ‘Disable Playback of View Keys’ option.
  43. Go to the ‘Mates’ folder, select the ‘Angle1’ mate and move the timebar at 10 second.
  44. Right-click on the animation timeline and place the new key by using ‘Place Key’ command.
  45. Modify this new key and paste the angle value 69.78676/2 deg. and click OK.
  46. Move the timebar at 13 second and place the new key.
  47. Pause the animation for 3 seconds.
  48. Move the timebar at 23 second and place the new key.
  49. Modify this new key, fill the value 0 deg. and click OK.
  50. Follow the same steps which were done earlier to create the animation for ‘Angle2’ mate.
  51. Click the ‘Calculate’ button to check the animation.
  52. Stop the animation and clear the screen to view full screen of the model.
  53. At the last, click ‘Play from Start’ button to see the result.

Wednesday, December 27, 2017

Animation displayed in 'Combination Pliers' Assembly--SolidWorks 2014 (with caption and audio narration)

Animation by Precise Positioning in Combination Pliers

Serial No. 33

Animation displayed in 'Combination Pliers' Assembly--SolidWorks 2014 (with caption and audio narration)

In this video, we will demonstrate how to apply the different type of mates in the assembly environment for creating the animation.

………………………………………………………………………………

To watch full sketching video of this model 'Combination Pliers', please visit on my another associated video named as 'Combination Pliers' (Video Tutorial) SolidWorks.

download-Link


Click the following link to get the model file: - http://bit.ly/2oyA2ti


Transcription of the Video

  1. Create a new assembly inside an English template.
  2. The ‘Begin Assembly’ command is preactivated in the assembly design window.
  3. Place the ‘Part1’ file in the assembly.
  4. When the first part file is placed in the assembly, the part remains as a grounded component.
  5. So we will do unground the part with the help of ‘Float’ option.
  6. Right-click on the ‘Part1’ file and choose ‘Float’ option.
  7. Rotate the part by using ‘Move with Triad’ command.
  8. Save the assembly, name it as ‘Combination Pliers with Animation’.
  9. Select the part file in the design window and choose ‘Edit Part’ option.
  10. Go to the design tree, open the visibility of ‘Axis1’ and go on the ‘View’ tab and turn on the ‘Axes’ button.
  11. The Axis is shown in the design window.
  12. Return back to the assembly environment.
  13. Apply a ‘Coincident’ mate between the Top Plane of Assembly and Top Plane of ‘Part1’.
  14. Apply another ‘Coincident’ mate between the Axis1 of ‘Part1’ and Origin point of the Assembly.
  15. Activate the ‘Insert Component’ command, place the ‘Part2’ file in the assembly.
  16. Apply a ‘Concentric’ mate between the two holes of the Part.
  17. Apply a ‘Coincident’ mate between the inside face of the slot of ‘Part2’ and inside face of the slot of ‘Part1’.
  18. Drag the Plier to see the effect, the part moves on its own axis.
  19. Place the ‘Part3’ file in the assembly.
  20. Select the ‘Part3’ file and rotate to the proper position.
  21. Apply a ‘Concentric’ mate between inside cylindrical face of ‘Part3’ and inside cylindrical face of the hole of ‘Part1’.
  22. Apply a ‘Coincident’ mate between inside face of the ‘Part1’ and back face of ‘Part3’.
  23. Close the visibility of ‘Axis1’.
  24. Go to the View tab and turn on the ‘Planes’ button.
  25. Open the visibility of Right Plane of the assembly.
  26. Apply an ‘Angle’ mate on this face and Right Plane of the assembly.
  27. Set the angle value 0 degree and click OK.
  28. In the same way, apply another ‘Angle’ mate on the opposite side of the part.
  29. Apply a ‘Coincident’ mate between Right Plane of the ‘Part3’ and Right Plane of the assembly.
  30. Go to the ‘Mates’ folder and Suppress the ‘Angle2’ mate.
  31. Activate the ‘Move Component’ command and select the ‘Collision Detection’ option.
  32. Drag the part until touch to the opposite part.
  33. Now highlighted face shows here to stop the motion of the component at the moment of touch of any other entity.
  34. Click OK to finish the command.
  35. Go to the ‘Evaluate’ tab, measure the angle between these two edges of the part by using ‘Measure’ command.
  36. Activate the ‘Interference Detection’ command and check interference between the two components.
  37. Unsuppress the ‘Angle2’ mate.
  38. Go to the ‘Motion Study’ tab and click on the ‘Disable Playback of View Keys’ option on the animation timeline.
  39. Go to the Mates folder, select ‘Angle1’ mate and drag the timebar at 10 second.
  40. Modify the ‘Angle1’ mate key, fill the angle value to 20.077055 deg. and click OK.
  41. Drag the timebar at 13 second and right-click on the timeline, click ‘Place Key’ option.
  42. Pause the animation for 3 seconds.
  43. Drag the timebar at 23 second, double click on the ‘Angle1’ mate and fill the value 0 deg. in the Modify dialogue box, click OK.
  44. Repeat same steps which were done earlier for creating the animation of ‘Angle2’ mate.
  45. Click the ‘Collapse Motion Manager’ button.
  46. Now start the animation to see the result.
  47. Save the assembly.

Monday, December 18, 2017

Animation displayed in Box (mini size) -- SolidWorks 2017 (with caption and audio narration)

Box (mini size) with Animation

Serial No. 215

Animation displayed in Box (mini size) -- SolidWorks 2017 (with caption and audio narration)

In this video, we will demonstrate how to apply the different type of mates in the assembly environment for creating the animation in SolidWorks 2017.

download-Link


Click the following link to get the model file: - http://bit.ly/30MboTG


Transcription of the Video

  1. Create a new assembly with an inch template.
  2. And place the ‘Part1’ file in the assembly.
  3. When the first part file is placed in the assembly, the part remains as a grounded component.
  4. This part does not need to place any mates.
  5. Go to the ‘View Orientation’ tab and choose an ‘Isometric’ view.
  6. Activate the ‘Insert Components’ command and place the ‘Part3’ file in the assembly.
  7. Apply a ‘Coincident’ mate between the Front face of ‘Part1’ and Back face of ‘Part3’.
  8. Apply a ‘Coincident’ mate between Front Plane of the assembly and Front Plane of ‘Part3’.
  9. Apply a ‘Distance’ mate between the top face of ‘Part3’ and ‘Part1’.
  10. Set the distance value 0.688 inches and click OK.
  11. Activate the ‘Insert Components’ command and place the ‘Part6’ file in the assembly.
  12. Apply a ‘Concentric’ mate between the inner circular face of ‘Part6’ and an outer circular ring of ‘Part1’.
  13. Apply a ‘Coincident’ mate between the back face of ‘Part1’ and back face of ‘Part6’.
  14. Save the assembly with the name ‘Base Assembly’.
  15. Apply a ‘Distance’ mate between the side face of ‘Part1’ and ‘Part6’.
  16. Set the distance value 2.564 inches and click OK.
  17. In the same manner, place a copy of ‘Part6’ in the assembly and mate it with ‘Part1’.
  18. Create another new assembly and place the ‘Part2’ file in the assembly.
  19. Open the visibility of Front Plane of assembly and turn on the ‘View Planes’ button.
  20. Open the visibility of Top Plane of ‘Part2’.
  21. Right-click on the ‘Part2’ file and select ‘Float’ option.
  22. Apply a ‘Coincident’ mate between the Top Plane of ‘Part2’ and Front Plane of Assembly.
  23. Turn off the visibility of planes.
  24. Apply a Coincident mate between Right Plane of ‘Part2’ and Right Plane of ‘Assembly2’.
  25. Save the assembly, name it as ‘Lid Assembly’.
  26. The part is not fully defined in the assembly, so that apply another ‘Coincident’ mate between the Top plane of Lid assembly and the Front plane of ‘Part2’.
  27. Activate the ‘Insert Components’ command and place the ‘Part7’ file in the assembly.
  28. Apply a ‘Coincident’ mate between the top face of ‘Part2’ and back face of ‘Part7’.
  29. Apply a ‘Coincident’ mate between Front Plane of Lid assembly and Front Plane of ‘Part7’.
  30. Apply a ‘Coincident’ mate between Right Plane of the ‘Part7’ and Right Plane of ‘Lid assembly’.
  31. Place the ‘Part5’ file in the assembly.
  32. Apply a ‘Concentric’ mate between the outer circular face of ‘Part5’ and inside face of the hole of ‘Part2’.
  33. Apply a ‘Coincident’ mate between Front Plane of ‘Part5’ and Front Plane of ‘Lid Assembly’.
  34. Apply a ‘Coincident’ mate between Right Plane of ‘Lid Assembly’ and Right Plane of ‘Part5’.
  35. Now the part is Fully Defined in the assembly.
  36. Go to the ‘Evaluate’ tab and check the interference between two components by using ‘Interference Detection’ command.
  37. Save and close all the assembly files.
  38. Create a new Assembly file, it is our main assembly to create animation, and place the ‘Base Assembly’ file in the assembly.
  39. Choose an Isometric View, right-click in the design area and activate the ‘View Orientation’ command.
  40. In the Orientation dialogue box, select the ‘New View’ option.
  41. Set the ‘Named View’ as ‘View-1’ and click OK.
  42. Save the assembly by the name ‘Box (mini size) with Animation’.
  43. Activate the ‘Insert Components’ command and place the ‘Lid Assembly’ file.
  44. Apply a ‘Concentric’ mate between inside hole of the hinge and outer circular face of wire.
  45. Apply a ‘Coincident’ mate between the side face of the hinge and face of slot of lid.
  46. Drag the Lid Assembly and see the result, the ‘Lid Assembly’ rotates on the base of the hinge.
  47. Place the ‘Part4’ file in the assembly.
  48. Apply a ‘Concentric’ mate between the hole of the ‘Part4’ and outer circular face of wire.
  49. Apply a ‘Coincident’ mate between the side face of ‘Part4’ and face of slot of lid.
  50. Apply a ‘Tangent’ mate between the bottom face of the lid and outer circular ring of ‘Part1’.
  51. Apply a ‘Coincident’ mate between the front face of ‘Base Assembly’ and back face of ‘Part4’.
  52. Place the ‘Part8’ file in the assembly.
  53. Turn off the visibility of the sketch of ‘Part8’ by using ‘View Sketches’ command.
  54. Apply a ‘Concentric’ mate between ‘Axis1’ of the Lid assembly and circular face of ‘Part8’.
  55. Apply a ‘Coincident’ mate between the Front Plane of ‘Part8’ and Front Plane of main assembly.
  56. Apply a ‘Tangent’ mate between the cylindrical face of ‘Part8’ and the top face of ‘Part7’.
  57. Check the interference between Handle and base.
  58. Suppress the ‘Tangent1’, ‘Coincident3’ and ‘Tangent2’ mates.
  59. Apply an ‘Angle’ mate between the Right Plane of ‘Part8’ and the top face of ‘Part7’.
  60. Set the angle value to 12.46923 degrees and Click OK.
  61. Change the name of the angle mate as ‘Drive-1’.
  62. Unsuppress the ‘Tangent1’ mate and apply an ‘Angle’ mate between the back face of the ‘Part4’ and the front face of the ‘Part1’.
  63. Set the angle value to 0 degree and Click OK.
  64. Change the name of the angle mate as ‘Drive-2’.
  65. Suppress the ‘Tangent1’ and ‘Drive-2’ mates.
  66. Drag the ‘Lid Assembly’ and turn on the ‘View Planes’ button.
  67. Apply the ‘Angle’ mate between Plane3 of ‘Part1’ and back face of ‘Lid Assembly’.
  68. Set the angle value to 0 degree and Click OK.
  69. Unsuppress the ‘Drive-2’ mate and change the name of the ‘Angle6’ mate as ‘Drive-3’.
  70. In the next section of this video, we will create three additional views with in alternate position of this model before entering the ‘Motion Study’ environment.
  71. These saved views will be used later in animation timeline.
  72. Click on the ‘Motion Study’ tab and click the ‘Collapse Motion Manager’ button.
  73. Choose ‘View-2’ in the Orientation dialog box.
  74. Click ‘Expand Motion Manager’ button.
  75. Go on the ‘Orientation and Camera’ tab in the animation timeline.
  76. Right-click the View-5 key and select ‘Replace Key’ option.
  77. Right-click on the animation timeline, move the time bar at 2 second.
  78. Copy the ‘View-2’ key and paste it.
  79. Pause 2 seconds on the ‘View-2’ position.
  80. Move the time bar at 7 second and place the new key.
  81. Choose ‘View-3’ in the Orientation dialogue box.
  82. Right-click on the View-2 key and select ‘Replace Key’ option.
  83. Time required 5 seconds in changing from View-2 to View-3 position.
  84. In the Mates folder, copy the ‘Drive-1’ mate key.
  85. Move the time bar at 9 second and paste the key.
  86. Pause 2 seconds on the ‘View-3’ position.
  87. Move the time bar at 24 second and place the new key.
  88. Double click on the new key to modify the key and set the specified angle 167.53077 degrees and click OK.
  89. Move the time bar at 26 second, copy the ‘View-3’ key and paste it.
  90. Move the time bar at 31 second and place the new key.
  91. Minimize the animation timeline and set the view as ‘View-4’ position.
  92. Expand the animation timeline and choose ‘Replace Key’ option.
  93. Time consume 5 seconds in changing from View-3 to View-4 position.
  94. Move the time bar at 33 second.
  95. Copy the ‘Drive-2’ mate key and paste the key.
  96. Move the time bar at 48 second and place the key.
  97. Modify the key and set the angle value to 90 degree.
  98. Move the time bar at 50 second, copy the ‘View-4’ key and paste the key.
  99. Move the time bar at 55 second and paste the key.
  100. Choose ‘View-5’ in the Orientation dialogue box.
  101. Right-click on the View-4 key and select ‘Replace Key’ option.
  102. Move the time bar at 57 second, copy the ‘Drive-3’ mate key and paste the key.
  103. Move the time bar at 72 second and place the new key.
  104. Modify the key and set the angle value to 90 degree.
  105. The time spent for each Drive mates will be of 15 seconds.
  106. Click ‘Calculate’ button to calculate the motion study.
  107. Stop the animation and click ‘Play from Start’ button and start the animation.
  108. Follow the same steps which were done earlier to create the animation in reverse direction.
  109. Now start the animation to see the result.
  110. Save the assembly.

Friday, December 1, 2017

Animation displayed in Ceiling Hook -- SolidWorks 2014 (with caption and audio narration)

Ceiling Hook---1

Serial No. 214


Animation displayed in Ceiling Hook -- SolidWorks 2014 (with caption and audio narration)

In this video, we will demonstrate how to apply the different type of mates in the assembly environment for creating the animation.
..................................................................................
To watch full sketching video of this model 'Ceiling Hook', please visit on my another associated video named as 'Ceiling Hook with Animation' (SolidWorks).


download-Link


Click the following link to get the model file: - http://bit.ly/31K8Bvu 


Transcription of the Video
  1. Create a new assembly file.
  2. The ‘Begin Assembly’ command is already activated in the assembly design window.
  3. Click Browse button, place the part file ‘Hook’.
  4. First of all, open the visibility of ‘View Origin’ of the assembly.
  5. Click the View Origin point button to place the file, centre of the assembly.
  6. Choose ‘Isometric View’.
  7. In the same way, place one more part file-name ‘Circular Ring.’
  8. Rotate the part by using ‘Move with Triad’ tool.
  9. Save the assembly with the name ‘Ceiling Hook’ and edit the ‘Hook’ part file.
  10. Create a new sketch over the ‘Front Plane’ and take a project of this circular edge by using ‘Convert Entities’ command.
  11. Finish the sketch and return back to the assembly environment.
  12. Select the Front Plane of assembly and Right Plane of Circular Ring and mate it.
  13. It will apply a Coincident mate.
  14. Move the Circular Ring slightly.
  15. Activate the ‘Mate’command, select tangent face of Circular Ring and arc along the path of hook, and apply the tangent mate.
  16. Select the Front Plane of Circular Ring, Right Plane of assembly and apply the Coincident mate.
  17. Edit the Circular Ring part and activate the Axis tool.
  18. Choose ‘Point and Face/Plane’ option as this particular type of selection.
  19. Many options available here, choose any option as you need.
  20. Select the origin point and Front Plane of assembly to create the axis.
  21. Click OK to execute the command.
  22. Open the visibility of axis by using ‘View Axes’ command.
  23. Return to the assembly view.
  24. Activate the ‘Mate’ command, select the assembly origin and Axis of Circular Ring and apply it.
  25. Select the Coincident2 mate and suppress the mate.
  26. Let see here, the Circular ring part rotates about the inner periphery of Hook with the help of tangent and axis mate.
  27. Create an Axis between origin point of assembly and end point of arc in assembly.
  28. Create a new work plane between front plane and this axis.
  29. A work plane has been created along the axis.
  30. Apply an angle mate between Front plane of Circular Ring and Plane1.
  31. Set the angle value to 0 degree.
  32. Go on the Evaluate tab and activate the ‘Measure’ command.
  33. Select the Top Plane and Plane1 and monitor the value.
  34. Copy the angle value and calculate the value as shown (290.39126 degree).
  35. In the next section, we will create animation on the Circular Ring its start value is 00 and end value 290.391260.
  36. Choose Front View, in the Orientation dialog box, activate the ‘New view’ command and set its name as ‘View2'.
  37. In the same manner, choose Isometric View, set its name as ‘View1’.
  38. These saved views will be used later in animation timeline.
  39. Select the Motion Study tab, click the Orientation and Camera button in the animation timeline.
  40. Right click on the time bar and select Move Time Bar option, set the time on 2 second.
  41. Copy the View-1 key and place the key on 2 seconds.
  42. Pause 2 seconds on the View-1 position.
  43. Move the time bar on 7 seconds and add the new key.
  44. Minimize the animation timeline and choose View-2, in the Orientation dialog box.
  45. Return back to the animation timeline and right click over the 7 seconds key and select ‘Replace Key’ option.
  46. Time taken 5 seconds in changing from view-1 to view-2 position.
  47. In the Mates folder, select the Angle1 mate and add the key in the timeline by using Add key button.
  48. Right click the animation timeline, move the time bar at 22 seconds.
  49. Right click on the Angle1 and select Edit Dimension option, paste the specified angle, click OK.
  50. Click the ‘Collapse Motion Manager’ button.
  51. Click play animation button to check the motion.
  52. Now we will create some modifications in the animation.
  53. Right click the start key point time of angle mate and move the key position at 9 seconds in the Edit time dialogue box.
  54. Right click the end key point time of angle mate and move the key position at 24 seconds.
  55. Stop the animation 2 seconds between View-2 and starting key point of Angle1 mate.
  56. Go on the Orientation and Camera tab, copy the View-2 key and paste the key over 24 seconds in the timeline.
  57. Move the time bar at 26 seconds, right click and paste View-2 key.
  58. Pause the animation for 2 seconds at View-1 position.
  59. Copy the end key point of Angle1 mate and paste key on 26 seconds.
  60. Stay in the still position for 2 seconds.
  61. Repeat the whole animation in reverse order to come back in starting position.
  62. Minimize the animation timeline and clear the screen.
  63. Click ‘Play from Start’ button and start the animation.
  64. Return back to the assembly environment and save the file.

Saturday, February 18, 2017

Chuck and Key || Autodesk Inventor Tutorial

Chuck and Key
In this Autodesk Inventor Tutorial we will create a Chuck and Key Assembly. First we will create Chuck and Key parts and then assemble it. So viewers will learn following Part and Assembly Modelling topics:--
Part Modelling
1. Creating new model file.
2. Basic Sketching
3. Extrude Tool
4. Revolve Tool
5. Sweep Tool
6. Extend Surface
7. Trim Surface
8. Stitch Surface
9. Circular Pattern Tool
10. Combine Tool
11. Hole Tool
Assembly Modelling
1. Creating new assembly file with specified units.
2. Adding components in assembly.
3. Applying Assembly Constraints to properly position parts.


download-Link 

Visit the following link to get the model file…
http://bit.ly/2JC2wdu


...................................................
Visit the following link to watch basic tutorial on Autodesk Inventor by us
https://www.youtube.com/playlist?list=PLb-IhKRMYSERYpB48aY-sZ10fN6CfXIL4
.........................................................................
To watch detailed tutorials on the same software visit the following link
https://www.youtube.com/playlist?list=PL74BDF7431ED13443
..........................................................................................
Hope all of you will enjoyed the tutorial. If you find the video useful please like it and share it with your friends/colleagues and do not forget to subscribe us to get latest updates about our new uploads.
http://www.youtube.com/user/nisheethsorjm?sub_confirmation=1


Saturday, June 18, 2016

Gimlet (SolidWorks 2015 Tutorial)

Gimlet_1

Gimlet_2

Serial No. 57

Gimlet (SolidWorks 2015 Tutorial)

In this SolidWorks Tutorial we will describe how to build the model of a ‘Gimlet’.

It will cover the following topics.

........................................................................................................

• Creating 2D Sketches on different Planes.

• Use the sketch constraints that are applied on during sketch creation.

• Use feature commands such as Extruded Boss/Base, Revolved Cut, Extruded Cut, Swept Cut, Helix/Curve etc.

• How to create ‘Helix/Curve’ feature with various operations by selecting a sketch profile.

• Use Extrude command with various operations.

• How to place the part into the assembly and how to create a handle in context of an assembly environment.


download-Link


Click the following link to get the model file: - http://bit.ly/2nXRO9J

Gimlet (Autodesk Inventor 2016)

Gimlet_1

Gimlet_2

Serial No. 38

Gimlet (Autodesk Inventor 2016)

In this Inventor Tutorial we will describe how to build the model of a ‘Gimlet’.

It will cover the following topics.

........................................................................................................

• Creating 2D Sketches on different Planes.

• Use the sketch constraints that are applied on during sketch creation.

• Use feature commands such as Extrude, Revolve, Coil, Mirror etc.

• How to create ‘Coil’ feature with various operations by selecting a sketch profile.

• Use Extrude command with various operations such as Join and Cut.

• How to place the part into the assembly and how to create a handle in context of an assembly environment.


download-Link


Click the following link to get the model file: - http://bit.ly/2nNcCAe

Saturday, May 28, 2016

Peeler (Autodesk Inventor 2016 Tutorial

Peeler_1

Peeler_2

Serial No. 70

Peeler (Autodesk Inventor 2016 Tutorial)

In this video we will describe, how to modelling ‘Peeler’ with the help of Extrude feature with Surface option, Loft with surface option, Boundary Patch, Mirror, and Rectangular Pattern feature and so on, after creating the surfaces convert all the surfaces into solid body by using ‘Sculpt’ tool. Use Copy Object and Combine command to subtract the one part to another part in assembly environment. How to use Mirror component tool in assembly environment.

download-Link 

Click the following link to get the model file: - http://bit.ly/2njCL9w

Friday, May 27, 2016

Peeler (Video Tutorial) Siemens NX 10

Peeler_1

Peeler_2

Serial No. 27.

Peeler (Video Tutorial) Siemens NX 10

In this video we will describe, how to modelling ‘Peeler’ with the help of Fill Surface,Pattern feature with Linear option,Edge Blend,Sew,Extrude,and so on, afterwards create a ‘Handle’ assembly. Use various sketching techniques and sketch constraints. Use the ‘Mirror Assembly’ command to create the mirrored version of selected component in assembly environment.


download-Link


Click the following link to get the model file: -http://bit.ly/2no6NJH

Wednesday, May 18, 2016

Allen Screwdriver (Double Ended)-Siemens NX 10 Tutorial

Allen Screwdriver (Double Ended)

Serial No. 26

Allen Screwdriver (Double Ended)-Siemens NX 10 Tutorial

In this video we will describe, how to modelling ‘Allen Screw Driver (Double Ended)’ with the help of Fill Surface, Extend Sheet,Pattern feature,Trim Body,Edge Blend,Sew,Extrude,Revolve tools and so on, afterwards place the parts into the assembly and create a ‘Sleeve’ part in context of an assembly with the help ‘Create New’ component tool and how to create a reference between two components by using ‘Create Interpart Link’ command in assembly environment.


download-Link


Click the following link to get the model file: -http://bit.ly/35cJsM5

Monday, May 16, 2016

Allen Screwdriver (Siemens NX 10 Tutorial)

Allen Screwdriver

Serial No. 25

Allen Screwdriver (Siemens NX 10 Tutorial)

In this video we will describe, how to modelling ‘Allen Screwdriver’ with the help of Fill Surface, Sew,Through Curves,Pattern Geometry,Subtract,Extrude, and so on, afterwards place the parts into the assembly, how to change the transparent color of the model by using Translucency option, using subtract command into one part to another part in assembly environment.

download-Link


Click the following link to get the model file: -http://bit.ly/31TamXg

Thursday, May 12, 2016

Screw Driver (Video Tutorial) Siemens NX 10

Screw Driver_1

Serial No. 24

Screw Driver (Video Tutorial) Siemens NX 10

In this video we will describe, how to modelling ‘Screw Driver and Screw Handle’ with the help of Fill Surface, Sew,Extrude,Revolve tools and so on, afterwards place the parts into the assembly, how to change the transparent color of the model by using Translucency option, using subtract command into one part to another part in assembly environment.

download-Link


Click the following link to get the model file: -http://bit.ly/2OnQszB

Friday, May 6, 2016

Cam and Follower - Modelling and Motion Simulation (Video Tutorial) Siemens NX 10

Cam and Follower

Serial No. 23

Cam and Follower - Modelling and Motion Simulation (Video Tutorial) Siemens NX 10

In this video we will display how to create and simulate a ‘Cam and Follower’ assembly. Initially we will show the way to create cam and follower parts next we will place them in assembly. To animate this assembly we will use Motion Simulation Application of Siemens NX where we will apply different joints like Slider, Revolute and Curve on Curve constraint.


download-Link


Click the following link to get the model file: -http://bit.ly/2AM2M4M

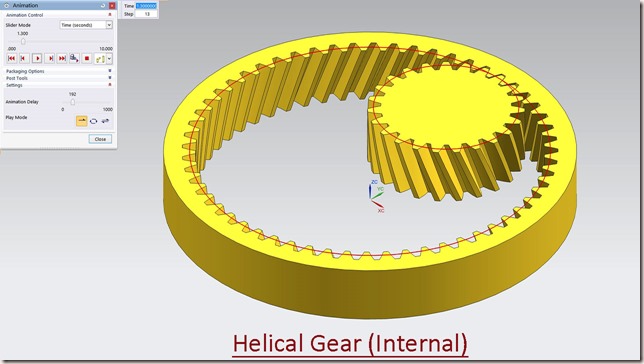
Helical Gear (Internal) - Motion Simulation (Video Tutorial) Siemens NX 10

Helical Gear 1

Serial No. 22

Helical Gear (Internal) - Motion Simulation (Video Tutorial) Siemens NX 10

In this video we will describe, how to simulate the ‘Helical Gear (Internal)’ with different joints, Gear joint, Revolute joint and so on in Motion Simulation Application Environment.


download-Link


Click the following link to get the model file: -http://bit.ly/35bb4RJ

Tuesday, May 3, 2016

Rack and Pinion - Motion Simulation (Video Tutorial) Siemens NX 10

Rack and Pinion

Serial No. 21

Rack and Pinion - Motion Simulation (Video Tutorial) Siemens NX 10

In this video we will describe, how to simulate the ‘Rack and Pinion’ with different joints, Rack and Pinion joint, Slider joint,Revolute joint and so on in Motion Simulation Application Environment.


download-Link


Click the following link to get the model file: -http://bit.ly/2Mjg9yJ

Worm Gear-Motion Simulation (Video Tutorial) Siemens NX 10

Worm Gear

Serial No. 20

Worm Gear - Motion Simulation (Video Tutorial) Siemens NX 10

In this video we will describe, how to simulate the ‘Worm Gear’ with different joints, Gear joint, Revolute joint and so on in Motion Simulation Application Environment.


download-Link


Click the following link to get the model file: -http://bit.ly/2OqTm6W