The video covers the application of 2D sketching, 3D features like Helical Curve command, Swept Cutout command, Circular Pattern, Revolved Cut and Mirror.
Get the file required to complete this tutorial by visiting the following link:--
In this Solid Edge ST9 Tutorial we will describe how to build the model of a ‘Gimlet’. How to cutting thread along with sketch profile on the cylindrical surface and taper cylindrical surface (Part1) by sweeping a cross section along a helical path with ‘Axis length & Turns’ and ‘Taper by Angle’ option by using ‘Helical Cutout’ command. It is a part modelling and assembly modelling tutorial, first of all create a ‘Gimlet’ and afterward create a Handle in context of an assembly with the help of ‘Create Part In-Place’ command.
• Use some sketch constraints as Connect, Parallel, Concentric, Collinear, Perpendicular, Symmetric, Horizontal/Vertical, Equal etc. that are applied on during sketch creation to prepare the fully defined sketches.
• Use feature commands such as Extrude, Cut, Revolved Cut, Helical Cutout etc.
• Use the Cut command to removes a defined portion of the part.
• How to create ‘Helical Cutout’ feature with various operations such as ‘Axis length & Turns’ and ‘Taper by Angle’ by selecting a sketch profile.
• Use Extrude command with various operations such as symmetric, extrude-through all, finite extend.
• Use the ‘Copy Sketch’ command, how to copy sketches from a source document to a target document within the context of the active assembly which has been linked to the base part file, this command is very useful for constructing the new component in an assembly.
Allen Screwdriver—Double Ended (Solid Edge ST9 Tutorial)
In this Solid Edge Tutorial we will describe how to build the model ‘Allen Screwdriver (Double Ended)’. The edge of Allen screwdriver (Double Ended) has been constructed by different surface tools like Bound, Stitch, Extend etc. It is a Part and Assembly modelling tutorial. This assembly consist 3 part files (Handle, Circular Rod, Sleeve etc.).
It will cover the following topics.
........................................................................................................
• Creating 2D Sketches on different Planes.
• Use some sketch constraints as Connect, Horizontal/Vertical, and Equal etc. that are applied on during sketch creation.
• Use solid and surface feature command such as Revolved Cut, Bounded, Stitched, Extrude, Cut, Circular Pattern, Subtract, Round etc.
• How to create a line by using ‘3D Line’ command in 3D Sketch environment.
• How to change the color of the model by using ‘Part Painter’ tool.
• How to insert component into the assembly using drag and drop from parts library by using ‘Insert Component’ command.
• How to resize (scale) the handle of screwdriver with the help of ‘Part Copy’ command. You use the Part Copy Parameters dialog box to specify which geometry you want to copy and whether you want to mirror, scale, or flatten the copied geometry.
• How to create a sleeve part in context of an assembly in the assembly environment with the help of ‘Create Part In-Place’ command.
• How to mate the parts by using ‘Flash Fit’ command in the assembly.
• How to flip the component by using ‘Flip Side’ option in ‘Flash Fit’ command in the assembly.
• How to lock the rotation of the component by using ‘Lock Rotation’ option in ‘Flash Fit’ command in the assembly.
• Use the ‘Subtract’ command (Boolean) to remove the tool body volume from selected target bodies in the assembly. You can select multiple target bodies and multiple tool bodies.
(Starting design of the model is created in Volume-1)
In this Solid Edge Tutorial we will describe how to build the model ‘Vise’. It is a Part and Assembly modelling tutorial. This assembly consist of 1 Main assembly, 3 Subassemblies and 12 part files (Jaw Plate, threaded stud, Handle, washer, spring etc.) that are positioned according to design intent by using Assembly Constraints. This tutorial will give you a good practice of applying constraints in an assembly and give you an idea of Vise mechanism.
• Use the sketch constraints that are applied on during sketch creation.
•. Use features command such as Extrude, Revolved, Loft, Cut, Chamfer, Round, Text Profile, Mirror, Hole features Revolved Cut etc.
•. ‘Lofted Protrusion’ command constructs a protrusion by fitting through a series of cross sections. You can define the cross sections using profiles drawn within the command, sketches, or edges of existing features. The cross sections must be closed elements.
• How to create a text on the model by using Text Profile command and emboss the text by using Extrude command.
• Use Extrude feature command to extrude a profile along a straight path.
• Use the Hole command to construct threaded holes.
• Use Mirror copy feature command to construct a mirror copy of selected features.
• How to create a realistic thread (Acme Thread) by sweeping a cross section along a helical path by using ‘Helical Cutout’ command.
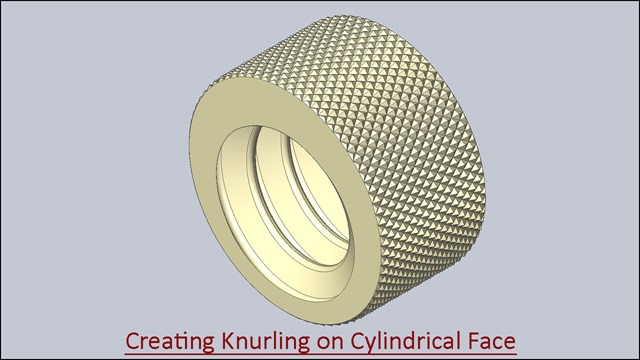
• How to apply knurl image on the face of the model with the help of ‘Styles’ tool.
• How to change the color of the model by using ‘Part Painter’ tool.
• Use assembly constraints such as Axial Align mate, Planer Align mate, Mate command etc.
• How to insert component into the assembly using drag and drop from parts library by using ‘Insert Component’ command.
• Use ‘Show Reference Planes’ option in the assembly to mate the components more easily.
• How to use the Planar Align command to apply a relationship between selected parts.
• How to mate the parts by using ‘Flash Fit’ command in the assembly.
• How to rotate and moving part by using ‘Drag Component’ command.
Vise (Volume-1)—Solid Edge ST9 Tutorial (Rest of the design of the model is completed in Volume-2)
In this Solid Edge Tutorial we will describe how to build the model ‘Vise’. It is a Part and Assembly modelling tutorial. This assembly consist of 1 Main assembly, 3 Subassemblies and 12 part files (Jaw Plate, threaded stud, Handle, washer, spring etc.) that are positioned according to design intent by using Assembly Constraints. This tutorial will give you a good practice of applying constraints in an assembly and give you an idea of Vise mechanism.
• Use the sketch constraints that are applied on during sketch creation.
•. Use features command such as Extrude, Revolved, Loft, Cut, Chamfer, Round, Text Profile, Mirror, Hole features Revolved Cut etc.
•. ‘Lofted Protrusion’ command constructs a protrusion by fitting through a series of cross sections. You can define the cross sections using profiles drawn within the command, sketches, or edges of existing features. The cross sections must be closed elements.
• How to create a text on the model by using Text Profile command and emboss the text by using Extrude command.
• Use Extrude feature command to extrude a profile along a straight path.
• Use the Hole command to construct threaded holes.
• Use Mirror copy feature command to construct a mirror copy of selected features.
• How to create a realistic thread (Acme Thread) by sweeping a cross section along a helical path by using ‘Helical Cutout’ command.
• How to apply knurl image on the face of the model with the help of ‘Styles’ tool.
• How to change the color of the model by using ‘Part Painter’ tool.
• Use assembly constraints such as Axial Align mate, Planer Align mate, Mate command etc.
• How to insert component into the assembly using drag and drop from parts library by using ‘Insert Component’ command.
• Use ‘Show Reference Planes’ option in the assembly to mate the components more easily.
• How to use the Planar Align command to apply a relationship between selected parts.
• How to mate the parts by using ‘Flash Fit’ command in the assembly.
• How to rotate and moving part by using ‘Drag Component’ command.
• Creating 2D Sketches on different Planes/model faces.
• Use the sketch constraints that are applied on during sketch creation.
• How to project the model edges, curves and sketch elements onto the selected sketch plane by using ‘Project to Sketch’ command.
• Project geometry command is very useful tool for creating the various features to build the part.
• Use features command such as Extrude, Revolved, Swept Cutout, Cut, Chamfer, Round etc.
• Use the ‘Swept Cutout’ command to construct a cutout by extruding a cross section along a path you define.
• How to mate the parts by using ‘Flash Fit’ command in the assembly.
• Check the interface between one another parts by using ‘Check Interference’ command.
• Use the ‘Subtract’ command (Boolean) to remove the tool body volume from selected target bodies in the assembly. You can select multiple target bodies and multiple tool bodies.
• How to apply knurl image on the face of the model with the help of ‘Styles’ tool.
• How to change the colour of the model by using ‘Part Painter’ tool.
In this Solid Edge Tutorial we will describe how to build the model ‘Bolt and Nut’ and cut the UNF External/Internal thread with the help of ‘Helical Cutout’ command. After creating the model, place the parts in to the assembly.
In this SolidWorks tutorials we are going to demonstrate the modeling of a bolt and nut which covers detailed topics of the software along with basics of part with assembly modeling. In part modeling topic we will learn about basic sketching, Extrude Boss/Base Feature, Extruded Cut, Revolved Cut, Chamfer, Helix and Spiral Curve, Swept Cut etc. From Assembly modeling section we will learn about Beginning a new assembly with a previously created component, Inserting additional components, Move with Triad Command, Application of Mates etc. Addition to this some detailed topics like creating Global Variables and using them over sketches and 3D Features, relating two features with equations, using previously created sketches in the current files etc. So let’s start the tutorial and watch everything in action……..
Transcription
Creation of Bolt…
Create a new part file.
Start a new sketch over front plane.
The units of the file must be set to IPS (inch, pound, second).
Fractional and Decimal setting should be set as displayed.
Create a circle over sketch origin.
Now activate Equation tool.
Create a Global Variable named ‘D’. All the other dimension now further will be related to this dimension.
Apply the recently created Global Variable dimension over the Circle.
Activate the Display Dimension Names.
Convert the Circle into construction Geometry.
Draw a 6 sided polygon coincident to sketch origin.
Apply the dimension over it in relation to Global Variable.
Display the relation between the sketches by activating ‘View Sketch Relation’ command.
Apply a vertical relation between the sketch center point and edge point of polygon.
The sketch is complete so save the file with the name Bolt.
Now switch to the Feature Tab and activate Extrude Boss/Base Tool.
The sketch has already been selected as profile for extrude.
Fill the depth value and execute the command.
Now change the model colour as per your wish.
Now start a new sketch over Right Plane.
Activate the Section View along the Right Plane to see the new sketch easily.
Change the view orientation parallel to sketching plane.
Activate the Intersection Curves command to take the project of the entire intersecting edges of previously created part.
Convert the projected sketch into construction geometry.
Draw the sketch as displayed along with dimensions.
The sketch is complete so exit from the sketching mode.
Activate the Revolved Cut tool.
Select the sketch profile and define the axis of revolution.
Click the green check mark to execute the command.
Deactivate the Section View command by pressing its button once.
Open the visibility of Sketch1 form the Design Tree.
Start a new sketch over back face of the model.
Take the project of previously drawn circle on Sketch1 into the current sketch using Convert Entities tool.
Close the visibility of Sketch1.
Draw the sketch as displayed.
The sketch is complete so exit from the sketching mode.
Activate Extruded Cut Tool.
Select the sketch and place a check mark over, flip side to cut option.
Fill the depth of cut and execute the command.
Activate Extrude Boss/Base Tool and draw a sketch over back face of model along with dimensions.
Exit the sketch and fill the depth of the extrude 2”.
Hit enter key to execute the command.
Select this edge of the model and activate Chamfer Tool.
Fill the distance and angle values.
Click green check mark to execute the command.
Again create a new sketch over Right Plane as displayed.
We will not create the thread profile here for the Bolt, instead we will past it from the file.
Open the file named ‘UNF Screw External Thread Profile’
Here you can see a sketch profile is drawn. The pitch of the profile is 1/20 or 0.05 inches which governs all the other dimensions by some relations.
Copy the sketch present in the file and return back to the previous file.
Now paste the thread profile here.
Properly position the sketch using Rotate and Move Entities Tools.
Exit from the sketching mode.
Next draw a circle along with dimensions over back face of the model.
Do not exit the sketch and switch to Features Table.
Activate Helix and Spiral Tool.
First reverse the direction of the curve.
We will define the curve using Height and Pitch.
Fill the height and pitch values as shown.
To coincident the curve start point with the profile end point adjust the start angle.
Click the green check mark to execute the command.
Activate the Swept Cut Tool.
First define the profile then the path and execute the command.
The model is complete so save the file and close it.
Creation of Nut …
Start a new part file.
Start a new sketch over front plane.
Set the units of file in the same way as we did in our first part.
Create a circle coincident to the sketch origin.
Create a Global Variable named ‘D’. All the other dimension now further will be related to this dimension.
Apply the dimension over the circle.
Convert the Circle into construction Geometry.
Draw a 6 sided polygon coincident to sketch origin with dimensions.
Apply sketch relation to fully define the sketch.
The sketch is fully defined so exit from the sketching mode.
Save the file with the name Nut.
Activate Extrude Boss/Base Tool.
Fill the depth value and execute the command.
Now change the model colour as per your wish.
Next start a new sketch over Right Plane.
Activate the Section View along the Right Plane to see the new sketch easily.
Change the view orientation parallel to sketching plane.
Activate the Intersection and take the project of entire intersecting edges of the model.
Convert the projected sketch into construction geometry.
Draw the sketch as displayed along with dimensions.
The sketch is complete so exit from the sketching mode.
Activate the Revolved Cut tool.
The sketch profile is automatic selected so define the axis of revolution and execute the command.
Open the bolt file and draw a sketch over Right Plane as displayed.
We are creating this sketch to get the dimensions for the hole that would be applied over our Nut.
Here we got our required dimension so switch back to the Nut file.
Activate Extruded Cut Tool.
Draw a sketch over back face of the model with dimension we got previously.
Exit the sketch and in Direction 1 filed select through all option.
Execute the command to create hole.
Close the file of the Bolt that is still open and return back.
Activate Chamfer Tool and apply it over the following edge of the model with the displayed parameters.
Start a new sketch over Right Plane.
Take the project of the model edges and convert them into construction geometry.
Again we will past the thread profile from the file ‘UNF Screw Internal Thread Profile’
Copy the Sketch and return back to the Nut File.
Paste the copied profile in the current sketch.
Properly position the sketch using Move Entities Tools.
The sketch is complete so exit from the sketching mode.
Create a circle over back face of the model as displayed.
Activate Helix and Spiral Tool.
First select the circle.
We will use Height and Pitch to define the curve.
Fill the pitch value as displayed and execute the command.
Select Helix/Spiral feature from the Design Tree and activate Equation Tool.
Select the height dimension from the design window to add it in the Equation field it would be equal to the depth of Boss-Extrude feature.
Apply and save all the changes.
Activate Swept Cut tool.
First select the profile then the path and execute the command.
The file is complete so examine the threads and close the file that are open after saving.
Assembly of Bolt and Nut
Create an assembly file.
First place the Bot file in the assembly coincident to the origin.
Save the file with the name Bolt and Nut.
Open the visibility of Temporary Axis.
Activate Insert Components Tool
Browse the Nut file and place it.
Select the Nut part and activate Move with Triad command from right click context menu.
Rotate the model as displayed.
Select the both axis of parts and activate Mate command.
The coincident mate has been applied automatically so execute the command.
Clear the screen by closing the visibility of Temporary axis and origin of file.


![Vise_1_thumb[2]](https://blogger.googleusercontent.com/img/b/R29vZ2xl/AVvXsEgZ1U-yTLslcDTrBSyyGtlaHD5_1NiR1p6U1o1ZT6m6PHMic2Z6y3hMI3wqli5ZOCASoPjGs4iAihSy2UKlxn2pWcIwNTHCjYup4337X7xQKGlDyMzIRUbtTmwZaA5J9ysC9EQmvDLK9jM/s1600-h/Vise_1_thumb23.jpg "Vise_1_thumb[2]")
![Vise_2_thumb[2]](https://blogger.googleusercontent.com/img/b/R29vZ2xl/AVvXsEioLmkkLYP5uoAGcxtw-fB4KLKqChnw3729rQYU58ncvMPvCfp2WEaGMhBlU8R-DPd05chBLP9uM32uOMEpYva30VLc_FgQV91idlxm6Etp1XLB7cz2Wk9LJ2KMDYbKK34v_b8R_0gl2D0/s1600-h/Vise_2_thumb23.jpg "Vise_2_thumb[2]")
![download-Link[6]](https://blogger.googleusercontent.com/img/b/R29vZ2xl/AVvXsEj-sIe2RomzLT7I61DiehUJi6Kdj3wEPvDORbXf1593V2EUCf3JpvHmWfnYMl4KZn9Wg8D7ZzV9AIU9bVoGX5Ompj3lWTstlEWLBBo7XLuzTXBTnjhlMwZGcqcFCJuazE1slcVJ38ijJKI/?imgmax=800 "download-Link[6]")


