Showing posts with label Part modelling. Show all posts

Friday, January 7, 2022

Arbor Press Assembly (Siemens NX 1855 Tutorial)


Serial No. 139   

Arbor Press Assembly (Siemens NX 1855 Tutorial)

This Siemens NX 1855 Assembly tutorial which also covers topics from NX Basics like sketching and part modelling display a creation process of an assembly named ‘Arbor Press’. At the end of this video, we will create an Animation of this Assembly in Motion Environment. This model contains 10 part files. First, we create the Arbor_Press_frame then later each component is created individually with no relation to each other which you can term the Bottom-up designing process. In this process, the parts are designed individually then inserted into the assembly and set up by using their assembly constraints. When the parts have been modified the changes also appear in the NX assembly.


Click the following link to get the model file: - https://bit.ly/3eWEoBy 


......................................................................
Visit the following link to watch more tutorial on Siemens NX by us
https://www.youtube.com/playlist?list=PLKWX3xUP3pPpUvtPuzEPoHimjTjpdbl_Q
.........................................................................
Hope all of you enjoyed the tutorial. If you find the video useful please like it and share it with your friends/colleagues and do not forget to subscribe me to get latest updates about my new uploads….
http://www.youtube.com/user/nisheethsorjm?sub_confirmation=1
....................................................................................................
Dear Viewers if you like our work and wanted to support us, to keep continuing the good work, then become a patron of ours at ‘Patreon’ site. Patreon is a simple way for you to contribute to the creator’s work every month/ every time they release their new work and get rewards in return. Please visit the following link to know all about our work and what we are offering as the reward to our patrons…
https://www.patreon.com/nisheethsri
...............................................................…   

Friday, February 10, 2017

Allen Screwdriver (Solid Edge ST9 Tutorial)


Allen Screwdriver_1

Allen Screwdriver_2

Serial No. 29

Allen Screwdriver (Solid Edge ST9 Tutorial)
In this Solid Edge Tutorial we will describe how to build the model ‘Allen Screwdriver’. The edge of Allen screwdriver has been constructed by different surface tools like Bound, Stitch, Derived etc. It is a Part and Assembly modelling tutorial. This assembly consist 2 part files Screw Driver and Handle that are positioned according to design intent by using Assembly Constraints.
It will cover the following topics.
........................................................................................................
• Creating 2D Sketches on different Planes.
• Use some sketch constraints as Connect, Horizontal/Vertical, and Equal etc. that are applied on during sketch creation.
• Use solid and surface feature command such as Revolved (Surface), Bounded, Stitched, Extrude, Cut, Circular Pattern, Loft, Subtract, Round etc.
• How to patterning an arc and a line by using ‘Derived’ command, this is the easiest way to create a sketch pattern.
• How to create a line by using ‘3D Line’ command in 3D Sketch environment.
• How to create a feature between circle and point by using ‘Loft Protrusion’ command.
• How to change the color of the model by using ‘Part Painter’ tool.
• How to insert component into the assembly using drag and drop from parts library by using ‘Insert Component’ command.
• How to mate the parts by using ‘Flash Fit’ command in the assembly.
• How to lock the rotation of the component by using ‘Lock Rotation’ option in ‘Flash Fit’ command in the assembly.
• Use the ‘Subtract’ command (Boolean) to remove the tool body volume from selected target bodies in the assembly. You can select multiple target bodies and multiple tool bodies.
• How to hide all components except the selected components by using ‘Isolate’ command in the assembly.

download-Link
  
Click the following link to get the model file: - http://bit.ly/2pWfHiu


Sunday, January 29, 2017

Hand Vise (Solid Edge ST9 Tutorial)


Hand Vise_1

Hand Vise_2


Serial No. 25

Hand Vise (Solid Edge ST9 Tutorial)
In this Solid Edge Tutorial, we will describe how to build the model named ‘Hand Vise’. It is a Part modelling as well as assembly modelling tutorial. The 'Hand Vise' assembly consist of 7 part files. First of all we will create a base part file, which will be placed into the assembly and afterward four part will be created in context of the assembly in the assembly environment with the help of ‘Create Part In-Place’ command.
By watching the tutorial viewer will learn following topics of the software.
........................................................................................................
• Creating 2D Sketches on different Planes.
• Sketch constraints as Connect, Parallel, Horizontal/Vertical, Equal etc. that are applied on during sketch creation.
• Features command such as Extrude, Loft Protrusion, Revolve, Thread, Swept Protrusion, Cut, and Mirror Copy Feature etc.
• Use of extrude command with From/To Extent option. Sets the feature extent so that the sketch is projected from the sketch plane to another specified surface.
• How to create a feature between two sketch profiles on the part with the help of four rails by using ‘Lofted Protrusion’ command.
• How to set the End Conditions of the loft feature with ‘Tangent Continuous’ option under the Lofted Protrusion - Tangency Control in ‘Lofted Protrusion’ command.
•. How to create a feature between single path and cross section with the help of one rail by using ‘Swept Protrusion’ command.
• Use of the Mirror Copy Feature command to construct a mirror copy of selected features. The copy is associative to the original features. If the original features are changed or deleted, the mirror features update. You cannot directly edit the mirror features.
•. How to create a thread on the cylinder by using ‘Thread’ command.
• How to change the color of the model by using ‘Part Painter’ tool.
• Use of assembly commands such as Insert Component, Create Part In-Place, and Copy sketch, Subtract, Isolate component, etc.
• Use of  the ‘Copy Sketch’ command, how to copy sketches from a source document to a target document within the context of the active assembly.
• Use of the ‘Create Part In-Place’ command can be used to create a new part or subassembly within the context of an assembly,
•How to check the interface between two components by using ‘Check Interference’ command.
• How to insert component into the assembly using drag and drop from parts library by using ‘Insert Component’ command.
• How to lock the rotation of the component by using ‘Lock Rotation’ option in ‘Flash Fit’ command in the assembly.
• How to rotate and moving part by using ‘Drag Component’ command.
• Use of ‘Show/Hide Component’ option in the assembly to mate the components more easily.
• How to hide all components except the selected components by using ‘Isolate’ command in the assembly.
• Use of the ‘Subtract’ command (Boolean) to remove the tool body volume from selected target bodies in the assembly. You can select multiple target bodies and multiple tool bodies.
• How to apply knurl image on the face of the model with the help of ‘Styles’ tool.


 download-Link

Click the following link to get the model file: - http://bit.ly/2MrIjYf

Thursday, January 26, 2017

Pipe Wrench (Volume-1)—Solid Edge ST9 Tutorial

Pipe Wrench_1

Pipe Wrench_2

Serial No. 24-A.

Pipe Wrench (Volume-1)—Solid Edge ST9 Tutorial

(Rest of the design of the model is completed in Volume-2)

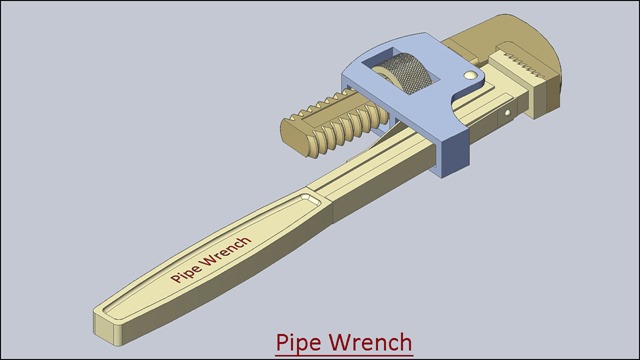
In this Solid Edge Tutorial we will describe how to build the model ‘Pipe Wrench’. It is a Part and Assembly modelling tutorial. This assembly consist 1 Assembly and 9 part files (Handle, Jaw, Threading Wheel with realistic knurling, 2 rivets, etc.) that are positioned according to design intent by using Assembly Constraints. This tutorial will give you a good practice of applying constraints in an assembly and give you an idea of Pipe Wrench mechanism.

To watch the video ‘Pipe Wrench (Volume-2)’, how to create a realistic knurling on cylindrical face of the part with the help of ‘Helical Curve’ command in Solid Edge software.

It will cover the following topics.

........................................................................................................

• Creating 2D Sketches on different Planes.

• Use some sketch constraints as Connect, Parallel, Horizontal/Vertical, Equal etc. that are applied on during sketch creation.

• Use features command such as Revolved, Extrude, Cut, Pattern, Helical Cutout, Helical Curve, Rectangular and Circular Pattern, Mirror Copy Feature, Round etc.

• How to create a helical path along the cylindrical face with the ‘Length and Turns’ option by using ‘Helical Curve’ command.

• Use the Mirror Copy Feature command to construct a mirror copy of selected features. The copy is associative to the original features. If the original features are changed or deleted, the mirror features update. You cannot directly edit the mirror features.

• How to create a realistic thread in our model Part3 and Part4 (BSP Thread Profile) by sweeping a cross section along a helical path by using ‘Helical Cutout’ command.

• How to change the color of the model by using ‘Part Painter’ tool.

• Use assembly commands such as Flash Fit, Angle mate, Axial Align mate, Connect mate, Mate/Planar Align command etc.

•How to create an Angular relationship between face of two components by applying an angle value (4.77 degree) by using ‘Angle Relationship’ command.

•How to check the interface between two components by using ‘Check Interference’ command.

• How to insert component into the assembly using drag and drop from parts library by using ‘Insert Component’ command.

• How to mate the parts by using ‘Flash Fit’ command in the assembly.

• How to lock the rotation of the component by using ‘Lock Rotation’ option in ‘Flash Fit’ command in the assembly.

• How to flip the component by using ‘Flip Side’ option in ‘Flash Fit’ command in the assembly.

• How to rotate and moving part by using ‘Drag Component’ command.

• Use ‘Show/Hide Component’ option in the assembly to mate the components more easily.


download-Link


Click the following link to get the model file: - http://bit.ly/2ns7jGu

Pipe Wrench (Volume-2)—Solid Edge ST9 Tutorial

Pipe Wrench_1

Pipe Wrench_2

Serial No. 24-B.

Pipe Wrench (Volume-2)—Solid Edge ST9 Tutorial

(Starting design of the model is created in Volume -1)

In this Solid Edge Tutorial we will describe how to build the model ‘Pipe Wrench’. It is a Part and Assembly modelling tutorial. This assembly consist 1 Assembly and 9 part files (Handle, Jaw, Threading Wheel with realistic knurling, 2 rivets, etc.) that are positioned according to design intent by using Assembly Constraints. This tutorial will give you a good practice of applying constraints in an assembly and give you an idea of Pipe Wrench mechanism.

To watch the video ‘Pipe Wrench (Volume-2)’, how to create a realistic knurling on cylindrical face of the part with the help of ‘Helical Curve’ command in Solid Edge software.

It will cover the following topics.

........................................................................................................

• Creating 2D Sketches on different Planes.

• Use some sketch constraints as Connect, Parallel, Horizontal/Vertical, Equal etc. that are applied on during sketch creation.

• Use features command such as Revolved, Extrude, Cut, Pattern, Helical Cutout, Helical Curve, Rectangular and Circular Pattern, Mirror Copy Feature, Round etc.

• How to create a helical path along the cylindrical face with the ‘Length and Turns’ option by using ‘Helical Curve’ command.

• Use the Mirror Copy Feature command to construct a mirror copy of selected features. The copy is associative to the original features. If the original features are changed or deleted, the mirror features update. You cannot directly edit the mirror features.

• How to create a realistic thread in our model Part3 and Part4 (BSP Thread Profile) by sweeping a cross section along a helical path by using ‘Helical Cutout’ command.

• How to change the color of the model by using ‘Part Painter’ tool.

• Use assembly commands such as Flash Fit, Angle mate, Axial Align mate, Connect mate, Mate/Planar Align command etc.

•How to create an Angular relationship between face of two components by applying an angle value (4.77 degree) by using ‘Angle Relationship’ command.

•How to check the interface between two components by using ‘Check Interference’ command.

• How to insert component into the assembly using drag and drop from parts library by using ‘Insert Component’ command.

• How to mate the parts by using ‘Flash Fit’ command in the assembly.

• How to lock the rotation of the component by using ‘Lock Rotation’ option in ‘Flash Fit’ command in the assembly.

• How to flip the component by using ‘Flip Side’ option in ‘Flash Fit’ command in the assembly.

• How to rotate and moving part by using ‘Drag Component’ command.

• Use ‘Show/Hide Component’ option in the assembly to mate the components more easily.

download-Link


Click the following link to get the model file: - http://bit.ly/2ns7jGu

Saturday, January 21, 2017

Drill Machine (Volume-1)—Solid Edge ST9 Tutorial

Drill Machine_1

Drill Machine_2

Serial No. 23-A.

Drill Machine (Volume-1)—Solid Edge ST9 Tutorial

(Rest of the design of the model is completed in Volume-2)

In this Solid Edge Tutorial we will describe how to build the model ‘Drill Machine’. It is a Part and Assembly modelling tutorial. This assembly consist 1 Assembly and 22 part files (Drill Machine frame (Multi Body part) Spindle, Drill chuck, Gear, Pinion, Gear hub, Washer, Handle etc.) that are positioned according to design intent by using Assembly Constraints. This tutorial will give you a good practice of applying constraints in an assembly and give you an idea of Drill Machine mechanism.

How to construct the part ‘Drill Machine Frame’ (Multi body part). After creating the frame convert all multi body parts into a single solid body with the help of ‘Union’ command.

It will cover the following topics.

........................................................................................................

• Creating 2D Sketches on different Planes.

• Use the sketch constraints that are applied on during sketch creation.

• Use features command such as Revolved, Extrude, Cut, Subtract, Intersection, Union, Add Body, Normal Cutout, Helical Cutout etc.

• Use the ‘Add Body’ command to create multiple bodies in a single part file (‘Drill Machine Frame’).

• Use the ‘Revolve’ command with different options.

• How to create a realistic thread in our model Spindle and Part1 (UNF Screw External &Internal Thread Profile) by sweeping a cross section along a helical path by using ‘Helical Cutout’ command.

• How to apply knurl image on the face of the model with the help of ‘Styles’ tool.

• How to change the color of the model by using ‘Part Painter’ tool.

• Use assembly commands such as Flash Fit, Axial Align mate, Connect mate, Mate/Planar Align command etc.

• How to mate the parts by using ‘Flash Fit’ command in the assembly.

• How to mating between the vertex point of gear and pinion by using ‘Connect Mate’ command.

• How to create gear relationship between gear and pinion by using ‘Gear’ mate command and how to define the number of teeth of the gear and pinion (15/56) to define the gear interaction.

• How to lock the rotation of the component by using ‘Lock Rotation’ option in ‘Flash Fit’ command in the assembly.

• How to flip the component by using ‘Flip Side’ option in ‘Flash Fit’ command in the assembly.

• How to rotate and moving part by using ‘Drag Component’ command.

• How to insert component into the assembly using drag and drop from parts library by using ‘Insert Component’ command.

• Use ‘Show/Hide Component’ option in the assembly to mate the components more easily.

• How to hide all components except the selected components by using ‘Isolate’ command in the assembly.


download-Link


Click the following link to get the model file: - http://bit.ly/2LWL8BP

Drill Machine (Volume-2)—Solid Edge ST9 Tutorial

Drill Machine_1

Drill Machine_2

Serial No. 23-B.

Drill Machine (Volume-2)—Solid Edge ST9 Tutorial

(Starting design of the model is created in Volume -1)

In this Solid Edge Tutorial we will describe how to build the model ‘Drill Machine’. It is a Part and Assembly modelling tutorial. This assembly consist 1 Assembly and 22 part files (Drill Machine frame (Multi Body part) Spindle, Drill chuck, Gear, Pinion, Gear hub, Washer, Handle etc.) that are positioned according to design intent by using Assembly Constraints. This tutorial will give you a good practice of applying constraints in an assembly and give you an idea of Drill Machine mechanism.

How to construct the part ‘Drill Machine Frame’ (Multi body part). After creating the frame convert all multi body parts into a single solid body with the help of ‘Union’ command.

It will cover the following topics.

........................................................................................................

• Creating 2D Sketches on different Planes.

• Use the sketch constraints that are applied on during sketch creation.

• Use features command such as Revolved, Extrude, Cut, Subtract, Intersection, Union, Add Body, Normal Cutout, Helical Cutout etc.

• Use the ‘Add Body’ command to create multiple bodies in a single part file (‘Drill Machine Frame’).

• Use the ‘Revolve’ command with different options.

• How to create a realistic thread in our model Spindle and Part1 (UNF Screw External &Internal Thread Profile) by sweeping a cross section along a helical path by using ‘Helical Cutout’ command.

• How to apply knurl image on the face of the model with the help of ‘Styles’ tool.

• How to change the color of the model by using ‘Part Painter’ tool.

• Use assembly commands such as Flash Fit, Axial Align mate, Connect mate, Mate/Planar Align command etc.

• How to mate the parts by using ‘Flash Fit’ command in the assembly.

• How to mating between the vertex point of gear and pinion by using ‘Connect Mate’ command.

• How to create gear relationship between gear and pinion by using ‘Gear’ mate command and how to define the number of teeth of the gear and pinion (15/56) to define the gear interaction.

• How to lock the rotation of the component by using ‘Lock Rotation’ option in ‘Flash Fit’ command in the assembly.

• How to flip the component by using ‘Flip Side’ option in ‘Flash Fit’ command in the assembly.

• How to rotate and moving part by using ‘Drag Component’ command.

• How to insert component into the assembly using drag and drop from parts library by using ‘Insert Component’ command.

• Use ‘Show/Hide Component’ option in the assembly to mate the components more easily.

• How to hide all components except the selected components by using ‘Isolate’ command in the assembly.


download-Link


Click the following link to get the model file: - http://bit.ly/2LWL8BP

Tuesday, January 10, 2017

Vise (Volume-2)—Solid Edge ST9 Tutorial

Vise_1_thumb[2]

Vise_2_thumb[2]

Serial No. 21-B.

Vise (Volume-2)—Solid Edge ST9 Tutorial

(Starting design of the model is created in Volume-1)

In this Solid Edge Tutorial we will describe how to build the model ‘Vise’. It is a Part and Assembly modelling tutorial. This assembly consist of 1 Main assembly, 3 Subassemblies and 12 part files (Jaw Plate, threaded stud, Handle, washer, spring etc.) that are positioned according to design intent by using Assembly Constraints. This tutorial will give you a good practice of applying constraints in an assembly and give you an idea of Vise mechanism.

It will cover the following topics.

........................................................................................................

• Creating 2D Sketches on different Planes.

• Use the sketch constraints that are applied on during sketch creation.

•. Use features command such as Extrude, Revolved, Loft, Cut, Chamfer, Round, Text Profile, Mirror, Hole features Revolved Cut etc.

•. ‘Lofted Protrusion’ command constructs a protrusion by fitting through a series of cross sections. You can define the cross sections using profiles drawn within the command, sketches, or edges of existing features. The cross sections must be closed elements.

• How to create a text on the model by using Text Profile command and emboss the text by using Extrude command.

• Use Extrude feature command to extrude a profile along a straight path.

• Use the Hole command to construct threaded holes.

• Use Mirror copy feature command to construct a mirror copy of selected features.

• How to create a realistic thread (Acme Thread) by sweeping a cross section along a helical path by using ‘Helical Cutout’ command.

• How to apply knurl image on the face of the model with the help of ‘Styles’ tool.

• How to change the color of the model by using ‘Part Painter’ tool.

• Use assembly constraints such as Axial Align mate, Planer Align mate, Mate command etc.

• How to insert component into the assembly using drag and drop from parts library by using ‘Insert Component’ command.

• Use ‘Show Reference Planes’ option in the assembly to mate the components more easily.

• How to use the Planar Align command to apply a relationship between selected parts.

• How to mate the parts by using ‘Flash Fit’ command in the assembly.

• How to rotate and moving part by using ‘Drag Component’ command. 

download-Link[6]


Click the following link to get the model file: - http://bit.ly/2VniPiY

Vise (Volume-1)—Solid Edge ST9 Tutorial

Vise_1

Vise_2

Serial No. 21-A.

Vise (Volume-1)—Solid Edge ST9 Tutorial
(Rest of the design of the model is completed in Volume-2)

In this Solid Edge Tutorial we will describe how to build the model ‘Vise’. It is a Part and Assembly modelling tutorial. This assembly consist of 1 Main assembly, 3 Subassemblies and 12 part files (Jaw Plate, threaded stud, Handle, washer, spring etc.) that are positioned according to design intent by using Assembly Constraints. This tutorial will give you a good practice of applying constraints in an assembly and give you an idea of Vise mechanism.

It will cover the following topics.

........................................................................................................

• Creating 2D Sketches on different Planes.

• Use the sketch constraints that are applied on during sketch creation.

•. Use features command such as Extrude, Revolved, Loft, Cut, Chamfer, Round, Text Profile, Mirror, Hole features Revolved Cut etc.

•. ‘Lofted Protrusion’ command constructs a protrusion by fitting through a series of cross sections. You can define the cross sections using profiles drawn within the command, sketches, or edges of existing features. The cross sections must be closed elements.

• How to create a text on the model by using Text Profile command and emboss the text by using Extrude command.

• Use Extrude feature command to extrude a profile along a straight path.

• Use the Hole command to construct threaded holes.

• Use Mirror copy feature command to construct a mirror copy of selected features.

• How to create a realistic thread (Acme Thread) by sweeping a cross section along a helical path by using ‘Helical Cutout’ command.

• How to apply knurl image on the face of the model with the help of ‘Styles’ tool.

• How to change the color of the model by using ‘Part Painter’ tool.

• Use assembly constraints such as Axial Align mate, Planer Align mate, Mate command etc.

• How to insert component into the assembly using drag and drop from parts library by using ‘Insert Component’ command.

• Use ‘Show Reference Planes’ option in the assembly to mate the components more easily.

• How to use the Planar Align command to apply a relationship between selected parts.

• How to mate the parts by using ‘Flash Fit’ command in the assembly.

• How to rotate and moving part by using ‘Drag Component’ command.


download-Link


Click the following link to get the model file: - http://bit.ly/2VniPiY

Thursday, December 22, 2016

Nose Pliers (Solid Edge ST9 Tutorial)

Nose Pliers_1

Nose Pliers_2

Serial No. 14

Nose Pliers (Solid Edge ST9 Tutorial)

In this Solid Edge Tutorial we will describe how to build the model ‘Nose Pliers’. It is a part and assembly modelling tutorial.

It will cover the following topics.

........................................................................................................

• Creating 2D Sketches on different Planes/model faces.

• Use the sketch constraints that are applied on during sketch creation.

• How to project the model edges, curves and sketch elements onto the selected sketch plane by using ‘Project to Sketch’ command.

• Project geometry command is very useful tool for creating the various features to build the part.

• Use features command such as Extrude, Revolved, Swept Cutout, Cut, Chamfer, Round etc.

• Use the ‘Swept Cutout’ command to construct a cutout by extruding a cross section along a path you define.

• How to mate the parts by using ‘Flash Fit’ command in the assembly.

• Check the interface between one another parts by using ‘Check Interference’ command.

• Use the ‘Subtract’ command (Boolean) to remove the tool body volume from selected target bodies in the assembly. You can select multiple target bodies and multiple tool bodies.

• How to apply knurl image on the face of the model with the help of ‘Styles’ tool.

• How to change the colour of the model by using ‘Part Painter’ tool.


download-Link


Click the following link to get the model file: - http://bit.ly/2onMr3G

Saturday, December 17, 2016

Combination Pliers (Solid Edge ST9 Tutorial)

Combination Pliers_1

Combination Pliers_2

Serial No. 12

Combination Pliers (Solid Edge ST9 Tutorial)

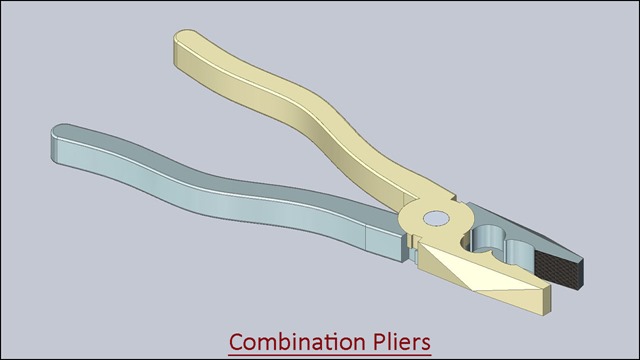
In this Solid Edge Tutorial we will describe how to build the model ‘Combination Pliers’. It is a part and assembly modelling tutorial.

It will cover the following topics.

........................................................................................................

• Creating 2D Sketches on different Planes.

• Use the sketch constraints that are applied on during sketch creation.

• How to create Spline between many points for creating a handle of Plier.

• Use features command such as Extrude, Revolved, Loft, Cut, Chamfer, Round etc.

• How to mate the parts by using ‘Flash Fit’ command in the assembly.

• How to rotate and moving part by using ‘Drag Component’ command.

• How to apply knurl image on the face of the model with the help of ‘Styles’ tool.

• How to change the color of the model by using ‘Part Painter’ tool.


download-Link


Click the following link to get the model file: - http://bit.ly/2oePDPe

Thursday, September 11, 2014

Building the Pattern Features Sample Part (SolidWorks 2014)

mhousing

Serial No. 8

Building the Pattern Features Sample Part (SolidWorks 2014)


In this Basic Tutorial of SolidWorks we will demonstrate the utilization of part modelling feature named Revolve and Pattern.
Revolve Feature is used when we want to create a solid by revolving a closed sketch profile through a specified angle and along an axis.
Pattern Feature is used when we want to replicate a feature. This can be one or two dimensional array of that feature.
The aforesaid features are utilized quite an often while designing parts. This tutorial is picked up from the default tutorials that comes up with the software. You can find its written version under Basic Techniques → Pattern Features
Following is the description that is mentioned in the original Tutorial..

In this lesson, you learn how to build the sample part used in the Pattern Features tutorial.

The steps include:

  • Creating a revolved base feature
  • Extruding a thin feature
  • Shelling a part

_______________________________________________________________

In this section of lesson, you learn how to create a linear pattern and a circular pattern. A linear pattern is a one- or two-dimensional array of features. A circular pattern is a circular array of features.

The steps include:

  • Creating an oblong cut
  • Creating a linear pattern
  • Creating a circular pattern
  • Using an equation to drive the circular pattern

download-Link


Click the following link to get the model file: - http://bit.ly/2oo3FgO

Building the Fillet Features Sample Part (SolidWorks 2014)

Knob

Serial No. 7

Building the Fillet Features Sample Part (SolidWorks 2014)


The Design of this model is selected from 'SolidWorks Tutorials':--

Basic Techniques → Fillets

In this lesson, you learn how to build the sample part used in the Fillet Features tutorial. You can capture the symmetry of a knob in the design intent of the part. You build one half of the sample part in this lesson, then in the Fillet Features lesson, you mirror the model to create the other half. Any changes you make to the original half are reflected in the other half. Later you learn how to use different types of fillets.

The steps include:

  • Using relations in sketches
  • Adding draft angles to extruded features

_______________________________________________________________

This part of lesson describes how to use different types of fillets.

In this lesson, you modify this knob part by:

Adding different fillet types:

  • Face
  • Constant radius
  • Variable radius
  • Using mirroring to assure symmetry
  • Applying a library feature

download-Link


Click the following link to get the model file: - http://bit.ly/2mKNQAs

Basic Techniques-Revolve and Sweep Features (SolidWorks 2014)

Candle Stick

Serial No. 6

Basic Techniques-Revolve and Sweep Features (SolidWorks 2014) 


In this Basic Tutorial of SolidWorks we will demonstrate the utilization of part modeling feature named Revolve and Sweep.
Revolve Feature is used when we want to create a solid by revolving a closed sketch profile through a specified angle and along an axis.
Sweep Feature is used when we want to create a solid using a closed sketch profile and a path.
The aforesaid features are utilized quite an often while designing parts.  This tutorial is picked up from the default tutorials that comes up with the software. You can find its written version under Basic Techniques → Revolves and Sweeps.
Following is the description that is mentioned in the original Tutorial..

In this lesson, you will create the candlestick. This lesson demonstrates:

  • Creating a revolve feature
  • Creating a sweep feature
  • Creating an extruded cut feature with a draft angle

download-Link


Click the following link to get the model file: - http://bit.ly/2nHGXjM

Sunday, August 3, 2014

Getting Started Tutorial Part-1 (SolidWorks 2014)

Pressure Plate

Serial No. 4

Getting Started Tutorial Part-1 (SolidWorks 2014)

Video Tutorial with Captions

The Design of this model is selected from 'SolidWorks Tutorials':--
Getting Started → Introduction to SolidWorks
The Introduction to SolidWorks lesson guides you through the creation of a part and drawing.
This lesson includes:
Creating base, boss, and cut features from sketches
Adding fillets to smooth edges
Creating a circular pattern
Adding drawing views
Adding centerlines, center marks, and dimensions to the drawing.

download-Link 

   Click the following link to get the model file: - http://bit.ly/2ooDruY

Thursday, July 7, 2011

Pencil (Autodesk Inventor 2010)

Pencil

Serial No. 72

Pencil  (Autodesk Inventor 2010)
In this tutorial we would create a model named Pencil. It is created in part modelling environment of Autodesk Inventor. We would just create some 2D sketches and use Extruded Tool and Loft Tool to form a solid. Then would use ‘Split Tool’ to cut its surface to give separate colours over the model. In the end using the Emboss Tool we would write some text over its surface.


download-Link

 
Click the following link to get the model file: - http://bit.ly/2lLrdeH