Showing posts with label Assembly Modeling. Show all posts

Sunday, July 29, 2018

Suspension (Assembly Volume-2) Solid Edge ST9 Tutorial


Suspension_1

Suspension_2


Serial No. 75-B.


Suspension (Assembly Volume-2) Solid Edge ST9 Tutorial
In this Solid Edge ST9 Assembly tutorial, we have created a model named ‘Suspension’. The Assembly consist of 12 Subassemblies and 43 parts (modelled as well as standard parts) that are positioned according to design intent by using Assembly Constraints.
To complete this tutorial, first get the files used for creating the assembly.
This tutorial will give you a good practice of applying constraints in an assembly and give you an idea of suspension mechanism.
To watch the designing of assembly components, visit on following link:-
https://www.youtube.com/playlist?list=PLKWX3xUP3pPpRpkNsubaQdZuTGcNh1-MJ
………………………………………….
(Starting of the Assembly is designed in Volume-1)
The Design of the model ‘Suspension’ has been taken from Assembly file of 'Suspension' → ‘Sample files’ → Autodesk Inventor.


Click the following link to get the model file: - http://bit.ly/2OzRusu


Wednesday, June 27, 2018

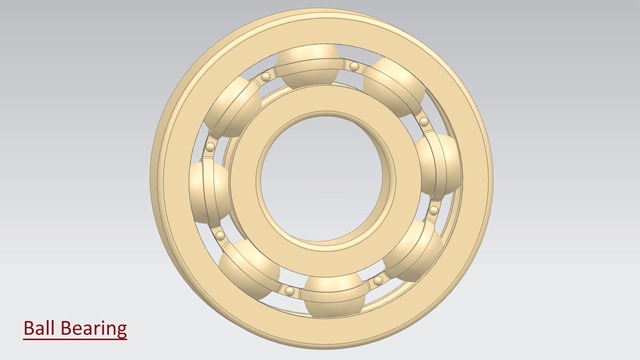
Ball Bearing || Siemens NX Tutorial

2018-06-27_08-19-14

In this Siemens NX 11 Tutorial, we will create a model of Ball Bearing. First of all components of Ball Bearing — Outer ring, Inner ring, Cage, Rivet and Ball will be created. With the help of these components final assembly will be created. So viewers will be able to observe and learn part and assembly modelling techniques.

download-Link


Visit the following link to get the model file…
http://bit.ly/3689wZ8


....................................................................................

Visit the following link to watch more tutorial on Siemens NX by us

https://www.youtube.com/playlist?list=PLKWX3xUP3pPpUvtPuzEPoHimjTjpdbl_Q
.........................................................................

Hope all of you enjoyed the tutorial. If you find the video useful please like it and share it with your friends/colleagues and do not forget to subscribe me to get latest updates about my new uploads….

http://www.youtube.com/user/nisheethsorjm?sub_confirmation=1
....................................................................................................

Dear Viewers if you like our work and wanted to support us, in keep continuing the good work, then become a patron of ours at ‘Patreon’ site. Patreon is a simple way for you to contribute to creator’s work every month/ every time they release their new work and get rewards in return. Please visit following link to know all about our work and what we are offering as a reward to our patrons…

https://www.patreon.com/nisheethsri

Friday, December 1, 2017

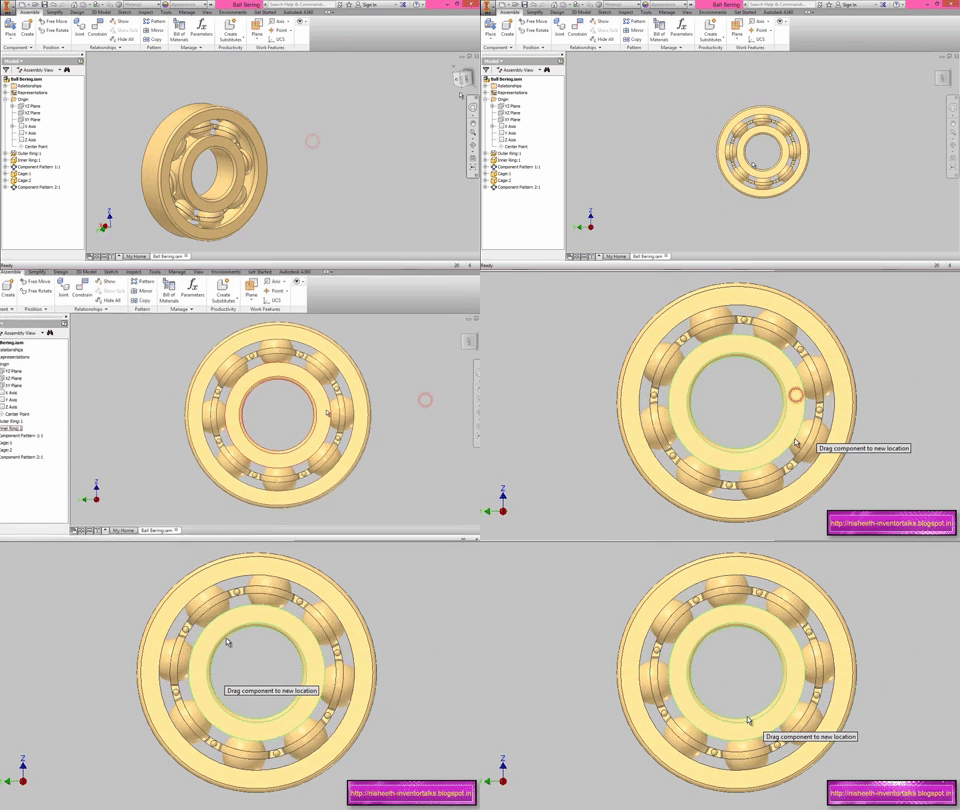
Ball Bearing || Autodesk Inventor Tutorial


Ball Bearing -- Autodesk Inventor Tutorial


In this Autodesk Inventor tutorial, we will learn about modelling a ‘Ball Bearing’ Assembly. The assembly has four components and a standard part. Four components will be created individually, later all of them will be placed into the assembly. So viewers will be able to watch part modelling as well as assembly modelling techniques of ‘Autodesk Inventor’ software.

....................................................................................
The model designing concept is taken from videos available on YouTube.
....................................................................................


download-Link

Visit the following link to get the model file…
http://bit.ly/2NsnVXP


...................................................
Visit the following link to watch the basic tutorial on Autodesk Inventor by us
https://www.youtube.com/playlist?list=PLb-IhKRMYSERYpB48aY-sZ10fN6CfXIL4
.........................................................................
To watch detailed tutorials on the same software visit the following link
https://www.youtube.com/playlist?list=PL74BDF7431ED13443
..........................................................................................
Hope all of you enjoyed the tutorial. If you find the video useful please like it and share it with your friends/colleagues and do not forget to Subscribe us to get latest updates about our new uploads.
http://www.youtube.com/user/nisheethsorjm?sub_confirmation=1


Thursday, July 20, 2017

Piston Assembly || Siemens Nx Tutorial

Piston Assembly --Siemens Nx Tutorial

In this Siemens Nx tutorial, we will learn about modelling a ‘Piston’ Assembly. The model has four components which will be created individually later all of them placed into the assembly. So viewers will be able to watch part modelling as well as assembly modelling techniques of ‘Siemens Nx’ software.
....................................................................................
The model designing concept is taken from videos available on YouTube.
....................................................................................

download-Link


Visit the following link to get the model file…
http://bit.ly/2Npr5eH


....................................................................................
Visit the following link to watch more tutorial on Siemens Nx by us
https://www.youtube.com/playlist?list=PLKWX3xUP3pPpUvtPuzEPoHimjTjpdbl_Q
.........................................................................

Hope all of you enjoyed the tutorial. If you find the video useful please like it and share it with you friends/colleagues and do not forget to subscribe me to get latest updates about my new uploads….

http://www.youtube.com/user/nisheethsorjm?sub_confirmation=1

Saturday, July 15, 2017

Piston Assembly || Autodesk Inventor Tutorial

Piston Assembly -- Autodesk Inventor Tutorial-(1280x720)

In this Autodesk Inventor tutorial, we will learn about modeling a ‘Piston’ Assembly. The model has four components which will be created individually later all of them placed into the assembly. So viewers will be able to watch part modeling as well as assembly modeling techniques of ‘Autodesk Inventor’ software.
....................................................................................
The model designing concept is taken from videos available on YouTube.
....................................................................................

download-Link


Visit the following link to get the model file…
http://bit.ly/349hy2a


...................................................

Visit the following link to watch basic tutorial on Autodesk Inventor by us

https://www.youtube.com/playlist?list=PLb-IhKRMYSERYpB48aY-sZ10fN6CfXIL4

.........................................................................

To watch detailed tutorials on the same software visit the following link

https://www.youtube.com/playlist?list=PL74BDF7431ED13443

..........................................................................................

Hope all of you enjoyed the tutorial. If you find the video useful please like it and share it with your friends/colleagues and do not forget to Subscribe us to get latest updates about our new uploads.

http://www.youtube.com/user/nisheethsorjm?sub_confirmation=1

Sunday, February 12, 2017

Allen Screwdriver—Double Ended (Solid Edge ST9 Tutorial)


Allen Screwdriver (Double Ended)


Serial No. 30


Allen Screwdriver—Double Ended (Solid Edge ST9 Tutorial)
In this Solid Edge Tutorial we will describe how to build the model ‘Allen Screwdriver (Double Ended)’. The edge of Allen screwdriver (Double Ended) has been constructed by different surface tools like Bound, Stitch, Extend etc. It is a Part and Assembly modelling tutorial. This assembly consist 3 part files (Handle, Circular Rod, Sleeve etc.).
It will cover the following topics.
........................................................................................................
• Creating 2D Sketches on different Planes.
• Use some sketch constraints as Connect, Horizontal/Vertical, and Equal etc. that are applied on during sketch creation.
• Use solid and surface feature command such as Revolved Cut, Bounded, Stitched, Extrude, Cut, Circular Pattern, Subtract, Round etc.
• How to create a line by using ‘3D Line’ command in 3D Sketch environment.
• How to change the color of the model by using ‘Part Painter’ tool.
• How to insert component into the assembly using drag and drop from parts library by using ‘Insert Component’ command.
• How to resize (scale) the handle of screwdriver with the help of ‘Part Copy’ command. You use the Part Copy Parameters dialog box to specify which geometry you want to copy and whether you want to mirror, scale, or flatten the copied geometry.
• How to create a sleeve part in context of an assembly in the assembly environment with the help of ‘Create Part In-Place’ command.
• How to mate the parts by using ‘Flash Fit’ command in the assembly.
• How to flip the component by using ‘Flip Side’ option in ‘Flash Fit’ command in the assembly.
• How to lock the rotation of the component by using ‘Lock Rotation’ option in ‘Flash Fit’ command in the assembly.
• Use the ‘Subtract’ command (Boolean) to remove the tool body volume from selected target bodies in the assembly. You can select multiple target bodies and multiple tool bodies.


download-Link

Click the following link to get the model file: - http://bit.ly/35gBCB8


Wednesday, November 2, 2016

Getting Started Tutorial ‘Solid Edge ST9’

Capture3

Serial No. 1

Getting Started Tutorial ‘Solid Edge ST9’

The Tutorial is selected from (Solid Edge Testdrive) E-Book.

This test drive demonstrates a typical workflow for modeling parts, creating assemblies, creating drawing views of part, create exploded view of the assembly and drawing sheet of exploded view of assembly with Solid Edge.


download-Link


Click the following link to get the model file: - http://bit.ly/2LVKy7d


Download the ‘Solid Edge Testdrive’ E-Book by visiting the following link:-- http://a360.co/2fDrFqT

Sunday, January 19, 2014

Creating a new Part on the curve surface in Assembly-Autodesk Inventor 2013 (with caption and audio)

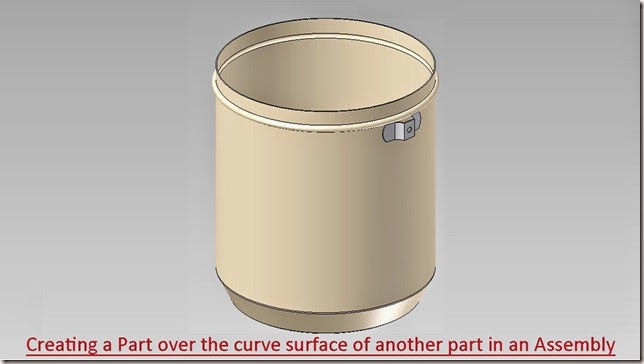
Creating a Part over the curve surface of another part

Serial No. 194

Creating a new Part on the curve surface in Assembly-Autodesk Inventor 2013 (with caption and audio)

In this exercise, a pre constructed part file (Base) is utilized, which is taken from our model ‘Can’.

 download-Link


Click the following link to get the model file: - http://bit.ly/2nO8BeB


Transcription of Video

We have following cylindrical component named ‘Base’ in our incomplete assembly.

The target is to create and fix a ‘Clip’ on its cylindrical face.

  1. Now create a new component in the assembly with the name ‘Clip’.
  2. Select the Standard (in).ipt template for the new part file.
  3. Select the Centre point of the assembly as a base plane for the new component.
  4. Return back to the assembly environment by clicking Return icon.
  5. At present the part is not fully constrained in the assembly.
  6. Remove the degrees of freedom of the component (Clip) by applying Mate constraints.
  7. So, after applying the Mate constraints no degrees of freedom is left in the Assembly.
  8. Double click the Clip part to edit it.
  9. Create a new sketch on the XY Plane of the Clip.
  10. Take the project of base part with the help of Project Cut Edges tool.
  11. Convert all the sketches into construction geometry.
  12. Exit the sketching environment.
  13. Create a new Work Plane on this point, perpendicular to projected vertical line of the base part.
  14. Create a new sketch on this work plane.
  15. Take the project of base part once again.
  16. Exit the sketching mode and change the name of the sketch as ‘Base sketch of Clip’ in the Browser Bar.
  17. Again enter in the sketching environment.
  18. Draw the desired sketch with the aid of 2D sketching tools as displayed.
  19. Use the constraints to properly position the sketch.
  20. Convert unwanted sketches into construction geometry.
  21. Now our base sketch is complete.
  22. Finish the sketch and start a new sketch on the same work plane.
  23. Take the project of following intersection points and arcs of the sketch.
  24. Close the visibility of the base sketch to see the projected points and arcs clearly.
  25. Complete the sketch as displayed.
  26. Now our sketch is complete so exit the sketching environment.
  27. Extrude this sketch profile 5/8 inch in the downward direction.
  28. Change the colour of the Part to ‘Steel’.
  29. Return back to the assembly environment.
  30. Check the interference between the both parts with the help of ‘Analyze Interference’ tool that is available on the Interference panel of Inspect tab.
  31. Activate the tool, first select the Base part and then the Clip, click Ok to Analyze.
  32. There was no interference detected.
  33. Edit the Clip part once again.
  34. Create a new sketch on the front face of the Clip.
  35. And draw sketch profile as displayed.
  36. Extrude the sketch profile and select Cut option in the extrude dialog box.
  37. In the Extents field select ‘All’ from the drop down list to remove the material from the Clip.
  38. Mirror this extrude feature with the aid of Mirror tool.
  39. Select XY Plane of the Clip as mirroring plane.
  40. Now create a hole on the front face of the Clip.
  41. Hole should lie on centre of the front face.
  42. Now our model is complete.

Monday, November 18, 2013

Creating a component in an assembly-Autodesk Inventor 2013 (with caption and audio narration)


Creating a component in an Assembly


Serial No. 147

Creating a component in an assembly-Autodesk Inventor 2013 (with caption and audio narration)

This video will display how to create a component in the context of an Assembly. Creating a component in this way has many benefits. We can Project faces and edges of the Assembly in the new component.  The faces of other components can be copied and placed on surfaces and many more things can be done. So watch the video to understand.


Transcription of Video

Creating a component in an Assembly

This video will display how to create a component in the context of an Assembly. Creating a component in this way has many benefits. We can Project faces and edges of the Assembly in the new component. The faces of other components can be copied and placed as surfaces and many more things can be done. So watch the video to understand.

  1. We have an Assembly named ‘Mesh (Front)’ consisting two components ‘Part1’ and ‘Part2’.
  2. Now we want to create a new component named ‘Part3’ in this Assembly like this.
  3. The Vertical distance between Part1 and Part2 is 1.625 inch.
  4. We will start our work with creating a new component in this Assembly.
  5. The degree of freedom command shows that the newly created Part3 is not fully constrained with the Assembly.
  6. So we will apply a Mate Constraint between the Part3 and Assembly’s Z Axis.
  7. Next a Mate Constraint will be applied between XZ Planes of Assembly and Part3.
  8. In the following steps, we will create a loft feature in this component with the help of two sketches and a centre line rail.
  9. By double clicking the Part3 we will enter in the Part Modelling Environment.
  10. First of all we will get the edges of previously created components with the use of ‘Project Geometry Tool.’
  11. These projected geometries are required only for reference. We are actually going to use these geometries in the developing the loft feature, that is why we will convert them in Construction Geometry.
  12. By applying Coincident Constraint we will properly position our geometry.
  13. Again unnecessary sketches will be converted into Construction Geometry.
  14. So we have created the required sketch now.
  15. Now we will create a New Work Plane parallel to YZ Plane of Part3 (7.625 inch away).
  16. Now we will create the remaining sketch on the XZ Plane of the Part3 that will be used for Centre line loft.
  17. From here we will change the colour of the Part to ‘Being Personal.’
  18. In the next following steps we will develop the second loft feature in this Part.
  19. At present we are copying the outer face of the Part2 with the ‘Copy Object’ Tool. This will place a new surface component in this part.
  20. Now we will project this sketch on the previously created surface component with the help of ‘Project to 3D Sketch’ Tool.
  21. At present this 3D sketch is intact. We cannot use its one edge as a rail in the loft feature. So we will create a new 3D sketch and project its one edge in it with the use of ‘Include Geometry’ Tool.
  22. Repeat the same process to create the second Rail.
  23. In this way, we found our two separate rails required for the loft.
  24. Now we will create two 3D sketch profiles required for the loft.
  25. So everything is set. Start the ‘Loft’ Tool.
  26. Model edges can also be used as rails.
  27. So in this way we created our second loft feature in the Part3.
  28. We will now replicate this (Part3) 8 times at an angle of 45 degree by using ‘Pattern Component’ Tool, available at Component Panel of Assembly Tab.
  29. If you want to watch the development of other components, used in the ‘Mesh of Table Fan’ Assembly, watch our previous video named ‘Mesh of Table Fan’ (Autodesk Inventor 2010).

Sunday, October 20, 2013

Assembly Modeling in Pro E Wildfire (Hinge)


Hinge (You Tube Icon This video tutorial displays the modelling of a Hinge in Pro E Wildfire. Hinge is the assembly of three parts so viewers will see the application of many part and assembly modelling tools of Pro E Wildfire 5.0 like Extrude, Hole, Mirror, Chamfer /Adding and creating new parts in assembly, applying constraints parts etc.


download-Link 


Click the following link to get the model file: -http://bit.ly/2mC9d7f


Related Newer  Post:---

Hinge || Creo Parametric Tutorial


Tuesday, June 11, 2013

Modelling and Simulating a Cam and Follower Assembly (Autodesk Inventor 2013 Tutorial


Serial No. 137

Modelling and Simulating a Cam and Follower Assembly (Autodesk Inventor 2013 Tutorial

We have added the audio on this video so that you can understand it this video more easily. In this video, we will create a model 'Cam and Follower' in Autodesk Inventor. At first, we will design the Cam and Follower components and afterwards, we will show the animation of this model through Dynamic Simulation.

download-Link 


Click the following link to get the model file: - http://bit.ly/2mOvPBp


....................................................................................................
Visit the following link to watch the basic tutorial on Autodesk Inventor by us
https://www.youtube.com/playlist?list=PLb-IhKRMYSERYpB48aY-sZ10fN6CfXIL4
.........................................................................
To watch detailed tutorials on the same software visit the following link
https://www.youtube.com/playlist?list=PL74BDF7431ED13443
..........................................................................................
Hope all of you enjoyed the tutorial. If you find the video useful please like it and share it with your friends/colleagues and do not forget to subscribe us to get latest updates about our new uploads.
http://www.youtube.com/user/niveshandnisheeth?sub_confirmation=1
....................................................................................................
Dear Viewers if you like our work and wanted to support us, to keep continuing the good work, then become a patron of ours at ‘Patreon’ site. Patreon is a simple way for you to contribute to the creator’s work every month/ every time they release their new work and get rewards in return. Please visit the following link to know all about our work and what we are offering as the reward to our patrons…
https://www.patreon.com/nisheethsri+

Tuesday, April 23, 2013

Documenting a Positional Representation Using Overlay View

By using overlay drawing view any one can document Positional Representations in Autodesk Inventor. Positional Representations are used to show an assembly in multiple positions by overriding assembly constrains.

First I took my previously created model Almirah (Mini Size) and created two positional representations named Open and Closed respectively.

Then I documented the same in a drawing file using overlay drawing view.

Following images shows the final result--Documenting a Positional Representation Using Overlay View_1 

Documenting a Positional Representation Using Overlay View-2